Making Your Home Look Ten Times Better in Ten Minutes

At Apartment Therapy, we want to show you the way that real people live. So when I show up to shoot a tour, I don’t bring a whole truckload of props with me—usually it’s just me and my camera. Still, over the years I’ve developed a few quick tricks that I occasionally employ on shoots. They’re all simple things—tiny tweaks to get a home camera-ready—and they’re all things that you can do in ten minutes or less (really!) to make your home perfect for the most important of audiences: you.
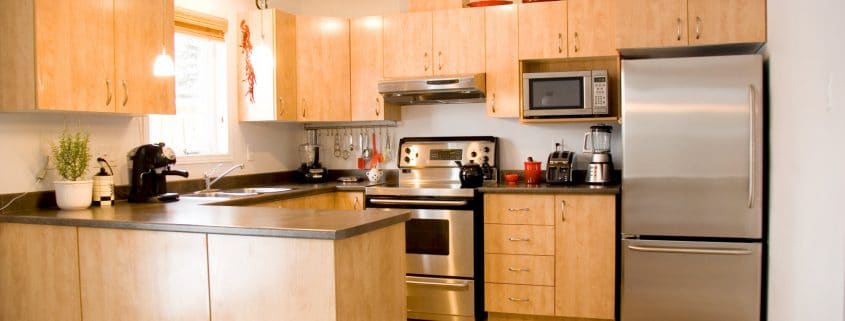
Cut the clutter

A lot of what I do on shoots is just moving things out of the way. Almost everybody has these little spots of clutter—a box over here, a pile of papers over there. You may barely even notice these things, because you’re so used to seeing them. A neat trick I’ve found for spotting clutter that you can no longer see? Take a picture of your home. This will help you see it through new eyes, and maybe inspire you to find permanent homes for things that are sitting out.
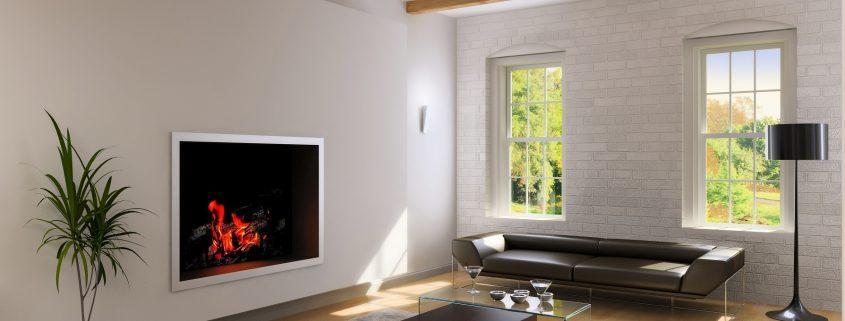
Take something away

Was it Elizabeth Taylor who said that you should get dressed, look in the mirror, and then take off one accessory? (Ok, it was Coco Chanel, which makes more sense.) I would challenge you to do the same thing for your home. So many interiors have just a little too much stuff. And it’s really nice stuff! When I shoot interiors, I often feel torn as to which things to take out. But removing one or two items creates a more breathable, relaxing atmosphere, and gives the things that are left a chance to really shine. This doesn’t mean you have to get the rid of the things you love—move them to another room, or put them in storage, and then rotate them back in (and take something else out) when you’re ready for a change.

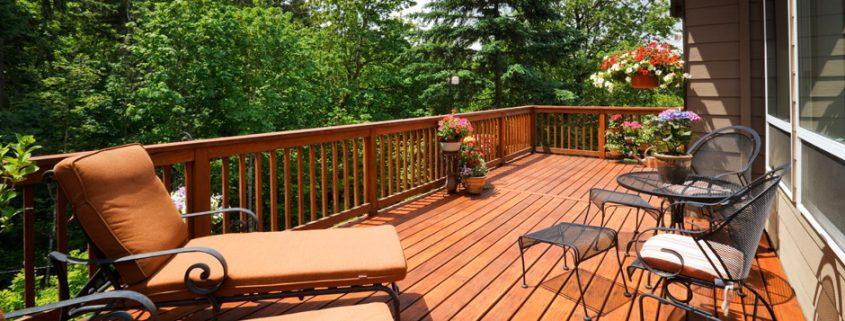
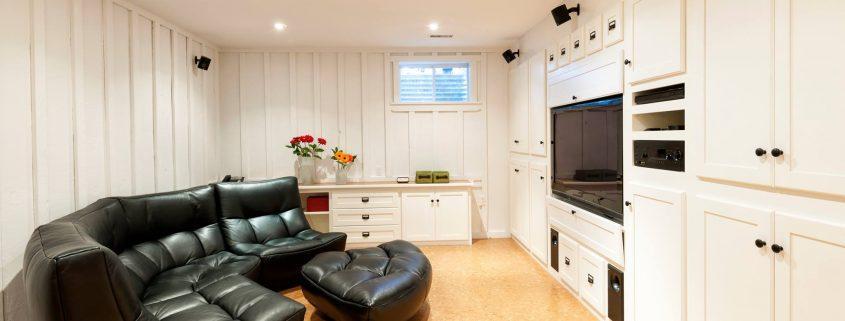
Let your furniture breathe

Another trick I often employ is taking furniture pieces and moving them just slightly farther away from one another. Try it! Even a few inches can make a big difference. If you have the space, giving your furniture a little extra room to breathe can give your space a lighter, airier, feel. Another trick? Pulling furniture just a few inches away from the wall.
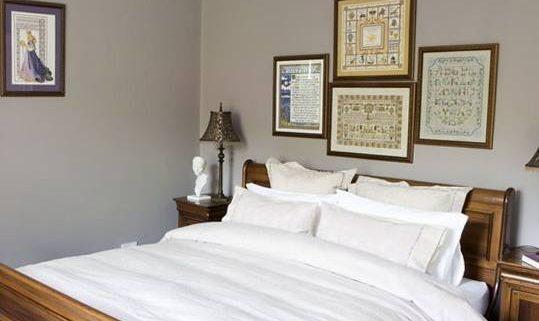
Add flowers!

If you look closely, you’ll notice a thing that many of the most beautiful house tour shoots have in common: fresh cut flowers. A touch of nature adds liveliness and texture to a room, and can help to soften the lines of a modern space. Having fresh flowers all the time could get a bit expensive, but you can achieve the same effect with a houseplant, which is (hopefully) a one-time purchase.

Embrace the diagonal

One way to make a picture a little more exciting is to take one thing in the photo and angle it just a bit. You can try this with furniture pieces like accent chairs or ottomans—there’s no rule that says everything has to sit on a grid. By looking at your home like a stylist, you can unlock the potential that’s been there all along.

Homemade Ant Repellent

While ants can actually help your yard by breaking down organic matter and aerating the soil, they can also be pests once they enter your home to look for food and water. Ants are the most frequent pests to enter the home. You can buy ant sprays and nebulizers to get rid of them, but these products can be detrimental to your health, and it is a hassle to cover your furniture and other objects before using them. These aerosols or sprays can be expensive. However, there is an alternative, and it can be done right at home. By using the following steps you can make your own homemade ant repellent.

Instructions

  1. Put 2 cups of distilled white vinegar in a large bowl. Vinegar contains natural compounds that can alter the smell that ants use to communicate. Ants rely on odor routes left by other ants to guide the members of the colony to sources of food in their home.
  2. Add 4 tablespoons of cayenne pepper to the mixture. Cayenne pepper contains a potent substance called capsaicin that is an irritant to ants. Some commercial ant repellents contain capsaicin as an ingredient.
  3. Add a cup of grated grapefruit, lemon and orange peels in the mixture. The peels of these citrus fruits contain a potent chemical called limonene that naturally repels ants. Limonene is added to many commercial chemical insecticides. The peeling can also improve the effects of the other ingredients in the mix.
  4. Add two cloves of chopped garlic to the mixture. Apart from its strong odor, garlic contains an active ingredient called illicit that releases potent compounds that propel insects away. The addition of garlic to the mixture will also act as a preservative and increase the potency of the other ingredients.
  5. Shake the ingredients together and carefully pour in a large spray bottle. Spray the areas of the house where the ants normally gather, such as kitchen corners, bathrooms, basement floors and any doorway in your room. Spray this mixture around your house once every 2 days.

Tips and warnings

  • The strong smell of this ant-repellent home will disappear in about 3 minutes after spraying. It is a safe solution that does not harm small children or pets.
restoration-2

Waterproof and Water Resistant Paints

There are various types of paints that withstand water, either a wet basement walls, storms or constant immersion. Find a paint that is water repellent or waterproof. The kind of paint you choose will depend on the type of work you’re doing and the surface on which you will apply. Follow the manufacturer’s instructions for preparation and priming. Even the best paint does not look good if applied on a dirty or damp surface. Never apply the paint without proper ventilation and use a face mask to help with the fumes.

Exterior paint

Exterior latex paints, enamel and oil are water repellent and designed to last several season and through storms. Varnish also creates a water resistant surface when applied correctly. Some exterior paints are formulated to particular climatic conditions. Latex paint is lower in volatile organic compounds (VOC) than paint that is oil based.

Masonry Picture

Masonry paint used on stucco, concrete and cement are latex-based or acrylic. Oil paints are not suitable for masonry surfaces. A coat of paint can help masonry waterproofing a basement leak if the surface is properly prepared; some situations require special waterproofing primer. If you are painting a concrete floor or deck, be sure to choose a recommended floor polish; they are made to endure repeated use and washings.

Marine paint

For surfaces that are frequently or constantly soaked you might consider using marine paint, also called coating or waterproofing. Marine paints are popular for use on metal surfaces and can form a protective coating that retards rust and corrosion.

Other finishes

If you are painting a wooden surface, you can consider products like varnish and lacquer finish. These mixtures of resin and solvent can be applied to untreated wood or wax, oil or stain for durability and gloss, and dry on the surface when the solvents evaporate. Applying varnish or lacquer is a more difficult process to apply than paint; you need to do your homework or get help from a professional.

living room interior

Simple Ways to Keep Your Home Smelling Fresh

Sometimes you can try to clean the entire house and still find that it does not smell as good as you’d like. If this has happened to you, worry no more.  Here are some tips to help make your home smell fresh.

Try odor neutralizing agents to make your home smell fresh

There are some out of the ordinary odor neutralizers available today. An example is soda which has an incredible ability to absorb all sorts of odors.

Just put a small container of a little soda and a few drops of lemon juice in different corners of your home. Of course, be careful that they are out of reach for children.

Charcoal is another good option. It is very effective when it comes to neutralizing strong odors especially in places where there is a lot of moisture. To be effective, make sure to replace it with fresh coal often.

Water and white vinegar

To get rid of cooking odor, mix equal parts water and white vinegar into a bowl.

Then add some aromatic herbs or citrus peel. Leave it in the kitchen so it absorbs odors while cooking. This is also a good remedy for tobacco smoke and you can use it in any room.

Get your home to smell fresh

You should try using a home-made air purifier. All you have to do is add 15 drops of lavender or lemon oil to a spray bottle filled with water and shake to mix the ingredients well.

You can use this preparation to refresh any corner of your house. Homemade air fresheners are a good option to place near windows because the airflow will circulate in the room and improve the smell.

Flowers, a natural choice

Gardenia, geraniums and orchids can all be great floral choices to make your home smell better. Jasmine flowers are also very fragrant. Place them in a container of water to release their strong fragrance.

Try air cleaners at home

An air cleaner is one of the best ways to eliminate all sorts of odors and pollutants, such as viruses and bacteria. They are especially useful if you have pets because they will help keep your home clean and fragrant.

You can try natural vanilla flavor. Just add a few drops of vanilla to a cotton ball near the filter once every 6 hours.

  • A homemade pine air freshener is another option. To do this, cook three pine branches, two laurel leaves and a mushroom seed. To maintain the aroma longer you should keep it at low heat.
  • Orange air refresher: To make an orange air freshener, cut an orange open, scrape out the inside and fill it with coarse salt. Place this in a tight container and you will have a fantastic homemade air freshener.
  • Rosemary Air Freshener: To make this kind of air freshener, cook some rosemary leaves and lemon slices for one hour. Then add a few drops of vanilla extract to get a fresh scent which will last a few days.
  • Dried Flower Air Refresh: This air freshener consists of chopped rose petals, laurel leaves, eucalyptus, thyme and sage. You mix everything well and add them to bags. If you find that they lose their smell, just add a few drops of alcohol.

Do not forget to ventilate your home to make the house smell fresh

One of the key things you should not forget is ventilation. Try to vent out your home every morning. This is an important and simple step to take.

All you have to do is spend 10 minutes to refresh the air and remove any bad odors that are left.

Make sure you have a good flow of air to have the desired effect.

Home Decoration 3

Help with Home Decorating

Most home decor items are very popular among people. By changing a couple of things in your home, you can bring a big change into one’s personal space. Even a minute change in your interior design will make it feel new and refreshing. Decorating your home is one of the best ways to transform bored and tired looking rooms to a rejuvenating, healthy and happy atmosphere.

Home decoration involves several things like colors, furniture, fabrics and other accessories. For some people home decor can involve several thousands of  dollars while it just takes some imagination to make grand changes.

Hiring a professional home decorator is always a great idea, but it involves a lot of money. A professional decorator will definitely bring a trendy and sporty look to your home and they are well aware of the latest trends. They have a very professional viewpoint compared to an amateur decorator, as they have both experience and talent. Decorators are able to transform your boring, non-happening place to an exciting place to hang out in.

One can also use home improvement software, which can give you a visual of how your new room will look.  Most of the professional painters make use of home decor software as they provide accurate idea of ​​the display of your home after improvement. This software also expands the vision of decorator as you can see the ideas on the screen of the computer.

Home decor is chosen according to the size of your home and you may need to buy or keep things away according to the size of your home. If the size of your home is very small then you need to go for a very simple and elegant home décor and you shouldn’t go to add additional decorative pieces and furniture.

carpentry work Baltimore

Wood Pallet Kitchen Shelves

Wooden pallets are convenient and often free sources of wood used. Many hardware stores and lumber stores routinely pull large amounts of wooden pallets, which can be reused in a variety of ways. The platforms are durable and usable for many types of furniture, including kitchen shelves. The dimensions of a wooden pallet made for a kitchen shelf ideal for an open-display to hold spices and cookbooks. You can easily make your own kitchen shelves with wooden pallets in an afternoon.

Instructions

  1. Lay the platform so that the side with the slats is facing up. This side will become the back of the kitchen shelves.
  2. Slot two D ring hangers to an edge of the platform, along one of the short sides (the edge becomes the top of the platform, so that the rack wall hanging as a rectangle). Drill hooks in the platform with a drill fitted with a Phillips head bit, using the screws that come with the D rings. Place each D ring in two inches from the outer edge of the platform.
  3. Flip the platform over. Balance it against the wall with the D-rings along the wall and at the top of the palette. There should be nine shelf openings in the front of the platform, between the four vertical and four horizontal slats.
  4. Set a cordless drill with a 1/32 inch drill bit and drill two holes in the bottom edge of each of the ninth slat. Space the holes evenly between adjacent vertical slats. These holes will prevent the wood from splitting when you drive the nails on the shelves.
  5. Drive a common 3-inch nail into each predrilled hole. Make the nails vertical and lead them to the bottom of each shelf. Hold your nails or other objects into place on each shelf opening when the platform is installed.

Hanging Heavy Objects on the Wall

Sometimes a task at first glance is easy, like hanging an object on the wall of a room, but can become complicated if you’re not sure how. Hanging, for example, a large mirror can become a problem if you are not quite sure, because it can fall in when least expected and cause damage to the person who is looking at or passing in front of it.

For this reason, you should make sure that the systems for hanging heavy objects hold perfectly throughout, not just one time, but many years. For objects that are particularly heavy, such as murals or mirrors of large dimensions, can be hung in an effective, simple and durable way by using special fittings for hangings.

Types of Hardware

Such grips are metal and may even support up to ninety pounds of weight, and even more. They consist of two distinct parts. One goes into the wall and secures with four resistant screws and anchors. The other part has a projection which is screwed to the object with four screws. You must use two sets of hardware of this style, one on each side of the mirror or object you want to hang, and then engage the projection in the slot.

To perform this task, you need the help of another person in order to avoid accidents. If you want to get extra strength on the walls, it is necessary to use wall anchors. These can be of many types. Some are standard, that holds a lot of weight and are designed for hollow walls and false ceilings. They also can come in metal and chemicals that are the most resistant. For plaster walls, there are special bolts.

Storage Ideas for Small Spaces

When you live in a small house or apartment, you have to find creative ways to store items, all while maintaining a clean and tidy home. No need to spend a small fortune on specific items to store your belongings. A little imagination and creativity can make the difference between a room that offers plenty of storage space and is completely organized.

Tables

Use extra floor space under the tables of your home. You can stack boxes, books or any other object that fits under your tables. Purchase attractive and decorative fabrics and glue with hot glue to your tables to form a valance. Your guests will not realize that these attractive tables have a dual purpose, of course, unless you tell them.

Furniture

Buy furniture containing drawers and doors dedicated to storage. Entertainment centers, bookcases and all those large pieces of furniture should include drawers or shelves for your storage needs. Furniture with doors ensures that your items will be well kept. Buy at your local discount stores and garage sales for deals on furniture.

Book stand

The shelves are wonderful solutions for small rooms. Purchase and install shelves for all your small rooms. Place shelves on windows, behind cabinet doors or cover an entire wall with shelves. Place your objects on shelves in an orderly fashion to ensure you have an ordered environment in your room.

Beds

Under your bed there is a fair amount of floor space that isn’t typically used. Use this space to store objects. Manufacturers have created a variety of containers specifically created for the purpose of going under a bed. Shoes, sweaters and quilts can fit smoothly under the bed. For added storage benefits, raise your bed frame up and add a long skirt. The skirt will hide all stored objects under your bed.

Cupboards

The cabinets have the extra space that is rarely used. Move small pieces of furniture, such as a cabinet, inside your closet. Paste hooks to the walls of your closet and the inside of the door for hanging belts, ties and lingerie items. Save items you do not use on a daily basis for the upper shelves of your closet or in containers. When you’re considering a storage solution for your wardrobe, consider all the space you do not use and how you can use it.

Ideas for Painting a Dining Room Table and Chairs

Scratched or worn dining tables and chairs can be a valuable discovery at a garage sale. By refinishing and updating the surface, an old dining set can become great dining furniture. Before selling your current dining room furniture, consider resurfacing it and adding a modern look to the room without the cost of purchasing a new set.

Restoration

Restoring is the process of washing, stripping and sanding furniture to apply a new paint finish. The tables and chairs can have a new darker or lighter shade than the previous stain or can be painted with a matte finish paint for a new style. For example, try to change a room with a tinge of cherry to a dramatic black or a bright white to add a more modern look to a room.

Accents fabrics

The dining chairs’ solid wood can be uncomfortable to sit. Adding padding to make them more comfortable seats and will also add a new style to the furniture. Purchase prefabricated padded seats at craft shops and stretch colorful fabric over the seat of the chair to keep the stuffing in place. Ensure the fabric at the bottom of the seat of the chair using fabric glue or staple gun.

Opposite colors

A dining table does not have to be the same color as your chairs. Rooms with contrasting colors add drama and depth to a room. Try to combine bright white dining chairs with a deep black dining table. Vinyl chairs covered with purple or blue can also be combined well with tables in black or white. Mix and match different colored chairs in a set, like a red chair, blue, green and yellow with a wooden table to add a colorful mix in a dining room.

Faux finishes

Faux finishes add depth and warmth to the walls of a room, but can also be applied to a dining table. Popular styles include dining sets aged styles that have a base color that breaks through the surface of an upper layer. For example, a deep bronze color can be displayed in the cracks of an old white finish. Buy a faux finishing kit made specifically for furniture, not to wall surfaces at a local home improvement store.

What to Do When Ceiling Paint Starts to Flake Off

When you see that paint on the ceiling has begun to flake off, you must act quickly to find the cause and remedy possible problems with the house. To restore the ceiling you must go through multiple steps, including the removal of old paint and restoration of the ceiling surface.

Check for moisture

Chipping paint usually indicate moisture problems running through the ceiling or high humidity in the house that produces condensation of water in the ceiling. You should check if there is moisture on the site where the paint is peeling off simply by placing the hand over the area where the paint has begun to come off. However, if you see mold growth, do not place your hand near it. If you see water seeping through the ceiling, check the pipes in the upstairs room to see if they’re leaking, if there is a room upstairs, or call a roofing company to find the cause of the damage.

Protect yourself

If your house was built before 1978, there is a possibility that the paint on your ceiling contains lead and can be toxic. For added security, it means that at least one layer of paint contains lead, if you live in an older house, wear clothes that cover arms, put on gloves, a face mask and safety glasses. If you see the presence of mold, protective clothing will also help protect your health.

Remove the loose paint

Before you can do something with the section of the ceiling where the paint is peeling, you must remove the old peeling paint. A spatula is a good way to remove the old paint without ruining the ceiling. Remove the loose paint in the area where it is peeling off, while still scraping ceiling around the painted parts until you find chipped paint firmly attached to the ceiling. If the flaking was the result of water damage, dry the ceiling with fans before proceeding.

Patches up the place

Having taken all the peeling paint off and drying the damp ceiling, patching is the next step. You have to use a patch to smooth into the plaster ceiling, where there are cracks or other surface damage. The patch also helps bring the ceiling level with the rest of the ceiling. It might be a good idea to apply several coats before the area where the paint is missing is level. Once the patch is completely dry, you can apply a primer to match the rest of the ceiling