Making Paint Remover with Baking Soda

Removing the paint off an object is never a pleasant task. Chemical paint removers are foul-smelling and can easily overwhelm you if not used in a well-ventilated room. Fortunately, baking soda, which is sold in many grocery stores is strong enough to remove paint. Baking soda, also known as sodium carbonate, is similar to sodium bicarbonate, only more powerful. It has many uses. It is used to clean floors and gratings and when mixed with water, is a chemical free paint remover.

Instructions

  1. Put on some gloves to protect your hands. Unlike chemical strippers, baking soda is not harmful to the respiratory system, but it burns the skin.
  2. Mix ¾ cup baking soda with 2 cups of hot water. Mix the two ingredients well to form a thick paste-like consistency. If the mixture seems watery, add more baking soda until thick enough.
  3. Spread a thick layer of the mixture on the painted object with a trowel. Let the paste settle on the paint for five or six hours and then remove the remaining paint with a wire brush or scraper. Rinse the area with warm water. Leave to air out for three to four hours.

Tricks to Adding More Natural Light to a Room

Studies have shown that 70% of us have too little light in our home. At the same time, 40% of our total energy consumption goes to heating, ventilation and lighting in our homes.

Sunlight can get you in a better mood and make your home more welcoming while lightening your energy bill. In other words, there are many good reasons for creating more natural light in your home, so here are some good tips on how to easily improve existing light and create new light sources.

New windows and doors

Even smaller rooms can appear bright and large if there is a greater amount of natural light entering. Today, doors with large glass windows are available, which can create a welcoming entrance hall; The installation of French doors and with large windows are an easy way to create additional light and an easy expression.

Elsewhere in the home is also worth considering. Windows in the kitchen and dining room are good places to start, as well as staircases which are often darker areas where new windows will make a world of difference.

Additionally, a replacement of existing windows can do wonders. Older windows with worn thick glass can leave much to be desired when it comes to the use of sunlight. Modern windows have narrow arms and a slim profile that ensure that you get as much sunlight into your home as possible.

Interior

Finally, you can easily utilize and optimize the light that already comes into your home through reflectivity and light flow.

You can maximize the amount of light that is thrown back into your room by choosing bright colors on the ceiling, walls and floor. In addition, matte surfaces will often be preferable, reflecting the light in all directions, whereas shiny surfaces often cause the light to aperture.

In addition, sunlight can be blocked if furniture is placed in front of windows and doors. Bookshelves and room dividers should be placed in a 180 degree angle in the window wall, ie. on side walls if the window sits on an end wall. Also, remember that the light from the top of the window can reach the furthest into the area, so blinds or curtains should not block this part.

Useful tips and good ideas

Other ways to create more light – and give the impression of a brighter home – is by hanging up mirrors, painting in bright colors, or by choosing bright colors for wood floors or carpeting. In addition, cleaning the fixtures, light bulbs and windows makes the natural light better.

Unclogging a Washing Machine Drain

Unclogging a drain from the washing machine depends on where the blockage is in the line. If the drain is backing up with water where the drain hose fits into the drain line of the house, call a plumber. This means the clog is inside the main drain pipe in the home and requires a professional. If there is no water coming out of the drain hose of the washing machine, there is an obstruction in the drain hose or in the drain pump.

Instructions

  1. Unplug the power cord of the washer from the outlet. Close the water valves on the wall.
  2. Open the lid washer and remove any clothes that are in the tub. Place a big bucket up close and start scooping the water from the tub with the smaller bucket. Pour the water into the large bucket and empty that bucket as necessary. If you have access to a wet vacuum, use it to remove water from the bathtub. Empty the wet vacuum as necessary until all the water in the tub.
  3. Pull the washing machine away from the wall. You need enough space to work behind the washer, but do not stretch the water supply hoses that connect the washer to the wall.
  4. Look for access to the water pump in the washing machine. Some will be clearly visible from the back of the washing machine. Others can be behind a standing panel in the front of the washing machine. If your washer has a foot panel, insert a knife into the seam between the top of the foot panel and the bottom of the front panel. Feel for the three-inch clamping clip on each corner with the blade of the knife. Slide the blade over the retaining clip and pull the panel away from the washing machine.
  5. Place a tray under the water pump where the two hoses connect to the pump. One hose connects to the tub of the washing machine and the other to the drain hose. Grasp the ends of the spring clamps that hold the hoses to the pump with a pair of pliers. Squeeze the ends together and slide the clamp down each hose. Pull the hoses from the water pump. Water will might spill because there is little water in the hoses, as well as the pump. Have towels nearby to absorb any spillage and end point of the hoses on the tray.
  6. Look inside the water pump ports for small pieces of clothing such as socks. Sometimes small items will get between the internal and external tub and find their way into the water pump, causing an obstruction. Remove any article of clothing from the water pump and install the two hoses to the pump. Secure the hoses to the pump with spring clamps. Press the rear foot panel on the front of the washer.
  7. If the water pump was not clogged, then locate the spring clamp to attach the drain hose to the back of the washer. Squeeze the ends of the spring clamp together with the clamps and pull the drain hose from the washer. Disconnect the other end of the drain hose from the drain pipe. Bend only the drain hoses in the tube which may have a clip that rises out of the tube.
  8. Take the drain out of the hose and place the end of a garden hose, without a nozzle, on one end of the drain hose. Turn on the water and push the garden hose through the drain hose until it comes out the other end. Often an accumulation of soap and dirt is clogging the drain hose. Turn off the water and pull the hose from the drain hose.
  9. Install the new drain hose at the end of the house drain line and the back of the washer. Secure the hose to the washer with the spring clamp. Push the washer towards the rear wall. Turn on the wall water plumbing and plug the power cord into the wall outlet. Set the wash cycle to the smallest load position with hot water. Allow the washing machine to work through this cycle. The hot water will remove any residual material from the drain pipe of the washing machine.

Tips and warnings

  • Look for a broken belt while you are looking for a clog in the water pump. If there is a broken belt, the belt should be replaced. The drive belt of the pump to drain the water. If no obstruction is found, the water pump is defective.
  • Always disconnect appliances from the power source before attempting repairs.

7 Tips to Improve the Safety of your Home

Living with tranquility and security in our house is the maximum investment we can make in it. Therefore, it is important to know that prevention is the true form of home security.

In this post we recommend seven tips to keep in mind to maintain the safety of your home:

  1. The doors are a key element of a home to prevent theft. It is recommended that they be thick, solid and hard and that they have a good lock system. It is essential to lock them when you are away from home, even for just a moment. It is also important to take the necessary precautions to not lose the keys, as well as never keep them with key chains or any other documentation that can reveal the address to which they belong.
  2. The doors must be property installed by securing them with their bolts. It is good that the doors have a counter security located at the top to reinforce the entrance. In addition, they must remain closed, as well as windows that face the street, patios or basements.
  3. It is necessary to ensure that the main door has at least two closing points. When leaving it always closes with a key, not only with the slip, since it can be easily opened.
  4. Check that there is no gap between the door and the floor to avoid being leveraged. To do this, it reinforces the part of the hinges with steel pivots and metal angles.
  5. Another element to take into account for home security are the windows. These are one of the weak points. You have to make sure that those that give the basements have bars, especially those that lead to unprotected yards. The chalets have a special charm for people who are dedicated to stealing, so it is advisable that all windows contain bars for their security. In addition, it is highly recommended in the windows of the home to use strong glasses and install bolts that allow a closure much more secure.
  6. A measure of security in your home is to make it always seem inhabited. For this, in time of prolonged absence, do not disconnect the electricity completely or close all the blinds. Technology will facilitate this because automatic timers are the best option for this. If you live outside an urban area, this can be reinforced by lighting the entrance, porch and courtyards.
  7. And perhaps, the security measure of the home that can provide you with the most guarantee of protection, whether you stay in it or not, are surveillance systems and security alarms. The placement of a visible alarm at the entrance of the house and/or perimeter sensors on terraces and gardens can discourage potential intruders. There are several companies that are dedicated to security and offer this type of services. Nowadays, these companies even give you the option of being able to control the alarm system remotely from a smartphone, allowing you to connect and disconnect the device, open the door without the need for a key or take photographs of the home to verify that everything is how it’s supposed to be.

Follow these seven tips to improve home security and your peace of mind will be greater.

Tips to make your home smell fresh

Sometimes you can try to clean the entire house and still find that it does not smell as good as you would like. If this has happened to you, worry no more.  Here are some tips that help you make your home smell fresh.

Try odor neutralizing agents to make your home smell fresh

There are some out of the ordinary odor neutralizers available today. An example is soda which has an incredible ability to absorb all sorts of odors.

Just put a small container of a little soda and a few drops of lemon juice in different corners of your home. Of course, be careful that they are out of reach for children.

Charcoal is another good option. It is very effective when it comes to neutralizing strong odors also in places where there is a lot of moisture. To be effective, make sure to replace it with fresh coal often.

Water and white vinegar

To get rid of cooking odor, mix equal parts water and white vinegar into a bowl.

Then add some aromatic herbs or citrus peel. Leave it in the kitchen so it absorbs odors while cooking. This is also a good remedy for tobacco smoke and you can use it in any room.

Get your home to smell fresh

You should try using a home-made air purifier. All you have to do is add 15 drops of lavender or lemon oil to a spray bottle filled with water and shake to mix the ingredients well.

You can use this preparation to refresh any corner of your house. Homemade air fresheners are a good option to place near windows because the same airflow will circulate in the room and improve the smell.

Flowers, a natural choice

Gardenia, geraniums and orchids can all be great floral choices to make your home smell better. Jasmine flowers are also very fragrant. Place them in a container of water to release their strong fragrance.

Try air cleaners at home

An air cleaner is one of the best ways to eliminate all sorts of odors and pollutants, such as viruses and bacteria. They are especially useful if you have pets because they will help keep your home clean and fragrant.

You can try natural vanilla flavor. Just add a few drops of vanilla to a cotton ball near the filter once every 6 hours.

  • A homemade pine air freshener is another option. To do this, cook three pine branches, two laurel leaves and a mushroom seed. To maintain the aroma longer you should keep it at low heat.
  • Orange air refresher: To make an orange air freshener, cut an orange open, scrape out the inside and fill it with coarse salt. Place this in a tight container and you will have a fantastic homemade air freshener.
  • Rosemary Air Freshener: To make this kind of air freshener, cook some rosemary leaves and lemon slices for one hour. Then add a few drops of vanilla extract to get a fresh scent which will last a few days.
  • Dried Flower Air Refresh: This air freshener consists of chopped rose petals, laurel leaves, eucalyptus, thyme and sage. You mix everything well and add them to bags. If you find that they lose their smell, just add a few drops of alcohol.

Do not forget to ventilate your home to make the house smell fresh

One of the key things you should not forget is ventilation. Try to vent out your home every morning. This is an important and simple step to take.

All you have to do is spend 10 minutes to refresh the air and remove any bad odors that are left.

Make sure you have a good flow of air to have the desired effect.

Can table salt clean a clogged drain?

A clogged drain is an uncomfortable problem that should be treated as soon as possible. If there are no cleaners bought in stores around the house, you have no need to run out to the store; Try a homemade method instead. Table salt, a product found in almost all kitchens, is one of several common household products that help clear clogged drains as it works as an abrasive.

Benefits

Using this at home solutions, such as table salt, has a number of benefits, including the fact that it is almost always at hand in the pantry. In addition, many find the harmful gases and costs of drain cleaners purchased unpleasant. Using table salt and other household items, such as vinegar and baking soda, is not only better for the environment but also safer to touch or inhale.

How to use

Mix on a 1/2 cup of table salt in 4 L of water, boil and pour down the drain. This method works best when only a light drainage cleaning is necessary. Another method of breaking clogs is to pour a 1/2 cup of table salt down the clogged drain. Leave the salt in the drain for 30 minutes and pour hot water into the drain to rinse the salt particles and loosened debris away. Repeat if necessary.

Salt combination

Baking soda and table salt also make a good pairing when trying to clear a clogged drain. First pour a cup of baking soda into the clogged drain followed by a cup of table salt. You will want to leave the combination in the drain for a few hours, no more than 4 hours, which allows the mixture to work. Pour two cups of boiling water to rinse it. Baking soda helps break down waste.

Warnings and preventive measure

After cleaning the clogged drain, you will want to avoid future ones. Placing a strainer over each drain will stop larger pieces of dirt and hair from making its way down the drain. Always handle boiling water with proper care so as not to burn yourself and limit the amount of boiling water if you have plastic pipes that can melt.


Adding Wayne’s Coating to Your Walls

Waynes coating is a decorative panel that is installed between the baseboard and the guard on your home.  Most panels are made with tongue-and-groove wooden boards; however, they can also be found in alternative materials such as vinyl and laminate. Siding can be installed easily if you have the right tools and want to invest a little time and effort. Read the sections below to learn how to install siding or build and install your own from scratch.

Prepare the area for installation. Remove the skirting boards, guards or existing stair moldings. You should also remove the plates from the plugs. Measure the linear footage of the room or the wall with a tape measure to determine the number of panels you will have to buy.

  • Let the wood panels acclimate in the room where they will be installed, for at least 48 hours. This will prevent an expansion and contraction of the panels after the installation.

Mark the top level line. Set a level line around the room to the top of the panels. Measure the correct height of the panels, from the floor and, using a level as a straight edge, mark a guideline on each wall with a pencil. A laser level will make your job easier.

Mark the beams. Use a beam detector or tap the wall with a hammer to locate the wall beams and mark them just above the level line.

Glue and nail the panels from left to right. Apply construction adhesive to the back of an entire panel and put it in place, starting at the corner of the room. Make sure the top of the panel is flush with the level line. Hold the panel in place and secure it with nails for panels. Try to anchor the molding on the beams marked on the wall, when possible. Continue installing panels in the same way, leaving 2.5 cm (1/16 inch) of space between panels, until you reach the next corner.

  • The bottom of a piece can be sanded or cut if there is a variation in the floor and the piece does not fit. However, you should double check that the top level line is correctly made.
  • You will need to cut a hole for an outlet when you see that a panel is covering one. Cover the socket with light colored chalk, align the panel, press it against the chalk to get the outline of the outlet, and then cut it with a jigsaw.

Cut pieces as needed when necessary. Measure and cut the last panel with a jigsaw to fit the correct length of the wall.

Install the skirting and upper moldings. Make sure the molding is aligned with the top of the boards. Again, secure each piece to a wall beam, when possible.

Create your own panels

Put your materials together You will need 60 cm (1/4 inch) plywood for the back panels, 2.5 x 10 cm (1 x 4 inches) wood for the uprights, 2.5 x 15 cm wood (1 x 6 inches) for skirting and 2.5 x 5 cm wood (1 x 2 inches) for the rails. You will have to rent a circular saw at the hardware store in your area to cut the wood and panels to measure. A laser level, pieces of wood for the spacing of the steps, a beam locator, a nail gun with 6 cm and 4 cm (2.5 and 1.5 inch) finishing nails and other tools can also be good to have on hand.

Prepare the area for installation. Remove the skirting boards, guards or existing stair moldings. You should also remove the plates from the plugs. Measure the linear footage of the room or wall with a tape measure to determine the amount of wood you will need.

  • Allow the wood to acclimate in the room where it will be installed, for at least 48 hours. This will prevent an expansion and contraction of the panels after the installation.

Mark the top level line Set a level line around the room to the top of the panels. Measure the height of the room, divide it by 3 and create your panels so that they reach that height or almost reach it. Once you have calculated the height, draw and then mark (what works best is the painter’s tape) a level line around the room. A laser level will make your job easier.

  • You could try and place the top edge of the panel slightly higher than it is actually the panel if you know that the floor is uneven. This will keep to a minimum the amount of cuts you need to make. The baseboard molding can always be placed at the bottom to hide the spaces that can be left if you have an uneven floor.

Mark beams and service lines. Use a beam locator or tap the wall with a hammer to locate the wall beams and mark them above the level line. If you can locate service lines, you should also mark them on the wall to avoid hitting them with nails.

  • Service lines are often found around water fountains or right next to the rafters that are closest to electrical outlets and wall lights. Be careful when nailing in those areas.

Plan the spacing. The size and orientation of your room will determine the appearance of the siding, so unfortunately no specific measures can be given. But there are a few basic guidelines you should follow to know where everything should go:

  • Try placing a few studs on a beam. This will help seal your panel on the wall.
  • Do not place an upright over an outlet or other unusual item. This will only cause you to cut and measure more.
  • Try aligning your studs to cover the spaces between the panels, helping to hide the joints.
  • Set the spacing of the studs in a way that looks good for the room size you have. The smaller the room, the more separated the uprights must be. Larger rooms can be spaced just like beams: 40 cm (16 inches) center by center.

Place the panels. Place construction adhesive on the back of the panels and place them on the wall, starting at the corner and covering the largest wall first. Align the top of the panel with the level line and secure the panels to the joists with a nail gun and 4 cm or 1.5 inch finishing nails (they should be placed on the top and bottom in ways that remain hidden by the guard and the skirting board). Continue throughout the room until you have placed all the panels.

  • You will have to cut a hole for an outlet when you see that a panel is going to cover one. Cover the socket with light colored chalk, align the panel, press the panel on the chalk to get the outline of the outlet, and then cut the outline with a jigsaw.

Secure the guard. Align the 2.5 x 5 cm (1 x 2 inch) guards so that they line up with the top of the panels and then clamp them in place with 6 cm (2.5 inch) finishing nails. These should also be nailed to the beams, when possible.

Place the uprights. Then, stick and nail the uprights in place, exactly as you placed the guard. Start with two studs in the corner of the room, then use the spacer on the top and then again on the bottom while you nail the two ends in place. Use a carefully cut piece of wood as a spacer and a normal level or laser to make sure to nail the studs as straight as possible.

Fix your baseboard and skirting molding. Finally, place the molding in the same way you placed the uprights and the guard. Do not worry about the spaces that you leave in the lower part due to uneven floors: that will be covered by the molding of the base that is placed at the end.

  • You can also add molding at the top to cover railing and uneven panels or just use a flat piece of wood if you want a usable shelf.

Give it a finish. Sand the finished wood surface, cover the nails with a pencil to puncture nails and then paint or stain the wood as you wish. Enjoy your new coating!

DIY: Cleaning Your Fireplace

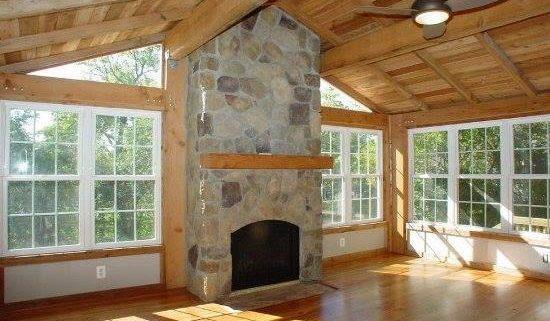
Feeling the heat and hearing the noise of the burning wood from the fireplace in your house can be very relaxing. However, the soot deposits it leaves behind eventually condense to create a creosote, a toxic and tarred substance, in the chimney. You should clean your fireplace regularly. To do so, you can use a homemade or commercial cleaner. You must sweep the fireplace, apply the cleaner inside it and scrub it.

Consider using commercial cleaners. You can use standard household cleaners in the fireplace. You can also buy cleansers specifically manufactured to clean chimneys.

  • Ammonia can work well as a cleaner, but it may be very strong for brick chimneys.
  • You can apply an oven cleaner in the fireplace. This product can be very useful when a lot of burnt material accumulates in the chimney.
  • Stop by your local hardware store and look for chimney cleaners. These products may be less strong for your fireplace. If you use chimney cleaners, such as the Quick n ‘Brite brand, you should probably dilute them before using them, so be sure to read the instructions.

Make a homemade cleaner. If you are allergic to chemicals, you can use a homemade cleanser. You can usually make a cleaner with items that you can find in the kitchen.

  • You can combine 2 tablespoons of cream of tartar with water to make a good quality homemade cleaner.
  • You can also mix equal parts of vinegar and water to make a cleaner. Then, place it in a spray bottle to apply it.
  • Mix between two to three tablespoons of dishwashing liquid with 1/2 cup of baking soda. Create a paste with this mixture to obtain a good quality homemade cleaner.

Make sure you have a multipurpose spray cleaner. Before applying any cleaner, apply a multi-purpose cleaner to the fireplace. An aerosol cleaner, like 409 brand, that you can buy in most supermarkets, will be very useful for this purpose.

  • If you are going to use a commercial cleaner, make sure that the cleaner you choose does not interact negatively with the multi-purpose spray cleaner.

Get a small broom to sweep the fireplace. You must sweep the fireplace quickly before scrubbing it, so get a small broom. You can find small brooms in most stores.

  • Search the aisle for pet products. Often brooms and small pickers are sold to clean cat litter. You can use these brooms to clean the fireplace.

Get an abrasive tool. You must use this tool to scrub and remove debris from the chimney. A scrub brush or abrasive sponge is very useful for cleaning a chimney.

  • You can buy these products in most supermarkets and hardware stores.

Clean the chimney

Protects the area surrounding the fireplace. Use an old apron or clothing to protect yourself from dirt or debris. Spread a tarp or newspaper on the floor around the fireplace. Keep this in mind because you will get dirty when you clean the fireplace and removing soot from clothing or carpeting can be difficult.

  • If you do not have a tarp to put on the floor, use old clothes or towels that you no longer use. Make sure they are garments that you do not mind discarding as they are likely to be ruined during the cleaning process.

Remove waste from the chimney. Before cleaning, you must get rid of old leftover wood and other waste. Put on some cleaning gloves and remove the debris.

  • If there is any wood that you can use again, save it for later.
  • You may have to use a vacuum to vacuum loose debris.

Sweep the chimney from the top to the bottom. Take the small broom and use it to sweep. Thoroughly sweep any dust or ash from inside the fireplace.

  • It may be useful to sprinkle ground coffee on the ashes before cleaning. Doing so allows the ashes to acquire a more solid texture to prevent them from dispersing in the air.
  • Also sweep the entrance to the chimney, as it probably also has ashes.

Spray the fireplace with a cleaner. First you must use the multipurpose cleaner. Spray the inside of the fireplace with a light coat of this cleaner. The purpose of this procedure is to wet the area, whereupon the cleaning process begins.

  • Make sure to wet the inside of the fireplace completely before continuing.

Use an abrasive tool to clean the fireplace. Use the cleaner you have chosen, whether it’s homemade or commercial. Wet the abrasive tool with the cleaner and start scrubbing.

  • Do not rub too hard because the brush is already abrasive. Apply the liquid in circular motions until the chimney is completely covered.
  • If there are hard-to-reach cracks in the fireplace, use a toothbrush to clean these areas.

Let the cleaner settle in the fireplace. If the fireplace has only slight stains, it will be enough to wait between 10 and 15 minutes. If the fireplace is very stained, wait at least 30 minutes.

  • If you are going to use a commercial cleaner, read the label carefully. There may be specific instructions on how long you should allow the cleaner to set.

Remove the residues that have accumulated in the chimney. The cleaner will loosen dirt and debris from the fireplace. Once this happens, you can easily remove the residue by scrubbing and cleaning the chimney a little.

  • Wet a cloth with warm or hot water from the tap.
  • Remove the stain. It should leave easily.
  • Generally, after doing so, you will have finished the process. However, you may need to clean the chimney for a second, or even a third time, if it is heavily stained or damaged.

Clean the glass of the chimney

Wet a cloth with water. Before starting, make sure the fireplace is off and cool to the touch. Use a cloth that you do not mind discarding after cleaning. If you wish, you can use paper towels instead of a cloth.

Dip the damp cloth in the ashes. Use the ashes of the fireplace. Make sure you cover the area completely, as this will help eliminate the soot on the glass, even if it seems contradictory.

Rub the glass with the cloth. You should rub hard to perform a good cleaning. Keep rubbing until you have removed all the soot or discoloration.

Clean the glass with a microfiber towel. Once it’s clean, remove all streaks or residue with a clean microfiber towel.

Keep the fireplace clean

Choose dry wood. Dry firewood burns better than other types of firewood. It also tends to produce less smoke, which reduces stains inside the chimney.

  • Make sure that any firewood you buy is dry or cured.
  • If the firewood is not labeled, ask someone at the store where they sell it.

Clean out the fireplace weekly. Doing so will reduce the process of sweeping and eliminating waste when you clean it. However, take certain precautions. Make sure the embers have dried at least 12 hours before vacuuming.

Use water to put out the fire only in emergencies. The fire in the fireplace should burn naturally. If you throw water on it, the ashes will form a paste that will be difficult to clean. Only use water in case of emergency.

  • If a fire starts in your home, you should immediately call the local emergency number. Even if you think the fire is under control, professional firefighters should check the house to make sure the fire has completely died out.

Warnings

Many of the substances described above are toxic, so always use plastic gloves throughout the cleaning process.

How to Clean a Chimney

Lighting the chimney leads to the accumulation of soot and creosote, a flammable and sticky substance that can cause a fire if it is not removed. Hiring a chimney cleaning professional can be expensive, but if you use your fireplace frequently, consider buying some tools so you can clean your chimney yourself. This article provides instructions on three methods to clean chimneys, as well as tips for doing it safely.

Get ready to clean the fireplace

Determine if you need to clean the fireplace. You should clean it at least once a year, especially if you use it frequently.

  • Take a flashlight and go inside the fireplace. Use a pencil or a plastic knife to remove the creosote that accumulated in the fireplace. If it has a width of 1/8” or less, it is time to clean it.
  • If you can clean your fireplace once a year, do it in the fall, before the burning season begins. Otherwise, it does not make sense to light your fireplace during the winter.

Look for animals inside the fireplace. If it has been a while since you last used your fireplace, look for any signs of animals before doing so. Birds, squirrels or raccoons love to nest inside them, especially in the colder months. Light a flashlight, look for the animals, take necessary steps to remove them.

Measure the density of the chimney. To clean the fireplace, you must use the right tools. Measure the chimney from the bottom to the top. You can climb a ladder and measure it from the top.

  • Determine the size and shape of the flue. It must be square or round, or measure between 6” or 8″.
  • Determine the height of the chimney. If you are guessing, it is better to overestimate, so you can have extra rope and make sure you brush the chimney well, reaching the entire surface.

Buy the necessary cleaning supplements. Go to a hardware store and buy all the materials you need to clean the fireplace:

  • A chimney brush, rope or plastic. Use the measurements to buy the appropriate size.
  • Chimney brush extensions can help you clean up completely. Alternatively, you can buy a rope designed for chimney brushes, or a string system.
  • A wire brush.
  • Plastic or cloths to use inside your house.
  • A high ladder to reach the ceiling, if you plan to clean it from the top down.
  • A broom and dustpan.
  • Mask and protective glasses

Dress appropriately. Use old clothes that do not matter if you have to throw it away later. Cover your hair with a bandana. You can use work gloves to protect your hands. Wear a mask and protective glasses to prevent dust from entering your eyes and mouth.

Prepare your house for cleaning. Place cloth or plastic around the fireplace, spread it around your living room. Use sheets to cover your furniture. Wrap all your carpets.

Removes moisture from the fireplace. Locate the moisture inside the fireplace and use a small brush to clean it. Take it out of the fireplace and separate it with a piece of cloth so that it does not obstruct the brushing of the fireplace while you proceed to clean the fireplace.

Cleaning the chimney from the top down

Prepare the ladder and climb to the roof. Assume that the roof is a safe place to step on, and that you feel safe being there, hold the ladder next to your house. Place the brush, next to the other tools, on your shoulder and climb the ladder.

  • If you are afraid to climb the ladder or stand on the roof, clean the fireplace from below using the method below.
  • If you’re not sure about the quality of your roof, or if you’re leaning and you’re not sure you can maintain the balance, use another method.

Brush a section of the pipe. Place the brush inside the fireplace. Using up and down movements, start cleaning it. Add an extension to the rope if you cannot reach easily. Continue until you are finished.

  • If you use a rope, join that part with the brush. Hold the end of the rope and go down along the chimney. Go up and down while you’re cleaning the entire surface.

Clean the lower part of the chimney. Use a small brush to clean the bottom that you have not cleaned.

Alternative methods

Clean the chimney from the bottom.

  • Attach to other sections.
  • Add the first piece of the pipe to the brush.
  • Insert the brush into the fireplace. Use up and down movements, starting at the top.
  • Add another section of the pipe to extend the brush to the top of the chimney.
  • Continue in this way until you have cleaned the entire surface.

Use a polishing system

  • Buy a rope polishing system to brush the fireplace. Join two strings to the brush, one on the top and one on the bottom, and brush from top to bottom.
  • Attach the polishing system to the brush. Ask for the help of a friend or family member on top of the roof.
  • The person on the roof must hold one part of the rope, and leave the other, with the brush in between, while waiting for another person to hold the rope.
  • Work with other people, use the rope to brush from top to bottom, brushing the entire chimney.

Final work

  • Clean the entrance to the fireplace. In the final part of the fireplace, usually located in the basement, where you will see a small door that leads to that part. The creosote and the soot stay there. Use a small spatula to separate it.
  • Use a brush and a dustpan to clean the remains of the fireplace. Empty the rest in a dumpster.

Use a brush to sweep the remains and clean the cloths. Empty what’s left over in a dumpster.

Dispose of soot and creosote according to local laws. Since these are flammable substances they may not have to be thrown into the dumpster.  Check with local laws before disposing of soot and creosote.

Warnings

  • Call a professional if you do not feel safe during the chimney cleaning process.
  • Do not step on the roof if it is in wet condition.
  • Be careful not to absorb the soot or creosote and clean your skin after having contact.
  • Do not operate flammable materials during the chimney cleaning process.

How to Clean Floor Vents

How to clean the floor ventilation ducts

No matter how clean you keep your home, the floor ventilation ducts will accumulate dirt and dust which becomes difficult to remove over time. This accumulation may be hard to clean, especially when dirt or dust has built up in the crevices and spaces of your ducts. If your floor ventilation ducts are ready for you to clean, you can do it effectively using a dishwasher or manual methods.

Use a dishwasher

Determine the composition of your ventilation ducts. In most cases, metal ventilation ducts can be cleaned in the dishwasher. Avoid washing the vents that are painted since the heat of the dishwasher can cause the paint to come off. You should not use your dishwasher to clean:

  • Wood ventilation ducts that are especially susceptible to intense heat. Never clean wooden floor ventilation ducts in a dishwasher, unless otherwise stated in the product care instructions.
  • Plastic ventilation ducts since the heat of the dishwasher can cause them to become deformed and ruined. Cleaning them by hand is safer.

Turn off the duct fan, heat, or air conditioner. If you leave your home ventilation system on while cleaning the ventilation ducts, the blower could ignite and expel dust and dirt in the air. This will only cause dirt in the pipes to spread throughout your home.

  • Dust and dirt that gets back into the air can irritate your eyes and lungs when you clean.
  • If you have sensitive eyes or lungs or if you suffer from allergies, you may need to wear protective glasses and a dust mask.

Clean the dust and dirt that comes out of the duct. Cleaning the dust and dirt that comes out of the duct will prevent it from falling on the floor when transporting your ducts to the dishwasher. You can do this easily with a vacuum equipped with a tool to check for cracks or by cleaning the ventilation ducts with a clean, damp cloth with water.

  • You do not have to be especially careful when cleaning the dirt that comes out of your ducts. Passing a damp cloth or vacuum a few times should be enough.

Remove the floor ventilation ducts. Most floor ventilation ducts are secured with standard screws. Use a standard screwdriver to loosen the screws and remove the ducts you wish to clean. Keep a damp cloth or vacuum cleaner on hand as dirt and additional dirt may have accumulated behind the duct.

  • You are likely to find more dirt and loose dust behind your ducts. In most cases, swiftly passing the vacuum cleaner can clean them.
  • You may want to put something, such as a newspaper or old fabric, on the floor or under the wall vents and next to the ducts on the floor. In this way, you will remove additional dirt and you will have a place to put the ducts that you removed.


Insert the ducts and turn on the dishwasher. Organize your ducts in the dishwasher without stacking them one on top of the other. Avoid using dishwashing detergent. These products are made for tableware and cutlery and are not suitable for ducts.

  • The shortest cycle of your dishwasher should be enough to completely clean the floor ducts and it will not be too strong for them.

Replace the ducts after washing them. Be careful when removing the ducts from the dishwasher. Immediately after the dishwasher cycle, they may be hot. Check your ducts to make sure they are clean and, if so, use a screwdriver to secure each one back in place.

  • If your ducts are still not clean, you may want to run them through the dishwasher for another short cycle or clean areas that are hard to reach with a cotton swab and kitchen soap.

Clean the floor ventilation ducts by hand

Turn off the ventilation system in your house. Every time you clean the ventilation ducts, you must turn off the heat, air conditioning or fan in order to prevent the ventilation system from starting and throwing dust and dirt into the air. This will cause the dirt in your pipes to spread throughout your home.

  • Even with your ventilation system turned off, your home’s natural airflow and your efforts to clean can cause dust to permeate the air. For this reason, you may want to wear protective glasses and a dust mask.

Clean the dirt and dust that comes out. Using the vacuum tool which can reach cracks can help you remove dirt from corners and spaces in your duct. If you see lumps that seem to be loose, but you cannot suck them up, take a damp and clean rag and clean them out.

  • If your ducts are not very dirty, doing a superficial cleaning can be enough to restore your ducts and make them good as new.
  • You do not have to be very careful with this superficial cleaning. Ducts that are very dirty will need a deep cleaning with soap and water. When you vacuum and clean, the objective will be to remove the dust that is loose.

Take out your pipes. To prevent the dirt behind your ducts from spreading or rising to your floor, put something, such as a tarp or newspaper, to catch the dust. More often, the ventilation ducts are installed using standard screws. Take a standard screwdriver, loosen the screws and remove the ventilation ducts.

  • Dirt and dust often accumulate behind the ventilation ducts. Use the tool to clean cracks on your vacuum in order to clean any type of undesirable accumulation.
  • When you finish removing each duct, place it on the floor covering. This will help you to contain the dirt that remains on the ventilation ducts.

Clean your ducts with warm water and dish soap. Use a dishwashing tool, such as a scrubbing brush or sponge, to clean the duct strips and other narrow crevices. Moisten the tool with water, apply soap and clean each duct. After the metal or plastic ventilation ducts are cleaned, you can dry them in the air or with a clean and dry cloth or a paper towel.

  • If the dirt in your vents is resistant to the soap scrubbing treatment, you may first need to soak them in warm water with soap for a few hours or overnight.
  • Wood ducts are easily deformed by excess water or by soaking them too much. Use a clean, damp cloth to clean it of the dirt and then dry the wood quickly and completely.

Put the ducts back into the corresponding openings. Now that everything is clean and dry, your ducts will be ready to return to their associated spaces. Place each duct in its place, one at a time, then use your screwdriver to secure all ducts.