Preventative Measures to Keep Your Home Fire Safe

Every year the fire department receives thousands of reports of house fires. Sometimes there is only material damage, but every year there are hundreds of wounded and dozens of deaths. Fire can be prevented, but you have to take measures. Together with the fire department we provide you wir=th tips on how you can prevent this from happening to you.

How quickly does a fire seize itself?

It depends on the fire load; That is the amount of combustible materials in a room. ‘An oak armchair from the old days hardly burned, but nowadays they are made of cheaper wood and materials which burn very quickly. Make sure to close doors at night. If there is a sudden fire at night, open doors ensure that a fire is fueled. Choose smoke detectors that are audible.

What causes a fire?

The fire service writes that the three most common causes of fire are: heating, cooking and an electrical appliance. If you have a chimney and fireplace, make sure you have clean and dry firewood that has been dried for at least a year and a half. You have to have your chimney cleaned and checked every year by a professional company.

The oven, fryer and microwave are often a source of a fire in the kitchen, but one can also be caused by a pan on the stove. Therefore, use a kitchen timer and make sure that you do not have flammable items around the stove.

The washer and dryer are also possible causes of fire. Clean the filters and clean under and behind the appliances once a year.

Fire? What do you do?

Is there a fire in the pan? Then close it with the lid and not with water. Turn off the extractor and do not walk with the pan. Chimney fires can best be extinguished with sand and by closing the chimney flap. Do not throw water onto the fire, an explosion may occur. If there is a fire starting in the house, it is best to extinguish it yourself with a fire extinguisher. Use short blows and only do so if you do not end up in danger yourself. If the fire starts to blow quickly, alert the fire department by calling 911.

Tips

Here are some preventative measures you should take to reduce the risk of fire as much as possible.

  1. Place smoke detectors and a fire blanket on every floor.
  2. Do you have a back door? Make sure that there is a key in there so that you can always go outside.
  3. Keep a large fire extinguisher in the house.
  4. Fire extinguishers are not eternally sustainable. You have to have it inspected every two years.
  5. If you have a smoke channel or chimney in the house have it cleaned at least once a year. Bird nests can be built inside them.
  6. There is a danger of carbon monoxide in winter. Therefore, install carbon monoxide detectors or fire/carbon monoxide combination detectors.
  7. Dust that collects in ventilation areas are very sensitive to fire.
  8. Sockets are very useful, but if you plug in too many chargers that require a lot of power, there is a risk of a shorting a circuit and fire.
  9. Washing machines and dishwashers can catch fire due to a short circuit, because there is too much dust in them, they are overloaded or too old.
  10. Do you have halogen lamps? It is better not to have them too close to the curtains or ceiling. Replace them with LED or energy-saving lamps.
  11. Nights on the couch with a candle on the table can be very nice, but also dangerous. Make sure that the holder or jar is a non-combustible material. Do not place candles near curtains either.
  12. Install a fire blocker. This device you place on the inside of a dryer or washing machine. Fire extinguisher will be released automatically in case of fire.
  13. In bed, an electric blanket can be very nice, but due to overheating or short-circuiting such a blanket can cause fire. Check before use after taking it out of the closet if it was stored for a long time and check the blanket before putting it in bed.

Home Insurance Coverage for Technology

Home insurances serve to cope with the most varied unforeseen events. The most common coverages include water damage, broken glass and sanitary appliances, as well as expenses caused by fire or atmospheric phenomena. Those that are less known by the general public are the coverage of home insurance for new technologies. Times are advancing and policies too and there are many advantages that you can benefit from.

The best policies for the home will offer your computer assistance, which includes technical support, by telephone or online, for incidents that occur on your computer or computers 365 days a year. In addition, you can access an additional service to erase the fingerprint. The insurance company deals with the erasure of information present in the public part of the Internet that causes reputational or economic damage to the insured. The best insurers assume the cost of this service.

There are insurances that include the protection against digital violence to minors. Upon the alert of the insured, the insurance company issues a report with certification of veracity for cases of digital violence to minors insured in the policy, which may serve as proof in a complaint. This option usually extends to any means of electronic communication, except for voice calls.

Another of the most interesting coverages for the insured is the location and blocking of mobile devices in case of loss, damage and theft. In order to provide this service, companies provide specific applications that the customer has to download to their mobile device. This allows to make reports of the situation of the device, screenshots and, if the device has a camera, a photo of the moment. It also makes it possible to see the programs that are running and the files that have been modified.

Coverage of home insurance for new technologies provide many advantages for all those who have computer equipment, but this type of policy also provides basic coverage for the risks that occur in a home, such as emergency assistance and repairs . Some insurances offer within their optional services, home DIY and repair of white goods.

How to Fix a Crumbling Brick Chimney

It is not uncommon for brick chimneys to crumble with age. Chimneys are often positioned in exposed areas of the roof, and crumbling can occur due to weathering even if other brickwork around your home is in good condition. In most cases, a crumbling chimney means the mortar between the bricks has degraded, the bricks have cracked, or both. Repairing a chimney that has started to crumble is a task most homeowners can do themselves. Often it requires you to repoint the mortar and replace any damaged bricks.

Replacing Damaged Bricks

  1. Measure the length of the damaged bricks in the chimney. Bricks that have been custom-cut will require you to cut the new brick to fit.
  2. Mark the measurement of the old bricks on your new brick using a marker.
  3. Put on safety goggles and work gloves. Chip a groove along the lines you marked in the brick using a chisel and a hammer.
  4. Insert a brick set into the groove, and strike the end with the hammer to split the brick at your mark. Continue cutting the remaining bricks in the same manner.
  5. Chisel out the mortar around the damaged brick to a depth of at least 1/2 inch, using the hammer and chisel. Move the chisel along the joint, removing about 1 inch of mortar at a time. Clean out the joints with a wire brush as you work.
  6. Pull each brick as it loosens from the chimney and set it aside. Do not remove too many bricks from the chimney at one time. Instead, repair the chimney in stages, removing only a handful of bricks at a time. Once one area is repaired, it will support the structure as you tackle the next.
  7. Mix your mortar according to the manufacturer’s label instructions. Make only enough to work for 15 to 20 minutes at a time.
  8. Dampen the brick with a sponge. Apply the mortar into the empty spaces in a layer that is the same thickness as adjacent joints.
  9. Trowel a layer of mortar onto the top and ends of the replacement brick, and place the brick into the mortared space.
  10. Scrape away excess mortar with the trowel. Shape the wet mortar with the trowel so that it matches the appearance of the adjacent joints.
  11. Continue applying mortar into the empty sections and replacing the bricks until all the damaged bricks have been replaced.
  12. Allow the mortar to dry for about an hour. Wipe the excess mortar from the surrounding brick with a damp sponge.

Repointing Crumbling Mortar

  1. Chisel cracked or crumbling mortar from the joints with a hammer and chisel. Clean each joint of loose mortar and dust with a wire brush.
  2. Mix your mortar according to the manufacturer’s label instructions. Make only enough to work for 15 to 20 minutes at a time. Usually, mortar is mixed at a ratio of 2 parts sand to 1 part cement. Water is added until you achieve a paste like consistency.
  3. Pour the mortar into a mortar bag. Place the nozzle of the mortar bag into the cleaned out joints, and squeeze to push the mortar through the nozzle to fill the joint.
  4. Scrape the excess mortar from the chimney using a trowel, and shape it so it matches the adjacent joints.
  5. Allow the mortar to dry for about an hour. Wipe the excess mortar from the surrounding brick with a damp sponge.

Tip

  • An old frosting bag can be used instead of a mortar bag.

Removing Paint Rust From a Car

A rust stain on your car can be detrimental to its appearance and cause great damage. What began as an aesthetic question can be turned into a structural one. Over time, rust can eat through paint and metal, causing parts of the vehicle’s body to fall apart. Irregular spots remain abandoned, posing a safety risk and threatening the structural integrity of the vehicle. Rust damage can also make a car difficult to sell.

  1. Use an electric hand grinder with a 150 grit sanding wheel to remove rust from your car. This will level the rusted area with the surrounding surface.
  2. Remove the 150 grit sanding wheel from the electric hand grinder and attach a metal grinding wheel. Slowly apply the metal grinding wheel to the rusted area to remove rust from your car. This process should also eliminate dents and bumps in the area. Turn off the sander and clean the area with a clean cloth.
  3. Use a piece of 150 grit sandpaper to sand the surface with your hand. Continue sanding until the previously oxidized surface is completely smooth. When you have finished sanding you should be able to close your eyes, run your fingers over the sanded area and not feel any difference between it and the rest of your car.
  4. Repair of remaining dents or imperfections with putty for car bodies, which can be purchased at any auto parts store. Allow the putty to dry overnight and sand with 150 grit sandpaper until it is soft to the touch and flush with the surrounding surface.
  5. Frame the outside area that you’ll be painting with blue painter’s tape. Apply a thin layer of car paint primer on the affected area. You can buy primer paint at most auto parts stores. Allow the first coat to dry for 10-15 minutes. Apply three thinner layers of primer paint. Allow the primer to dry overnight.
  6. Apply three thin coats of automotive paint in the same manner as the first. Remove the tape and allow the paint to dry completely overnight.
  7. Wax the area you have just painted to protect it from future oxidation damage.

How to Organize a Pantry

Organization is an important aspect of food storage. Maintaining an orderly storage area will give you easy access to food and make it easier to see what is available in a short time. It is easy to see what needs to be replaced and there is less waste when the area is kept organized. Another reason to get organized is to save money on food. By knowing how much of each item is available you can determine how much of each is needed. Being able to see how much storage space is available will let you know if it is possible to store more items that are on sale.

Instructions

  1. Put like items together. Place cereal, oatmeal and other breakfast items on a shelf. The pasta and pizza things with sauces on another. Arrange fruits and vegetables on their own shelves. Putting condiments on a shelf only will make things easier.
  2. Group together items of the same size of each shelf, but be careful to keep different foods separate.
  3. A blackboard hanging on a wall near the pantry. Take inventory in a grid using a permanent marker. Enter the list of foods with the same pen. Keep an erasable marker and an eraser.
  4. Draw a line for each stored item. Erasable marker used for this purpose. Draw a line over an item every time you use an item and add a line each time you add an item to the pantry.
  5. Use small containers for different products to carry, like ketchup and mustard. Use these products when making lunches for picnics and other activities.
  6. Use baskets or other containers to store small items that are not easily stored on the shelves. The spices can be stored in this way, also envelopes of beverages and sauce mixes.
  7. Use another container for teas. They can get out of control if not monitored. Coffee pods can be placed in another container. Use containers with lids for these products and to help preserve freshness.

Tips & Warnings

  • Line the shelves of the cupboard with paper for easy cleaning.
  • Put a couple of bay leaves on each shelf and one in each basket or other container. This will help prevent insect from getting in the food.
  • An additional basket for items to take as napkins and plastic cutlery sets can be helpful.

Applying Epoxy Paint to a Garage Floor

Epoxy paint can transform an old and tired garage floor into a showroom. Epoxy paint is a bit harder to apply than normal household paints. However, with proper preparation, you can get an excellent result from your DIY efforts. Learning how to apply epoxy paint will help get you on your way to great appearance and well-designed garage floor.

Instructions

  1. Tape a piece of plastic to your concrete floor with tape. Let the plastic stand for 24 hours. After waiting the allotted time, remove the plastic from the floor and check for moisture. If the floor looks darker or humidity is evident, do not apply epoxy paint to your floor. Moisture will ruin the paint job over time.
  2. Clean oil stains and grease spills from the ground. Use a degreaser, such as dish soap, and a brush to remove stains as much as possible. Clean the rest of the floor with an electric scrubber. To do this, first wet the floor and pour a small amount of degreaser on it. Run the electric scrubber on the floor until it is clean. Use a wet/dry vacuum to remove excess water and soap. Rinse the floor with water and repeat. Let the floor dry for 24 to 48 hours.
  3. Etch the ground with acid. Spread a solution of 12 ounces of muriatic acid and 1 gallon of water in the soil. Add the acid to the water in a bucket. Use a respirator to protect yourself from fumes. Use a power washer or hand wash to scrub the acid solution on the floor. Rub each area for about 10 minutes. Be sure to wear appropriate clothing, including safety glasses, gloves and closed shoes because the acid can be harmful to the eyes and skin. Rinse the floor twice with water and let it dry overnight.
  4. Mix the epoxy resin according to the instructions on the package. Spread the epoxy paint on the floor with a brush and a foam paint roller. Again, it is important to use proper safety equipment, including a respirator and gloves. Paint the entire floor with epoxy paint. Spread colored flakes over damp paint. Wait for the paint to dry overnight.
  5. Mix and spread the clear top coat over the top of the epoxy paint with a brush roller and paint. Wait for the top coat to dry for a day or two before use.

Three Interesting Facts About Water Damage

Every homeowner’s worst nightmare is having to deal with the aftermath of a flood. Initially, homeowners are generally concerned with questions like how much their homeowner’s insurance will cover and what possessions can be salvaged. When disaster strikes, life is placed on hold until everything is dried out and returned to normal, which isn’t always an easy task. Here are three facts about water restoration that will help you secure your home and return to normal life.

Knowing the Type of Water

In most cases, there are three types of water that will enter a home: rainwater, fresh water, and sewage water. The type of water you are dealing with will determine the cleanup process. If you are dealing with sewage water, you’ll need to contact a professional clean up company who will have the necessary tools to handle the problem safely. One sure way to know that you are dealing with a sewage water mess is that it will smell as terrible as you would expect it to. Bacteria that are commonly found in sewage water can be harmful, leaving you or your family members sick.

Trouble Doesn’t End When the Water is Gone

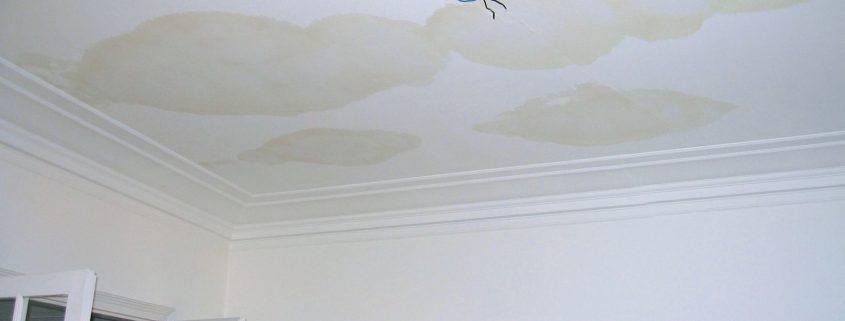
Don’t be deceived thinking that as soon as the water is removed from your home you can breathe a deep sigh of relief. Just because the obvious signs of water are gone, doesn’t mean there isn’t moisture, mold, or other issues lying just beneath the surface. Moisture can be hiding in walls, crawlspaces, under floorboards, etc., leading to mold growth. Not only is mold harmful to your health, but it can cause serious damage to the structural elements of your home. As part of your water cleanup process, be sure to have a mold prevention expert fully inspect your home to ensure you don’t have any potential issues hiding where you can’t see them.

Attics Are a Cause for Concern

The most common source of water entering a home is through a damaged roof or malfunctioning gutters. Because of this, your attic is at the highest risk for water damage to occur. If your roof leaks, have your attic inspected to ensure there isn’t a serious problem getting worse without you knowing about it.

Water restoration specialists can not only remove the water from your home but fully inspect to ensure that you don’t have any hidden problems you may not know about. Don’t attempt to clean up the water mess by yourself, call the professionals and let them do the work for you.

Seven Ideas to Decorate an Old Home

Old houses have an undeniable charm … So to better decorate and decorate your home, our experts in home staging reveal their secrets.

Paint the walls white to enhance the beams

Beams are common in old houses and they bring a certain charm. It is therefore better to make them apparent by ideally painting the walls of the room in white.

Dare to color in some rooms

In the kitchen or bathroom, for example, do not hesitate to add colorful touches on the walls and furniture, this warms the atmosphere of the house.

Embellish the house with modern decorative touches

Nothing like a subtle blend of modern and old. You can modernize the interior of the house with some decoration. It can be paintings, curtains, furniture or anything else.

Exploit the atypical elements of the house

Beams, an old fireplace, a wall with exposed stones … all of which give character to your home and you should not remove under any circumstances! Instead, highlight them. A little varnish or even a coat of paint on the beams, a good maintenance of the fireplace and a cleaning of the walls will give them a boost!

Hang decorating accessories from the walls

You can also decorate your walls with objects that will give the feeling of warm rooms: tables, photo frames, or mirrors can do the trick. Feel free to choose colorful, while avoiding the shade of the old elements that bring its charm to the house.

Enhance the space with a library

In an old house, the walls are often high and it is sometimes difficult to fill them. So why not consider installing a library? It will allow you to assert the style of your decoration, and bring an additional charm to the house!

Bet on a mezzanine

The mezzanines bring both comfort and an atypical look in a room. In the kitchen, it can be storage, in the living room it can be a quiet reading corner and in the rooms, you can install a bed to maximize space.

Tips to Improve the Safety of Your Home

To improve the security of your home against burglaries

Burglaries are more common in the winter months. So, how can you take steps to secure your property?

According to Aviva, burglary rates increase by an average of 26% in the second half of the year compared to earlier in the year.

Taking advantage of shorter daylight hours and valuable family content, burglars often choose the holiday period as the perfect time to attack your home.

There are several steps you can take to increase the safety of your home. Follow these tips

Domestic security alarms

According to a report by UK Home Security Week 2010, just one-third of homes in the UK have an alarm installed.

These alarms usually contain a wall unit that is installed on the outer wall of your property, in an area clearly visible to passersby. Alarms are perhaps the most common form of deterrence against burglars, sending a clear message to potential criminals.

Locks

According to Secure One, 20% of all burglaries are not the result of access to property by force.

Many households do not have essential safety equipment, such as outside locks on the back of their property.

Locks, chains, and other devices are easy to install and simple to use, but can be a big deterrent if you cannot secure your entry by using an Intercom or an electronic lock. It is always important to match the lock to the specific area where it will be placed and always look for areas that may be vulnerable – such as sheds, garages and doors.

Security cameras

Another great deterrent are security cameras which are an easy way to improve the security of your home. These are the perfect devices because they act as a clear deterrent, while ensuring you have a high level of visibility at all times.

As there are more than a million burglaries and burglary attempts each year, increased visibility and surveillance at your home is essential and these devices could help take the assailants responsible for breaking into your home.

Best practices

According to information from the UK Home Security Week, a fifth of British households admit that they leave the windows open when they go out, despite the fact that 45% of them believe that the locks of windows and doors are forms of sufficient and effective home security.

20% of burglars have access without using force and many of them will simply enter your property through open doors and windows.

Addressing your own habits can help reduce the risk of burglary. Simply closing and locking all windows and doors before leaving the house is the easiest way to ensure that burglars are not given an easy access point.

Determining if Floors are Water Damaged and What to do

One of the worst scenarios of home ownership is harm or decay as ae result of faulty technology or a natural disaster. One of the most common is a water damaged floor. This can be the result of many mishaps, ranging from a leaking pipe to a spilled drink to a leaking roof to the absolute worst, a flash flood. A water damaged floor needs to be inspected, and its covering materials taken up. Because wood rots and other damage may actually be beneath a carpet or other covering, you may not notice the damage until it is very bad.

One sign of water damaged floors might be discoloration in the carpet. Another is that a spot is sagging. Yet another is rotten wood that sinks beneath your shoe, and especially if your foot falls through. Rotten wood will be spongier than hard wood, and should not echo if knocked. Sometimes there is no evidence of water damage, and yet you might expect it because something was spilled there, or repeatedly. If you were away on vacation for a week and return to see your roof leaking, then suspect floor damage in the affected spot.

If there is the potential for water damage, but you do not wish to tear up the carpet just yet, then look underneath in the crawl space. A professional canl do this. Water damaged flooring is troublesome to repair, especially if the damage is expensive. The carpet must be torn up, if for no other reason than to allow the wood to dry. The affected spots must be cut out and new wood set down. If the carpet is discolored or mildewed, it must be replaced.

Although it is possible to do this yourself, especially if the damage is small, professional help is a very smart option for this type of project. A professional knows the many complex steps and safety procedures that are necessary. Of course, in the event of a flood, then extensive repairs may be needed, and the expense might be so great that the home is not worth fixing. Any home that has endured a flood depreciates, even if it was repaired.