
How to Fix a Crumbling Brick Chimney
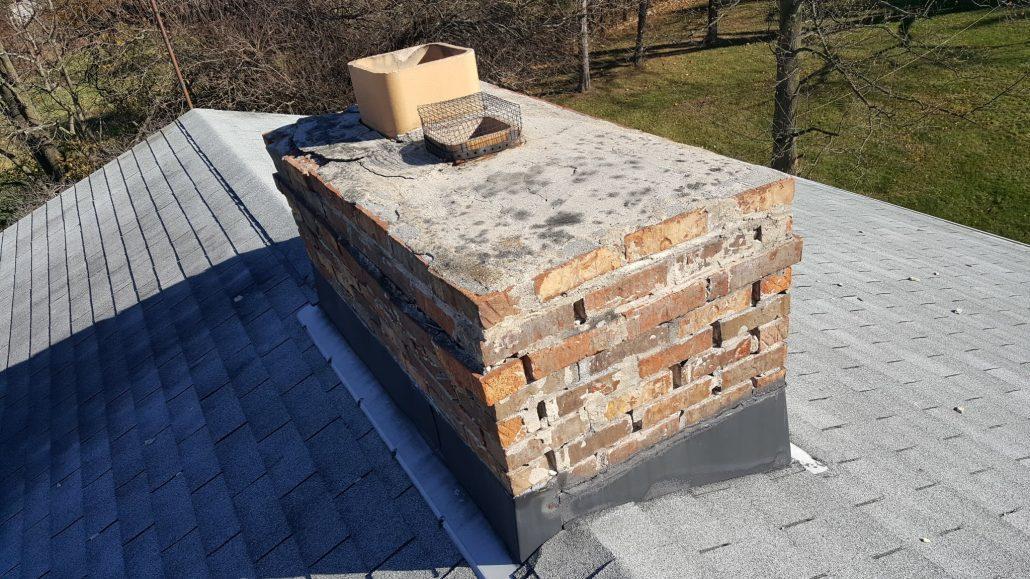
It is not uncommon for brick chimneys to crumble with age. Chimneys are often positioned in exposed areas of the roof, and crumbling can occur due to weathering even if other brickwork around your home is in good condition. In most cases, a crumbling chimney means the mortar between the bricks has degraded, the bricks have cracked, or both. Repairing a chimney that has started to crumble is a task most homeowners can do themselves. Often it requires you to repoint the mortar and replace any damaged bricks.
Replacing Damaged Bricks
- Measure the length of the damaged bricks in the chimney. Bricks that have been custom-cut will require you to cut the new brick to fit.
- Mark the measurement of the old bricks on your new brick using a marker.
- Put on safety goggles and work gloves. Chip a groove along the lines you marked in the brick using a chisel and a hammer.
- Insert a brick set into the groove, and strike the end with the hammer to split the brick at your mark. Continue cutting the remaining bricks in the same manner.
- Chisel out the mortar around the damaged brick to a depth of at least 1/2 inch, using the hammer and chisel. Move the chisel along the joint, removing about 1 inch of mortar at a time. Clean out the joints with a wire brush as you work.
- Pull each brick as it loosens from the chimney and set it aside. Do not remove too many bricks from the chimney at one time. Instead, repair the chimney in stages, removing only a handful of bricks at a time. Once one area is repaired, it will support the structure as you tackle the next.
- Mix your mortar according to the manufacturer’s label instructions. Make only enough to work for 15 to 20 minutes at a time.
- Dampen the brick with a sponge. Apply the mortar into the empty spaces in a layer that is the same thickness as adjacent joints.
- Trowel a layer of mortar onto the top and ends of the replacement brick, and place the brick into the mortared space.
- Scrape away excess mortar with the trowel. Shape the wet mortar with the trowel so that it matches the appearance of the adjacent joints.
- Continue applying mortar into the empty sections and replacing the bricks until all the damaged bricks have been replaced.
- Allow the mortar to dry for about an hour. Wipe the excess mortar from the surrounding brick with a damp sponge.
Repointing Crumbling Mortar
- Chisel cracked or crumbling mortar from the joints with a hammer and chisel. Clean each joint of loose mortar and dust with a wire brush.
- Mix your mortar according to the manufacturer’s label instructions. Make only enough to work for 15 to 20 minutes at a time. Usually, mortar is mixed at a ratio of 2 parts sand to 1 part cement. Water is added until you achieve a paste like consistency.
- Pour the mortar into a mortar bag. Place the nozzle of the mortar bag into the cleaned out joints, and squeeze to push the mortar through the nozzle to fill the joint.
- Scrape the excess mortar from the chimney using a trowel, and shape it so it matches the adjacent joints.
- Allow the mortar to dry for about an hour. Wipe the excess mortar from the surrounding brick with a damp sponge.
Tip
- An old frosting bag can be used instead of a mortar bag.


