8 Things You Should Know About Fireplace and Chimney Care

While the comfort of a modern furnace should never go unappreciated, many people utilize fireplaces during colder months to provide economical heating solutions or to make for cozier holiday gatherings. Whatever the reason, keep these eight tips in mind before your fireplace makes its seasonal debut.

CALL A CHIMNEY SWEEP.

A chimney sweep will provide a visual inspection of your fireplace and chimney, looking for evidence of creosote, a tar-like build-up, and blockages. If ignored, creosote can lead to chimney fires. An annual inspection prior to your first fire of the season is good fireplace hygiene.

LEAVE A LITTLE ASH.

Although it’s recommended you clean the firebox (where the logs burn) once a month during fire-burning season, it’s a good idea to leave an inch or so of ash left over. This way, the coals from fresh fires will retain heat more easily. When you scoop up the rest, be very careful to set them outside: ashes can remain surprisingly hot long after a fire has gone out.

KEEP THE AREA CLEAR.

Furniture should be set a minimum of 36 inches away from the fireplace to avoid sparks igniting upholstery. This is true even if you use a fireplace screen to catch sparks. (Which you definitely should.)

CLOSE THE DAMPER.

A damper is a hinged flap just above the fireplace that controls the amount of air allowed to pass through the chimney. It’s good to have it open during a fire, but you should remember to close it when the flame is out to prevent heat loss and cold air exchanges.

MAKE SURE YOU HAVE A CHIMNEY CAP.

If the idea of an open portal on the roof of your house sounds like an opportunity for trouble, it is. Chimney caps can partially close the opening to prevent animals from climbing in, building nests, and keeping smoke from leaving the fireplace.

ONLY USE SEASONED WOOD.

To stoke a hot fire, make sure you supply it only with seasoned wood—logs that have been dried out for at least one year. Wet wood that’s been exposed to the elements makes poor fuel and promotes smoky fires. When building your fire, you also want to make sure you’re placing logs in close proximity to one another; a large grate that allows for spaced-out arrangements will be a poor source of heat.

DON’T HANG STOCKINGS.

It’s a holiday tradition, but objects on or near the fireplace or mantel can quickly become fire hazards when targeted by flying sparks. And while we’re on the subject: Never toss wrapping paper in a fire. The finishing materials used on the paper could cause a flash fire that can easily spin out of control.

CONSIDER A FIREPLACE INSERT.

Ask a local chimney expert if your fireplace is suitable for an insert—a steel or cast-iron box with a glass front that traps gas or wood-ignited heat and radiates it like a space heater into your home. It’s a perfect blend of cozy and cost-effective.

Five Tips to Hang Furniture on a Wall

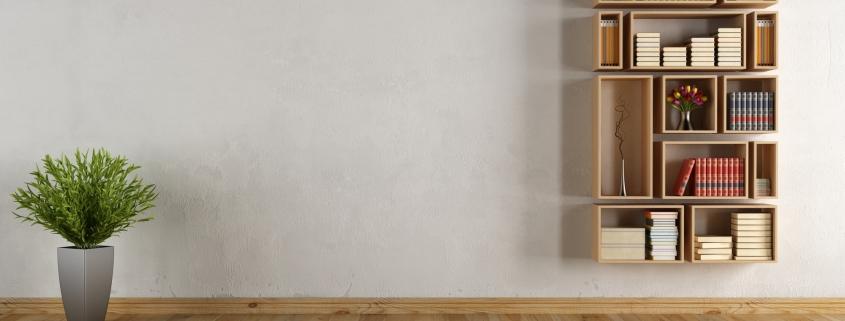
How to hang a wall cabinet successfully

  1. The first thing to do is identify the weight of the furniture. When you know, go to your local hardware store and ask for the screws and appropriate anchors for that weight and type of furniture. Always choose anchors metal or steel, not plastic or flexible materials that can easily break. Do not forget to install many more screws, fixing more.
  2. The measurements are very important. You must be precise to avoid drilling in the wrong place and having to start over. First work on the cabinet: Look at back to identify where you will place the hooks of the anchor system. Draw them at the same height accurately using a level. Screw the hook and make sure it is not loose.
  3. Before getting down to work on the wall, remove any furniture that is below or near the work area and cover all objects and decorative items to protect against dust. Taking accurate measurements for placing the hook in the cabinet and use the drill to make the holes fit. This is important to use plugs before screwing resistant anchoring. The screw plugs ensure and protect the wall.
  4. To attach the furniture to the wall system, do not forget to load the cabinet with the help of another person to avoid back injuries or accident. Try not to scratch or leave marks on the wall with hands or tools.
  5. Finally, the basic and most simple rule, do not overload objects on the furniture If the anchor you purchased is only able to hold the weight of the furniture, you won’t have any additional weight that can be used for frames and other objects.

Plumbing Tools Used to Unclog Pipes

Plumbers choose tools according to the location and severity of the obstruction of the drain cleaning. Instead of using chemical drain cleaners that offer a temporary solution, professionals uncover drains with rooting tools, submerging tools, tools and tools to remove drainage washing. Because clogged drains are such a common problem, drain cleaning tools and equipment are widely available for purchase and rent at home improvement stores and hardware stores.

Rooting tools

Rooting tools, also called augers or “snakes,” fall into two general categories: manually operated snakes and motorized snakes.  The main component of both types of drainage drills is a flexible metal coil with a corkscrew tip. A hand operated crank rotates the coil of the manual drain auger and an electric motor or gasoline turns power drill coil. To use a drain auger, the plumber inserts the tip of the coil into the drain pipe and pushes the coil until its tip meets the obstruction. Grab the tip of the corkscrew-like blockage and the plumber pulls the entire coil out of the drain pipe.

Sinking tools

Generally associated with toilet repairs, sinking tools are also used on common plunger drain pipes in sinks. The standard, home plunger consists of an inverted, rubberized glass attached to a straight handle. To use a plunger, the plumber places the cup over the drain opening of the clogged area and pushes down the plunger handle. The sudden push forces an air blast or stream of water into the obstructed drain pipe, often strong enough to dislodge the obstruction in a drain pipe.

Flushing Tools

Flushing tools use directed, strong water streams to dislodge and dissolve drainage obstructions. The most basic washing tool is a garden hose, but there are various garden hose accessories available on the market concentrate and strengthen the hose current for the specific purpose of unclogging drains. Unscrew fittings typically at the end of the hose. If you use a standard attachment or hose, the entry point into the drainage system is usually through a ventilation tube in the roof of the structure. To eliminate a drain, the plumber finds it nearer to obstruct the drain vent and feeds the hose into the drain system. The plumber becomes the water and allows the powerful current to dislodge debris.

Drain Removal and Tool Repair

In many cases, the most effective method of clearing a drain is to dismantle the drain and remove debris by hand. If an obstruction exists between threaded portions of drainage pipes, a plumber can remove pipes with standard wrenches. If pipe cutting is necessary, the plumber uses a metal saw or alternative saw. Cast iron pipes most connect with semi flexible rubber linings. Screw clamps drive cast iron accessories to loosen with screwdrivers and nut-drivers.

Four Chimney Problems That Need Immediate Repair

Even well-built chimneys will need maintenance and repairs from time to time. Winter weather conditions like rain, hail, snow and ice can accelerate the normal wear and tear. And with cold and ice outside, and fire and high temperatures inside the flue, chimney repairs are all but inevitable. Fortunately, most chimney problems can be detected with regular inspections. But there are some problems that will need immediate repair.

Water Leaks

Moisture inside the chimney is a problem that requires immediate repair. The most common sources of a leak are a cracked cap or crown, spelling bricks, and damaged flashing. Over time, water will soften the masonry that can affect the structural integrity of the chimney and your home. It can also cause cracks inside the flue that may also damage the liner. This can eventually become a safety hazard that not only puts your home at an increased risk of a fire, but it can also allow dangerous carbon monoxide fumes to leak into your living space. If you notice any water or condensation in the chimney or fireplace, give us a call to schedule an immediate inspection. Our chimney technician will visually inspect the chimney to pinpoint and repair the source of the leak.

Creosote Accumulation

Creosote is that sticky, tarry substance that clings to the chimney walls, flue liner and surrounding components. It is naturally produced from the combustion of igniting the fireplace. In chimneys that are not regularly cleaned, the creosote will continue to accumulate. It is this accumulation that is the leading cause of a chimney fire. In fact, many homeowners may be unaware of fire damage until they peek inside the fireplace or have an inspection. Fire safety experts agree that an annual chimney cleaning is the best way to minimize the risk of a fire. Homeowners that use their fireplace more frequently may need an additional cleaning.

Cracked or Missing Bricks

Cracked or missing bricks are the result of a combination of deterioration in the outer layer of the brick or masonry and the freeze-thaw cycle. Most damaged bricks or stones begin as tiny cracks in the surface that are hardly noticeable. As water and ice continues to penetrate, the masonry begins to crumble, and you may notice portions of or entire bricks missing from the chimney. The remaining bricks will continue to soak up any moisture or condensation that develops further weakening the structure. In many cases, tuck-pointing can repair the damage. But if the damage is severe it may require a chimney rebuild.

Damaged Flue Liner

When you have a beautiful roaring fire in the fireplace, inside the chimney is like a hot oven with temperatures that can rise above 1,100 F. The flue liner is designed to absorb much of the heat and insulate the chimney and your home from deadly carbon monoxide. But these conditions can also result in cracks in clay or cement liners. Also, the chemicals in oil and gas can also cause excessive wear and tear. You may notice that your fireplace is not heating as efficiently, or your carbon monoxide detector may signal an alert. But most flue liner damages are very difficult to detect without a professional chimney inspection. And a damaged flue liner means your fireplace is unsafe for use until repaired.

Making Wood Look Metallic

Painting wood to look like metal may sound complicated, but you can easily create a metallic look using metal finish spray. These paintings recreate the color, and the brightness of the metal on almost any surface, including wood. You should add a transparent layer to ensure that the metallic paint adheres properly and lasts for years.

Instructions

  1. Sand the wood with sandpaper with a thickness of 220 to prepare the surface for the base. Clean the dust produced by sanding using a dry cloth.
  2. With a brush, apply a layer of alcohol based wood paint. These bases are sometimes called “shellac” bases. Do not worry about using a coloredbase to match your painting; a white base will work perfectly.
  3. Shake your can of spray paint.
  4. Apply the paint on the wood, starting from the top and using horizontal and constant movements to apply a thin coat of paint. Continue to apply thin layers until the wood surface is completely covered. Let the paint dry.
  5. Paint over the dry metallic paint with a layer of transparent polyurethane-based latex with high gloss finish to protect and give shine to the metal paint.

Tips & Warnings

  • As you paint, spray the paint in constant motion or too much could be applied in an area, causing the paint to run and ruin the metallic look you’re going for.

How to Make a Shoe Storage Rack

If you find yourself pulling your shoes out from a big pile at the bottom of your closet, and you’re always missing one or both halves of your favorite pair, it may be time to make a shoe organizer in your closet. Make it any size you’d like and place anywhere in your closet.

Instructions

  1. Think about kindergarten classrooms and storage cubbies that were available for children to place their school supplies in. These storage shelves are perfect for keeping separate pairs of shoes.
  2. Count the number of shoes you need to store in the closet shelf. You can make each rack so it holds 2-6 pairs of shoes and build separate as many as you need. If you buy more shoes, you can make another shelf and attach it to your closet with the others.
  3. Start with the number of shoes to be stored on each shelf and multiply by 9 inches as each cubicle should be 9 inches wide. Add ¾ inch for end boards and each partition between pairs of shoes. For example, if you want to store 5 pair of shoes, multiply 9 and 5 for a total of 45 inches. You have two ends and four partitions and ¾ multiply by 6 for a total of 4.5 inches. Add the two together to total 49 1/2 inches.
  4. Gather your materials. For our example, you need two boards 12 inches wide and 49½ inches long for top and bottom of the grid. You also need 6 boards is 12 by 6 inches for the sides and partitions. All these joints must be ¾ inch thick.
  5. Assemble your shoe rack to form a rectangle which measures 49½ by 10½ inches and contain five shoe cubbies. Set pieces by drilling 1½ inch screws down through the upper to the lower board and board to attach the sides and partitions.
  6. Lay the grid on a piece of plywood and trace. Cut the piece of wood that you need to make the back of the grid. Fasten with wood screws 1½ inches at the edges and partitions. Paint the grid if you want and let it dry.
  7. Fit the rack to your closet. You can simply set it on the floor, if desired. Alternatively, you can connect it to the wall by screwing through the wood studs with 2 inch drywall screws. If you need more storage space for your shoes, you can put together another shelf above or below the other.

Tips For Painting a Garage Door

A door garage gaunt or faded, whether it is built of wood or metal, can have a negative aspect in the appearance of the outside of your house. The door is worn a lot with daily use and being constantly exposed to the weather. Painting your garage door is not complicated, but it needs to be done properly. Some advice for painting doors garage can help.

Clean the door

The garage door is outside in the elements collecting dust and dirt during the seasons. Before painting, wash the entire surface of the garage door. Metal or wooden doors are prepared in the same way. Start by spraying it with a garden hose. Scrub all over with trisodium phosphate and a scrub brush. Trisodium phosphate can be purchased at most hardware stores. Rinse the door and let it dry.

Sand the door

For both types of wood or metal doors, you must sand the entire door. If you avoid sanding, the paint will not stick to the door. Sand each panel surface individually with a medium-grain sandpaper. If the metal door shows signs of rust, use heavy grade sandpaper. Do not use steel fiber. If you accidentally removed the enamel during sanding or if there is rust on the metal door, you must prepare the garage door before painting. Apply a zinc base, then wait at least 16 hours to paint the door.

Select painting

Oil-based paints do not work as well on garage doors, whether metal or wood, because they show many flaws and imperfections. It is best to use a latex exterior coating and wood door trim and a Rustoleum metal paint for doors of this type. While you are buying the paint also pick up a roller, paint tray, a standard size brush and a brush for contours.

Paint the door

Distribute the paint over the wooden or metal door. Paint from top to bottom, all over the door. Overlap each section by a few inches to ensure the entire garage door is covered. Use the standard brush to soften the fingerprints of the roller and touch up corners and edges. After the first coat of paint has dried, apply a second coat in the same manner. Do not use the garage door for a day while the paint dries.

Facts About Water Damage Restoration

When the rain pours hard, there is always a danger that unwanted water could enter your basement or other areas of your home. Having unwanted water is what causes water damage. It does not always have to come from rain water; A faulty plumbing system can also cause it. When it happens in your home, knowing some basics of water damage restoration will help you avoid significant losses especially when disaster strikes.

What is water damage restoration?

Water damage restoration refers to activities aimed at curbing water damage. This includes anything ranging from simple leak problems to removing water from houses that were submerged in water after. Restoration is more or less a rescue operation aimed at salvaging furniture, books, appliances and the structural integrity of the house. Here is an overview of the general process of any water damage restoration exercise.

Removing water

The first step in any restoration process is to remove unwanted water from the house. Water can be removed in many ways depending on the extent of water damage. You can use pumps when dealing with massive amounts of water or a shop-vac to dry up soaked rugs. Ideally, the water removal process serves to eliminate the source of unwanted water.

Cleaning

After removing water, you need to clean up the affected areas. This is particularly important for people recovering from a flood as floodwater carries all sorts of dissolved contaminants. The cleaning process serves to remove dirt, and other contaminants left behind after water has been successfully removed.

Drying and disinfecting

After the cleaning is complete, you need to ensure everything is dry. You can either use natural drying methods or blowers and dehumidifiers. The idea is to eliminate moist conditions that can favor growth of mold and mildew, which pose some health risks. Disinfecting these areas serves to ensure that fungus has no chance whatsoever.

Why is water damage restoration necessary?

Water damage can result in deterioration of property and more damage to your valuables. Prolonged cases of water damage can expose the inhabitants of a home to significant health risks. Ideally, water damage restoration serves to take care of the health of the occupants, their belongings and the structural integrity of the home they are living in.

Who can do water damage restoration?

As much restoration activities seem basic, any remediation is best attended to by a professional. With professionals, you benefit from years of experience, proper restoration methods, and a timely restoration process.

The Definition of a Master Plumber

A master plumber is an expert in piping systems. Plumbing can be like working a puzzle, which helps you enjoy solving problems. A plumber is physically strong, detail oriented and good with practical work. A master plumber can also be known simply as a plumber.

Plumbers install, maintain and repair pipe systems, for various reasons, according to the Occupational Information Network. Plumbers work within the specifications of the plumbing codes. Plumbers work with specific tools, such as drainage or pipe cleaning equipment, pipe or pipe cutters, pipe wrenches, pressure gauges and special keys. Workers can spend hours in uncomfortable and narrow spaces. The work may require local travel.

According to the US Bureau of Labor Statistics (BLS), plumbers can repair and maintain water systems and septic tanks. Plumbers work in residential and commercial environments. Plumbers often work more than 40 hours a week and can be on call for emergencies during nights and weekends.

According to the College Board, a non-profit organization that connects students with educational experiences, plumbers start as apprentices, combining classroom studies with on-the-job pay. A learning program lasts four to five years and includes 144 hours a year in the classroom. The formal education of a plumber includes chemistry, physics and mathematics. Students also study plumbing-specific topics, such as bacteriology and sanitation.

The BLS compiles data on plumbers with the entire group of plumbers, plumbing installers and steamfitters. Plumbers, pipe fitters and steamfitters earned a median national hourly wage of $ 23.97 and an average annual national salary of $ 56,330 as of 2020, according to the BLS.

According to the US National Employment Matrix Bureau of Labor Statistics, employment for plumbers, pipe fitters and steamfitters are expected to increase at a rate of 5 percent from 2020 to 2030. The demand for plumbers will come from construction and renovation of buildings. In addition, the maintenance and repair of existing systems will keep employed workers.

Tips to Help the Economy of Your Home

Save energy

Turn off the lights when leaving the rooms, reduce water consumption, buy energy efficient appliances, replace your incandescent or low consumption LED lighting and disconnect all outlets that are not in use.

Make the budget

On the Internet there are good budget planners that will let you know how much you spend per year and in what. If you spend more than you earn, the planner will help you make cuts.

Buy with intelligence

Always carry the shopping list and buy only once a week. These are tried and tested tricks that will save you from temptations.

Cheap purchase

When you buy everyday items, buy the cheapest and most useful. Buy in quantity and, if you can, reduce meat consumption.

Keep the freezer full

In this way, less electricity is consumed than if it is half-way. If large empty spaces remain, fill them with ice packs.

Grow your own products

Try it, even if it’s only a few herbs, next to the kitchen door or on the balcony.

Hurry the containers to the end

To use every last drop of a cleaning product, add a stream of water to the container. To get to the end of creams and pastries, cut the containers and you’ll see how much is still left.

Give new life to the old

Toothbrushes used to scrub difficult corners and clean tile and mosaic joints; cut the old shirts and use them as cloths; take advantage of the containers.