siding-2

4 signs that tell you your siding needs to be replaced

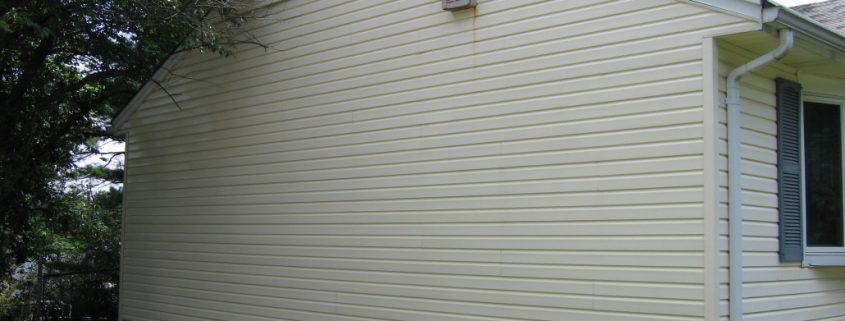
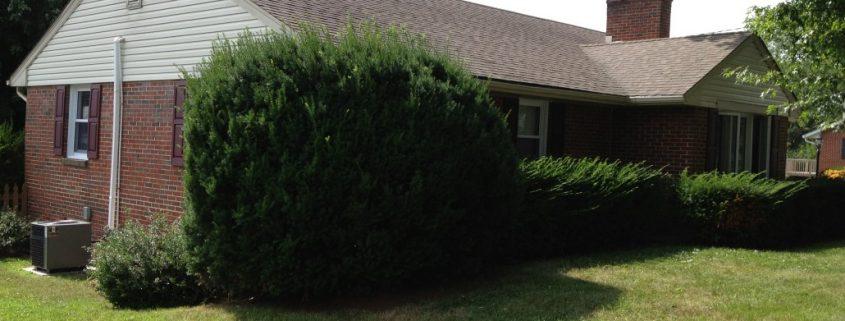
Your home exterior walls (also known as ‘siding’) is what people see when they first approach your house. Depending on how it looks, it can either leave a negative or positive impression among those who see it.

You want your home to look good always so that people get a good impression about it and about you. If you are about to put your house in the market, you will only attract good prices for it if you have improved how the siding looks.

Well-maintained siding is not all about aesthetics. It’s also functional as the interior of your house will get better protection against heat, rain, wind, pests, cold, snow, dust and dirt.

If you have not replaced your siding in a while, look for the following signs to know whether it’s time:

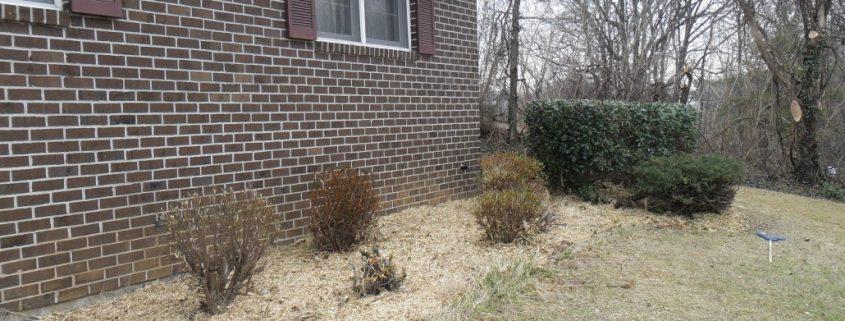
  1. Do you notice any warping, swelling or buckling?

Your siding is not supposed to retain any moisture. If you notice swollen, warped or buckled areas, these are indications that moisture is leaking into your walls.

If this is not fixed immediately, it will result in molding, rotting, and eventual collapse of your walls. Before you replace any damaged siding, fix the source of the moisture first.

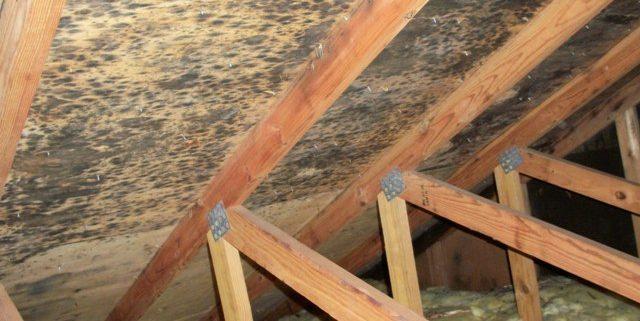
  1. Check for fungi, mold and mildew

The presence of mold, mildew and fungi is yet another indication that moisture is passing into your walls. The water could be leaking from piping that passes within your walls, from your house’s foundation or from cracks on your exterior walls.

  1. Dry rot

Dry rot is a dangerous type of fungi that if not eliminated, can cause your walls to weaken and eventually collapse. It might not be obvious just by looking at your exterior walls whether they have been attacked by dry rot. Hire a specialist to inspect the space between your exterior and interior walls and if any pieces show presence of dry rot, replace them.

You might need to reside your entire house if the dry rot attack has spread too far.
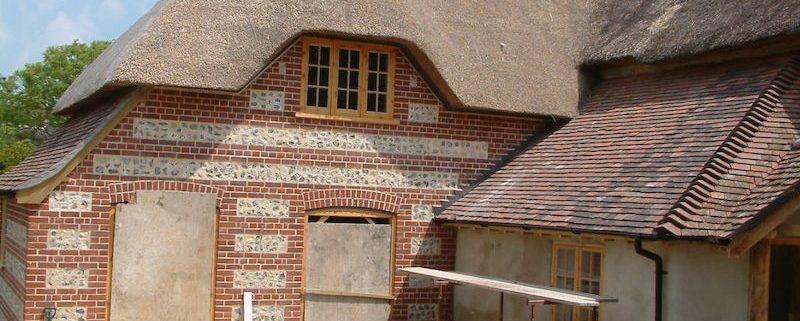
  1. Holes and gaps

Holes indicate that your walls have been attacked by insects. Note that the damage caused by insects might not be obvious from the outside, because insects burrow and feed on siding from the interior.

Even after you exterminate insects, the holes will still remain and if not sealed, will allow water, dirt and dust to leak into your walls. If the holes are numerous, be on the safe side by replacing your entire siding.

tree-services-12

7 factors to consider when hiring a Tree Services company

If the trees in your front or backyard are overgrown, it’s time to call in professional tree services. As tree trimming and removal is a dangerous and complicated job, you shouldn’t just hire anyone. When hiring, ensure they meet the following criteria:

  1. Check their licenses.

Hiring a service that works with unlicensed employees can cause a lot of damage to your property. Note that when hiring people who are not qualified, you do so at your own risk. It’s also important to remember that it’s illegal for anyone to do any tree removal without a license.

  1. Make sure they have a valid insurance cover.

Any damage done to your house by uninsured workers will have to be replaced by your own insurer. Note that your insurer might also refuse to cover damage done by an unlicensed company. A good tree removal service should have worker’s compensation insurance and liability insurance.

  1. Check referrals to confirm their previous work history.

Checking referrals will allow you to know the quality of work you should expect. Only previous customers can give you an accurate picture of what it’s like to work with a tree service.

If the company has a website, also check, ensuring to read through all the reviews. If you notice any negative reviews, follow the communication trail to see how the company handles disgruntled customers.

  1. Ask the company to give you official cost estimates.

You should let the company know that a cost estimate does not bind you to use their services, but is just a part of your due diligence process.

You should compare estimates from a few companies. Note however that cost should be the last thing you consider. First, think of the kind of service you’ll get. Cheap is not always good.

  1. Ask the tree service what equipment they’ll use.

You should not hire an under-equipped company, especially if the trees in your yard are too tall or too large. Confirm that the kind of equipment the company uses will be sufficient for handling the job without endangering you, your house or your neighbors.

  1. Find out what type of service you’ll get for the cost quoted.

Some companies will offer some extra services such as stump grinding. While with other companies, you might have to pay for additional services.  The more services you get within your budget, the better. Therefore, when interviewing the tree services company, find out what to expect for what you are paying.

  1. Confirm how much experience the employees have.

This can be either in terms of individual experience or combined years of experience within varied skill groups. Note that sometimes, though a company might not have that many years in tree services, their employees might be very good at working together and have a good record of successful service even within a short time. Therefore, when looking at experience, don’t forget to look at how well the teams work together and how varied their skills are.

painting-7

4 key things to consider before you start painting a room

One of the best and easiest ways for making an old room look good and fresh again is applying a new coat of paint. But before you jump right into cleaning the walls and filling in any holes, there are a few things you need to do first so that your project proceeds without a hitch.

Start by working out the following details about your project:

  1. What type of paint should you buy?

Not all paint will give you the look or feel you want. Paint can either be water based or solvent based. Both types are available in a variety of finishes, such as glossy, matte, satin and low sheen.

Some types of paints and finishes might not be suitable for some surfaces. For instance, solvent based paint is not good for ceilings. A wall with imperfections should not be finished with a glossy paint. You should instead use paint with a matte finish because it will mask imperfections.

Water paint dries faster and it tends to have a milder smell than oil based paints. Therefore, if you want to do a quick paint job or if you have allergies, it’s better to go with water based paints.

Solvent based (also known as oil based/enamel paints) are good for high traffic areas because they are tough. Surfaces finished with enamel paint are also easier to clean. Such paint is also good for door and window frames.

Walls with imperfections might not do well with oil based or water based paints. Acrylic paint is better for such walls as it will spread on better.

Choosing the right type of paint should be a task you take seriously.

  1. What colour do you want your room to be?

Paints come in many colors and the colors also vary in shades. If you want a room to be bright, then you should go with bright colors because light will bounce off them better.

Darker colors are probably better for corridors or offices. If you are not sure how a color will look in your house, get a sample quantity from the store and test on a small patch before you buy a large can.

  1. How much paint should you plan for?

Talk to your painter to give you estimates of the amount of paint you’ll need. While you don’t want paint to run out in the middle of the project, too much paint might go to waste especially if you don’t have any other immediate plans for it.

  1. Do you have material for covering surfaces that should not be painted?

Paint can be very hard to remove, so you should avoid getting it on items and surfaces by covering them.

Tape over your trim, skirting, door frames and window frames. If you are painting window frames, cover the glass. Buy enough paper or cloth to cover furniture and floors. Also tape around sockets because scrubbing the paint off later will be difficult.

When you have considered and done all these things, then your painting project is ready to begin.

restoration-6

5 common mistakes that should be avoided when performing a home restoration

It’s inevitable that your home, furniture and any other structures or items will age with the passage of time. Usually, the look and beauty of aged items can be brought back through restoration.

The restoration process however is not that simple and if approached in the wrong way, can lead to many mistakes such as: spending a lot of money because of poor planning, devaluation of an item or house because of using procedures that strip away its character, among others.

Restoration should not be approached lightly and it should definitely not be done by an unqualified individual. For your item to be restored successfully, you should avoid the following mistakes:

  1. Working without a plan

Before you proceed with restoration especially for a house, your first move should be to get everything in a plan. Assess the house for any damage top to bottom and in addition to making plans for fixing the damage, make plans for adding improvements that will fulfill the needs of future occupants.

Planning will help you know the scope of the project and also work out how much you are likely to spend.

  1. Expecting that a house will be easy to ‘flip’ as soon as it’s restored.

Flipping an old house is not that simple. Even after it’s been restored, there’s a likelihood that it won’t be as competitive as a new home.

An even bigger danger is if the restoration destroys the look of a vintage house. For instance, by adding vinyl siding, the installers might end up destroying any architectural details that vintage home buyers would be looking for.

If you are restoring a home with the hope of flipping it, adjust your expectations about deadlines.

  1. Working with an unrealistic budget

While it’s good to keep your budget at a minimum, it’s a big mistake to set one that is too low such that it’s unrealistic. Working with a very low budget will only lead to poorly or partially done restorations. When setting a budget, make provisions for unforeseen costs to avoid frustrations.

  1. Poor handling of environmental hazards

Hazardous material like lead paint and asbestos should be handled with extreme caution. Exposing yourself and others to these materials could lead to health complications.

Only work with restorers who have been trained in proper containment, removal and disposal of hazardous material.

  1. Working with an uncoordinated team

One factor that can lead to a poorly done restoration is working with a contractor who cannot properly coordinate his or her team.

Old homes are very sensitive and cannot be treated in the same way as contemporary homes. Plumbers, electricians and carpenters for instance, can in the process of their work, ruin the vintage look of walls in an old home.

It’s therefore important to work with a contractor who can coordinate members of his or her team so that they don’t damage the value of your property.

powerwashing-4

12 safety tips to observe when power washing your walls.

When you are preparing your walls for painting, the first thing you need to do is to remove dirt that may have accumulated on them over the years. This is done by power washing. Failing to remove dirt from walls prior to painting will cause a fresh coat of paint to fail sooner than later.

Impurities removed from walls through power washing include dust, mildew, chalk, old paint and mud. Some power washers operate on gas while others operate on electricity. Electric power washers are more preferred since they have the ability to deliver more power.

Safety tips when using a power washer:

  1. Power washing should be done by skilled hands. Even if they are not difficult to operate, leaving them in the hands of an unskilled person can make them dangerous to people and property. The biggest challenge with handling one is in learning to use the right pressure.
  2. Power washers should not be pointed at other people. The pressure expressed by the power washer is extremely high, so just like a gun, you should not aim it at people especially when it’s discharging water.
  3. If you are working on a ladder, angle your ladder such that it will compensate for the ‘kick’ that comes when the water makes contact with a surface.
  4. Power washers should not be used around or near power sources, such as meter boxes, lights and sockets. Turn off the power before you begin and after you finish, check to ensure that no water leaked into any power sources.
  5. Power washers should be used with the right levels of pressure. A psi of between 1500 to 1800 can eliminate spider webs, grit, dust, dirt and fungus. For washing off loose paint, a force of 2500 psi will work. Anything higher and you’ll damage the walls.
  6. Note that wood sidings are especially vulnerable to power washing and the right level of pressure should be applied when working with wood.
  7. Before power washing, your house should be protected against the pressure blast. All windows and doors should be closed. If any windows and doors are leaky, extra caution should be applied when blasting around them.
  8. Make sure the pipe doesn’t get tangled during power washing. Remove all items that could be in the way, such as furniture or kids’ toys.
  9. Power washing should only be done on still days. If done on a windy day and you are up on a ladder, the combined force from the wind and water pressure could make you fall.
  10. Start power washing from the top of your walls and proceed vertically in a downward direction.
  11. Washing should always start with a low pressure and from a safe distance. Only increase pressure in small amounts and move closer to surfaces in small distances.
  12. A power washer should never be aimed at windows or doors.
windows-and-doors-10

5 Key Features That Keep Your Windows and Doors Energy Efficient

As the cost of living goes up and the world becomes more conscious about environmental conservation, a lot of people have decided to take steps to make their homes more energy efficient. Windows and doors are the main parts of the house that can contribute to energy inefficiency if they don’t shut properly, are too thin, or if they have spaces around them that let in drafts.

For this reason, it’s important to ensure that the windows and doors you choose for your house are built for energy efficiency. Below are 5 key properties that should guide you when making your choice:

  1. Quality of the frames

Window and door frames have always been built for strength and durability. But you also have to check whether they are energy efficient. For instance, aluminium is very strong, but is not energy efficient. To make frames energy efficient, they have to be filled with insulating foam to prevent energy loss. Most energy efficient frames produced today also have the added advantage of being customizable, catering for your personal tastes.

  1. Is the glass Low-E?

‘Low-E’ is a coating that works by reflecting infrared light to retain heat inside the house during the winter and keep heat out during the summer. The coating also reflects UV light, protecting your furniture and décor from fading.

  1. Multiple panes provide more insulation

Energy efficient doors and windows have at least 2 or more panes. As the number of panes increases, so does the strength of the glass and its ability to retain heat. When combined with other features such as Low-E, the glass will surpass energy-star requirements.

  1. Go for gas-filled panes as opposed to air-filled

The panes in energy efficient windows can also be filled with insulating gases to reduce conduction of heat. These gases, such as krypton or argon, are better insulators than air.

  1. Check the quality of spacers

Spacers are made of material such as foam, stainless steel or aluminum and are used for keeping panes well-spaced in order to minimize heat transfer. Good quality spacers should handle the flex that comes with expansion and contraction. If the spacers are not good quality, this movement can be lost, resulting in loss of the seal in the panes.

duct-cleaning-19

6 Tips for Cleaning Ducts and Air Vents

Moisture, dirt and dust found in the air are carried into vents and ducts which can cause mold, and dust contamination over time. If these contaminants are not cleaned out, they might result in health complications in people with allergies and sensitive respiratory systems. Additionally, dirty air vents and ducts will not effectively move air in and out of your heating and cooling systems.

As such, it’s important to clean air vents and ducts every few months. For each cleaning session to be successful, you should follow the below 5 tips:

  1. Check for the presence of mold

If your house has inadequate ventilation, this can cause moisture accumulation resulting in growth of mold. As air travels through ducts that have mold growing in them, it causes mold spores to detach and blow into the house. If the spores are blown into moist areas such as bathrooms, kitchens or basement, large parts of your house to get mold infestation.

Though mold is visible, it might not be easy to see it in areas deep inside the vent. The best way to detect mold presence is through lab analysis. Depending on the extent of infestation, you might either have to clean out the mold or replace the damaged areas.

  1. In case of mold infestation, find out the source of the moisture problem

Even if you clean out the mold and replace moldy areas, the problem will still recur if you don’t address the moisture problem. In addition to cleaning your vents and air ducts, find out what is causing moisture accumulation and fix it. Though this will increase your costs, it’s better compared to the damage you could end up with in the future.

  1. Check for clogging and debris accumulation

If pests such as cockroaches, flies and rodents die inside air ducts and vents, they could cause clogging. As they decompose after they die, you will notice particles releasing into your living areas from the air vents or air ducts. You can also tell you have a clogging problem if air is not circulating as well.

  1. Identify professional air vents and ducts cleaners

To hire qualified professionals, check for valid licenses, a good reputation and lots of experience. This is the only way to guarantee that your air vents and ducts will be cleaned properly, keeping them efficient at heating and cooling.

  1. Get cost estimates

Costs will depend on certain factors such as: how extensive the air ducts or vents are, whether you have mold infestation, the amount of dirt contained in the system, and ease of accessibility. Ensure you understand how the cleaning professionals arrive at their estimates.

  1. Confirm the job has been done right after every cleaning

After cleaning is completed, you should notice a change in the air quality. The air ducts and vents should also appear visibly clean. Additionally, allergic symptoms should start to subside.

mold-remediation-6

7 Questions to Ask When Hiring a Mold Remediation Service

Every home will suffer from mold infestation from time to time, due to the presence of moisture.  Mold is toxic to your health so it’s important to hire professionals for mold remediation. In order to hire the right company, you should be prepared with the right questions to ask.

To improve your chances of hiring the right company, it’s advisable to interview between 3 to 5 companies. This will also improve your chances of getting a more favorable cost estimate. Interviewing can help you gauge the suitability of the company based on their willingness to answer questions and provide information such as references.

With these few tips in mind, the following are some interview questions that will help you to choose the right mold remediation company:

  1. Are you a certified mold remediation professional?

Usually, mold inspectors and remediators need to be certified by some select organizations and health bodies. The remediation company also needs an operating license, which should be issued by local authorities. Ask to see these licenses and certifications.

  1. How long have you been a mold remediator?

Employees who have been carrying out mold remediation for a longer time are more likely to do a better the job, making your home safer.

  1. Do you have any references?

References are important as they will always prepare you for what to expect in terms of work ethic and quality of work. Contact a few prior customers to get their opinion before you decide on the company to hire.

  1. Do you work on ventilation systems?

Mold found in ventilation and air conditioning systems can be breathed in and cause respiratory complications. To ensure your ventilation system is scrubbed free of mold, ensure the professionals you are hiring have performed remediation on air ducts.

  1. What guarantees do I have while working with you?

Conducting home tests after remediation should be part of the process, as this will allow you to gauge how likely the problem recurs. Find out what will happen if you find mold after the remediation is completed.

  1. What are your costs?

Costs will differ from one company to another, but should not be starkly different from what competitors are offering. Some companies will also charge for consultation, while others might not. Find out all these factors and compare the total cost against your budget.

  1. Can you provide documentation for insurance claims?

If you intend to claim payment from your insurer, ensure the remediation service can provide the required documentation. Some insurers also have preferred remediation services that they recommend, so it’s a great idea to check with them before you hire.

tree-services-16

7 Reasons Why Overgrown Trees Near Your House Are a Bad Idea

Trees around the house can be a great thing: they provide shade, serve as wind breakers, add beauty and increase property value. But when overgrown, trees can also pose a threat to you and your house. If you allow your trees to become overgrown, they might cause the following damage:

  1. Old and overgrown branches might fall and injure people and cause damage to electricity & telephone lines, your house, car and other belongings. Not to mention, downed electric lines can result in fatalities and fires.
  2. Broken branches and leaves that find their way onto the roof of your house will clog gutters which could result in water flowing into your roof, walls and basement.
  3. Rodents can invade your roof by walking on tree branches that grow too close to your roof.
  4. You might lose complete use of your patio, deck or balcony, if leaves and tree branches grow over that space.
  5. Constant rubbing of tree branches on your roof will wear your roof material faster. Additionally, constant shade from the sun will cause dampness on your roof leading to faster deterioration.
  6. Your house might get musty and cold due to improper circulation of air.
  7. Large root systems can cause damage to the foundation of your house, eventually affecting the entire structure. If there are cracks in the foundation, tree roots can grow into them, causing problems such as foundation uplift, sinking of buildings where roots have leeched water from soil and penetration into water and sewage pipes.

To prevent all these problems, you should trim and prune all trees and vegetation that grow around your house to keep it under control. Tree branches should be at least 4 to 6 meters away from your roof. Before you plant any trees, learn all the facts about them, including how long their branches and roots will grow. Big trees should be planted farther away from the house.

Safe removal and trimming of trees is important to prevent damage and accidents. If you are not confident about trimming overgrown tree branches, contact a professional in your area to do it for you.

fences-7

5 Tips to Remember for DIY Fencing

Are you tired of your neighbor’s dogs and kids always running into your yard? Do you feel as though you could do with extra privacy and increased security? Fencing your yard is a great way to achieve all these things.

If you have some spare time on your hands or feel in need of a DIY project, then consider installing a fence. In order for you project to turn out right, there are some tips you should consider:

  1. Familiarize yourself with the building rules and regulations of your local area.

Most local authorities have very strict rules for fence installation. If you don’t follow the correct zoning rules, this could land you in legal trouble and you might even have to take your fence down.

It’s also important to confirm where water, gas, electricity and sewer lines run, so that you don’t damage them.

  1. Discuss your plan with your neighbors

Discussing your intentions to fence your yard with neighbors who share your property lines will prevent any friction from popping up. It’s also a great way to share fencing costs, so before you start building your fence, ensure that all owners of neighboring properties are aligned with your plans.

  1. Take measurements and create a plan

Before you start digging, map out your plan on paper. If you start working without accurate measurements, you will botch your fence installation project. Correct measurements will also influence the quantity of material you buy.

  1. Buy fencing material and ensure you have all the relevant tools

There are many types of fencing material available on the market and your choice will depend on the reason why you need a fence. When choosing fencing material, also consider that some materials are easier to work with than others. Discuss available options with the sales clerk at the hardware store and choose the right one for you.

Additionally, ensure you have parts such as screws and nails, as well as all the tools needed.

  1. Don’t forget the entrance

A fence is not complete without an entrance to match. Whether you decide you want a pedestrian gate or a driveway, incorporate it in your plan. A great entrance can add a great dramatic effect in your overall fence design. Not to mention, it is a great way to add security to a home and maintain privacy.