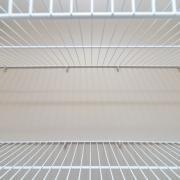
Handing Wire Computer Shelves
Installing wire shelving is an inexpensive and easy way to create a desk and computer storage. Wire shelving is available from home improvements stores and may be coated or uncoated. Coated wire shelves have a layer of vinyl plastic or wrapped around it as a buffer, while non-coated wire shelving is only bare metal. One of the other benefits of wire shelving mounted on the wall is the versatility; the computer area can be expanded or retracted to adjust to a changing room design. Hang shelves made of standard gypsum or plaster is a task that can be completed in less than an hour.
Instructions
Measurement
- Measure the length of wire shelving. There may be several pieces; the desired arrangement of shelves must fit in the designated area.
- Mark the wall where you want to hang the shelf. There should be three marks; one for each end of the platform and one for the middle. Note that if you are making a computer desk shelf, it should be high enough so your knees fit comfortably under it when sitting.
- Make sure the marks are straight using a level. This will ensure that the shelf is straight when mounted on the wall.
- Mark the location of the first clip from the wall. If the end of the platform is against a wall, the first clip must be at least 2 1/2 inches from the end. If not, the clip should be placed 1 inch from the end. Repeat on the opposite end.
- Make marks equal distances apart from the first mark of the second. Note that the clips should not exceed more than 12 inches apart.
- Measure 5/8 inches above each mark and mark again with a point. This will be the location of the screw that holds the clip in place.
Installation
- Drill a hole in the center of each point with 1/4 inch drill bit. This is the recommended standard drill for drywall or plaster.
- Press wall clip into the holes with a hammer. Attach wall clips in place with bolts.
- Hold the shelf on the wall clips and start to blow the wire back into wall clips. Wall made clips for wire shelving have slots at the top, allowing easy installation.
- Decide on the location of the support brackets. Support brackets must be installed no more than 3 feet apart, or less than 2 meters from the end of a platform that does not touch the wall.
- Place the assembly of a support bracket to the bottom of the wire shelving. The plate must sit flush against the bottom of the shelf horizontally, with the carpenter plate attached to the lip.
- Place a screw through the front jointer. Do the same with the smaller end of the plate at the end of the wire shelving. Tightening a nut (hand) on the back of the bolts. Repeat this with each media location.
- Mark the area in which each support bracket is fixed to the wall. Most likely to be a small hole in the bottom. This will be the area to be marked.
- Drill a 1/4-inch of each brand. Then, gently hammer the fishes, or wall anchors in each hole. Finish screwing the brackets to the fishes.


