John Epley
BEST – Each job is completed with quality and determination.

BEST – Each job is completed with quality and determination.
Our roof leaked after the recent hurricane. We called Handyman On Call as they had worked on this area previously. They inspected the roof and determined that the repair would be performed under warranty at no charge. This was a very responsible and honorable thing to do. They did an outstanding job diagnosing and correcting the situation.
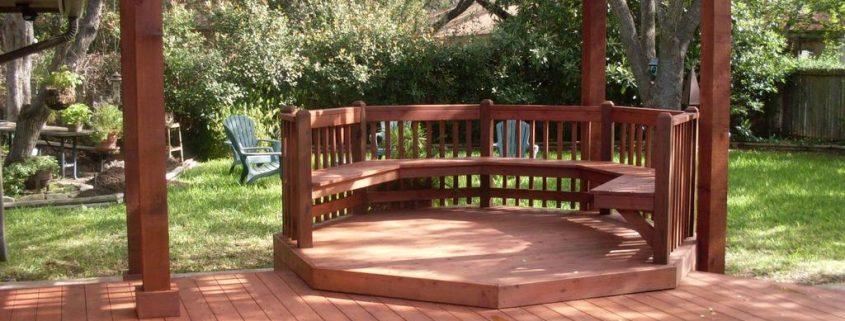
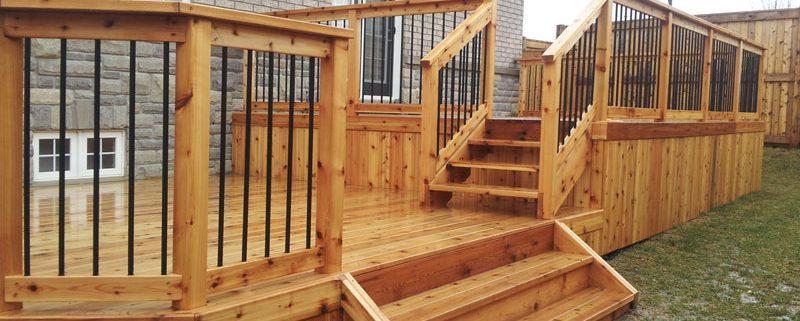
A rustic deck can be charming and quaint, but it’s an entirely different thing to have a deck that has simple gotten old. On older homes, decks can often go ignored for too long and what once would have been simple repairs to fix it up become laborious and expensive.
So if your deck needs to be restored, here are some things to keep in mind when trying to keep it looking good on a modest budget.
If the wood is starting to crack and splinter, just about any wood restoration product should do the trick. But before applying such a solution you’ll want to clean the deck with wood or deck cleaner. Be sure to pay attention to the directions all all cleaners; if they are not properly diluted, they can do much more harm than good. Once this step is done, you should be able to wash down your deck (using a power washer if you have one available, although a nice hit with a strong hose also works).
Let the deck sit for 4-7 days to dry properly, based on your current weather conditions. When you are confident the deck is dry, you can use your restore solution (Restore 10X, for example). Depending on the size of your deck, you can use wither a standard paint brush or a roller. Regardless of what you use, be sure to always spread the restore solution in one direction. Try to focus on one or two boards at a time rather than spreading it all around in order to ensure an even coating.
If the deck has seen a lot of wear and tear, chances are good that a second or even a third coat will be needed. In most cases, the second coat should be enough but it all depends on the condition of the wood. Make sure the first coat is dry before applying the second coat for maximum results.
If you have children or pets, make sure they don’t step foot onto the deck until the second coat is dry.
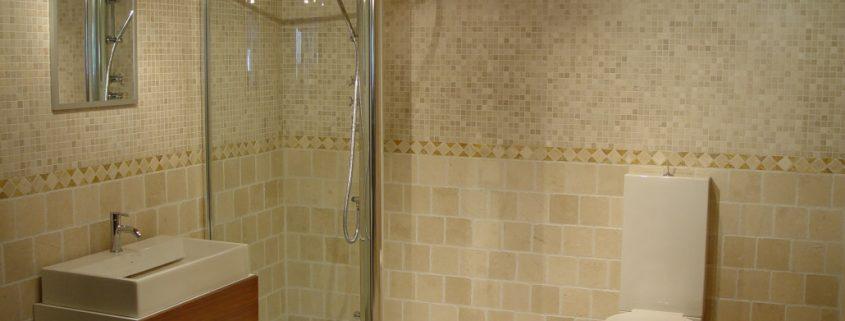
You don’t realize how important your toilet is to your family until you find it on the verge of breaking. Being one of the most used utilities in the home, toilets have their fair share of issues. Here are some of the most common ones along with simple remedies to fix them.
Filling On Its Own
When your toilet starts to fill on its own—as if it’s recently bene flushed when it has not—your flapper is likely the cause. When your flapper is either fitted poorly or is started to corrode, it often allows water to drain from the tank to the bowl. In almost every case, replacing the flapper will solve this problem. If a new flapper doesn’t do the trick, the water line connecting fill valve and the overflow tube is probably too long.
An Incomplete Flush
When it appears as if your toilet isn’t providing a complete flush, you can find the problem in a few different areas.
Unexplained Water Level Drops
If you’ve bene noticing a water level drop after flushing, you’re likely having one of two problems. The first is an easy one to fix—a simple clog can cause the tank to start siphoning water from the bowl. This can be remedied with a plunger and elbow grease. A worse problem, tough, is that you could be looking at a crack somewhere within the toilet, most likely where the water passes through the drain pipe. There’s no remedy when this happens…it’s just time to get a new one.
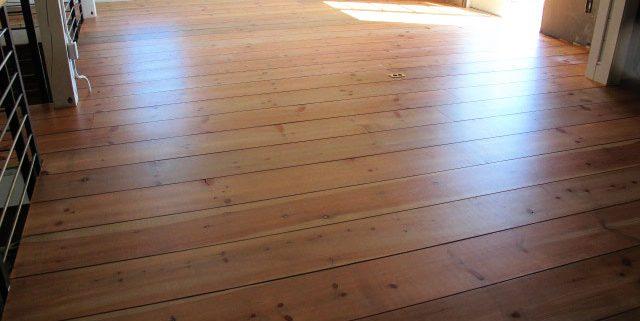
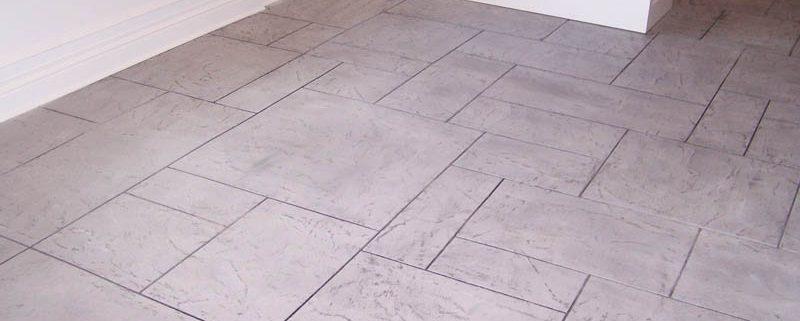
There’s just no getting around it—your hardwood floors are going to get dings, scratches, gouges, and scrapes. This is especially true if you have children or pets. The good news is that certain scratches you get in your hardwood floor can be covered up and cleaned to the point where they basically disappear.
For lighter scratches
Always clean and scrub the floor before starting the process. Once the area in question has dried, you can use an acrylic or wax floor polish to cover the scratches. Be generous is the application, though; too much of this sort of remedy can eventually make your floors darker and acrylic is not easy to get off of your floor.
A simpler solution would be to coat your floor with one of the many products on the market that will renew the look of the wood. You can find several of these at any home repair store. If you make a point to use these solutions every few months, you will also find that it helps to prevent future scratches. Lastly, make sure your floor is not a wood laminate, as these solutions can damage it.
For deeper scratches
While deeper scratches are certainly more unsightly than a lighter scratch, these can easily be maintained, too. By filling your deep scratches in with stain, you don’t really remove the stain but it is next to impossible to see. The trick, of course, is finding a stain that is the exact color of your floor. When applying the stain, use a Q-tip or a very small brush.
You can also find special stain markers or pencils that can make this job a bit easier.
For gouges
These are those gouges that simply hurt to look at. While these can be a bit more difficult to repair, it can usually be knocked out by a precolored latex wood filler. Just like the stains mentioned above, be sure that the filler you select matches the shade of your floor. Spread the filler into the gouge with a putty knife and then make sure you give it enough time to dry. Next, use sandpaper (of the fine grit variety) to smooth it out. You may need to finish this job off by placing abit of thinned varnish over the repaired gouge.
One of the absolute worst smells you can encounter in your home is the stench that is created by a garbage disposal that is used frequently but not cleaned very often. This is caused by bits of food particles that get caught in the disposal without being churned properly. These bits of food decay and start to stink, mingling with other similar food bits.
The good news is that this is a problem that is easy to eliminate and prevent from happening again.
There are several ways to get rid of your garbage disposal odors. Each are equally effective and should work in just about any situation.
Use Dish Soap to Clean the Guts: Plug your drain and run some water into it—about half full should do. Add some dish soap to the water and the remove the plug while flipping on the disposal. This will send the soapy water through the “guts” or housing of your disposal. This works great in terms of getting deep into the hard-to-get areas of your disposal.
Vinegar: You can use vinegar in the exact same way you used dish soap above. Vinegar is a great natural cleaner and while it may not smell as nice as dish soap, its cleaning abilities can work wonders on your disposal.
Use Ice When In a Pinch: A quicker and easier remedy is to put ice into the disposal and run it. Then add more ice with about a half a cup of salt this time, and run it again. Because salt serves as a good abrasive cleaner, it will scrub away any remnants the ice chunks didn’t knock away.
Using Lemons: This one is easy and works best after completing one of the two solutions above. Peel a lemon and runt he rinds through your disposal. It not only helps get rid of any food remnants but it also helps your kitchen smell nice and fresh with a citrus scent.
To prevent smells from building up, try running the lemon or dish soap solution at least once every two weeks.
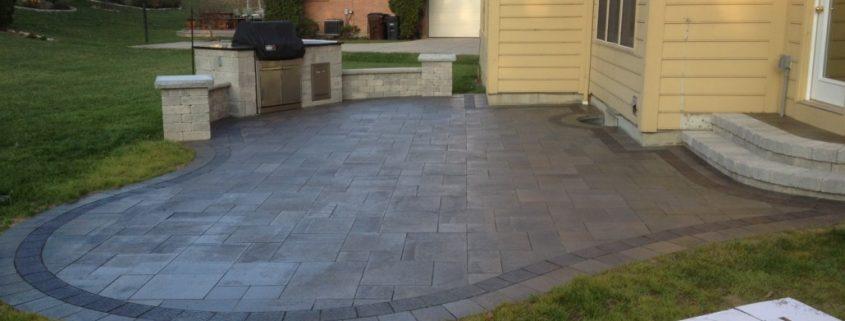
The garage can sometimes be the most neglected part of the house. But that doesn’t mean that it needs to go unnoticed when the garage floor starts to collect stains. Most people assume that cleaning stains from a garage floor is difficult and that’s why many of them go untended to.
But cleaning the garage floor is easier than you might think, no matter what type of stain you’re dealing with.
For oil and grease stains all it takes is mixing a cup of water with one ounce of trisodium phosphate and a cup of absorbent material. This creates a paste that you can then lather on the stain and leave until it dries. The paste draws the stain away from the concrete. Once the paste has dried completely, you can scrape it up. The stain will be gone and your floor will look as good as new. If the stain has been there for a while and has really set in, it could take three of four solid applications to fully remove it.
To remove paint stains you will also be using a paste that you can create with paont stripper and the absorbent material of your choice. Layer this paste over the paint stain and let it sit for half an hour or so. When removing paint this way, make sure the garage door is open and the area is ventilated, as the chemical in the stripper can often be harmful.
Not that if you use a low-impact, safer paint stripper, you may need to let the paste sit on the stain for two or three hours to get the full effect.
You can remove rust stains with a ¼ cup of muriatic acid mixed with two cups of water. The solution will dissolve the primary layer of stain. Just be sure to apply a thin layer, as too much acid can easily blemish your concrete.
No matter what sort of stain you’re cleaning, be sure to use the proper safety precautions.
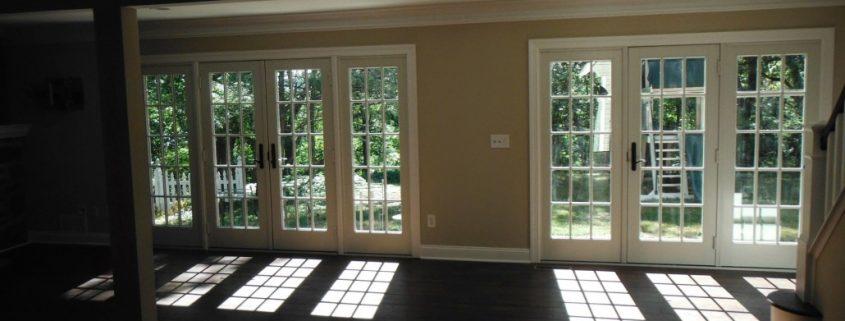
Your home is a large part of who you are and because of that, there’s no harm in wanting to spruce things up a bit. If you have grown tired of the same old look of the place you call ‘home’, a home remodeling project might be just what you need! Of course, a renovation project is easier said than done and at first, the thought can be a bit overwhelming. Follow these tips, and you’ll be on your way:
Plan Well and Organize:
It’s time to brainstorm. Identify the changes that you want in your house and write them up on a piece of paper or save them in a doc file in your computer. Do not make extravagant plans and always stick to changes that you believe can be achieved within your budget. While listing out the changes, it’s also better to separate them out based on priorities because of your budget limitations, so, if you run out of funds while remodeling, you can cut off the lowest ranked priorities from your list.
Set your Schedules Right
It’s obvious that your life will get pretty hectic while your house is undergoing the renovation project; you will have to stay with a friend or a relative, so you should check with them if they can accommodate you at the required time of the year. But, it’s always better to stay with a neighbor, that way you can always visit the site and check up on progress yourself. So, before you hire a professional handyman service to renovate your house, check which time of the year is perfect for you to get the job started.
Prepare a Contract and get the Job Started:
When hiring a professional handyman service for your house renovation project, always prepare a contract which includes a list of things that you want the company to do for you, and a price estimate. If this is your first time renovating your house, it’s always better to keep a friend or family member alongside who has done this before.
With these tips, you’ll be ready for whatever comes your way.

Whether it is to tighten that loose kitchen cabinet door or to fix that loose tray in your office’s Xerox machine, it always pays to have your own set of Pocket tools. These are usually very lightweight and you can attach most of them to your key-ring as well! Although, there are a lot of pocket tools available to be bought in the market, there are some which are preferred by top DIY Enthusiasts more than the others, here’s a list which includes some of those:
The Victorinox SwissChamp
The SwissChamp is perhaps the ultimate pocket tool box out there, packing no less than 33 functions and countless possibilities. Weighing at only a 185 gm, you can just attach it to your key-ring and forget that it’s even there; it is certainly one of the best pocket tools for a DIY enthusiast to have and even its manufacturing company, Victorinox AG, boast that it’s one of the best pocket knives that they have ever come up with.
The Fenix LD01 Flashlight
There comes a hopeless moment in every DIY enthusiast’s life when he/she has a pocket full of tools but has nothing to do due to darkness and in moments like those, it pays to have a flashlight with you. Most flashlights in the market are bulky and larger than your pocket, but what most DIY enthusiasts really need is a small flashlight which packs a lot of luminosity and as the answer to their prayers, out comes the Fenix LD01 Flashlight, its key-ring sized, it’s intensely bright for its size (72 Lumens), you have the option to switch between brightness levels to save battery life, and it’s really cheap (about $50).
The Husky Folding Utility Knife
If you are fending for pocket tools for yourself, you should always get a Husky Utility Knife for yourself. Unlike other pocket knives, this one is designed for rough use, so it doesn’t get ruined when you perform tasks such as grouting or scraping off on hard or metal surfaces.
Tool Logic SVC2 Survival Card
This is a brilliant piece of equipment for all DIY enthusiasts; it is essentially a credit card holder which packs 7 essential tools. It is armed with regular, everyday necessary tools such as blades, tweezers, toothpick and opener while its 2-inch serrated blades seem to cut through everything!
Nowadays, internet articles and videos have the potential to make everything look easy (Even rocket science); you will find a lot of articles and videos on the internet encouraging you to save money and do all your repairing yourself. But, hiring a professional handyman has benefits that you wont gain by doing DIY projects, here’s a list of some of the benefits attached to hiring a professional handyman:
Saves Time: Repairing your home belongings or sections of your home itself is a very exhausting and time consuming process and there are a lot of preparations involved with it as well! You can expect the work to be two hammer strokes long before you get to work, but when you get to work, you might realize that there are no hammers at your place so you have to drive to your nearest Walmart to get one, once you come back, you might realize that you have bought the wrong type of hammer and you have to go back again, this might go on the whole day till you finally realize that you have started at dawn, the sun’s down but you haven’t managed to fix it yet!
Better Quality: Have you heard about the guy who ruined his $5000 furniture while painting a few walls inside his home, just because he did not want to hire a professional service? Sure, hiring a professional handyman may cause you to spend some money up front but you will receive an excellent value for your money, that’s for sure! Professional handymen are usually very experienced and they will make sure that they do all good for you and no harm.
Less Risky: There are a lot of potential hazards involved with all types of repairing jobs and numerous actual cases of death attributing to repairing work are registered every year. Hiring a professional handyman pays off because they are highly experienced and unlike you, knows everything about what they are doing, so the risk factors associated with the task is greatly diminished. So, for your safety and to ensure protection for the people around you, you should always hire a handyman for all types of difficult repairing jobs.
Versatility: Most professional handymen are really good at fixing all types of things starting from your door hinge to your microwave. Handymen nowadays are trained in a variety of different services so they can provide you with more in exchange of your money. A typical homeowner might find multiple find multiple small problems around the house requiring to be fixed and coming up with solutions for all those problems may be very stressful for you, therefore, to make your life a lot more easier, just pick up the phone and call a professional handyman service.
