kitchen-62

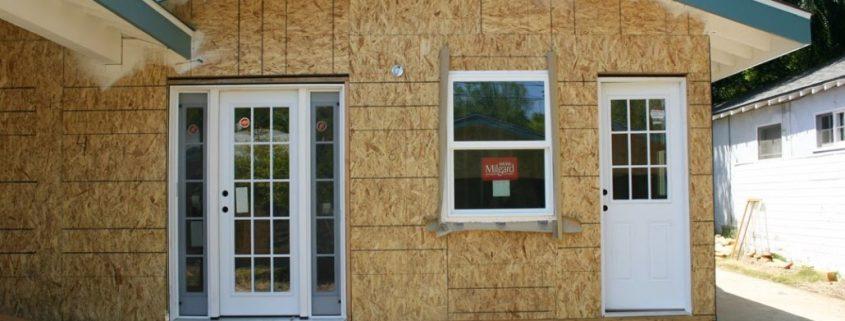
Inexpensive kitchen remodeling ideas

Unlike what most people think, kitchen remodeling doesn’t have to be an expensive undertaking. Research shows that it is possible to attain high financial returns even with only a few minor changes.

The following are a few strategies on inexpensive kitchen remodeling:

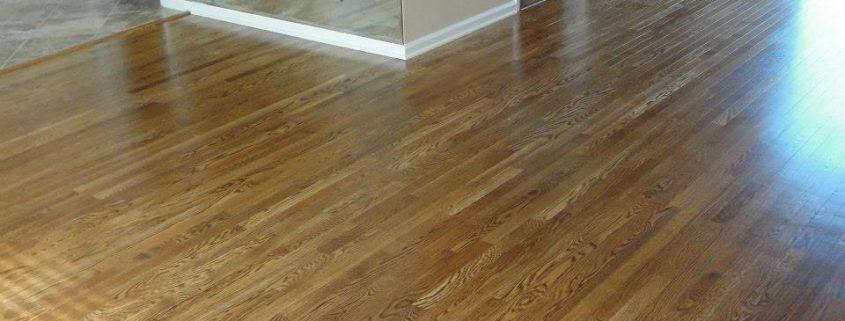
  1. Modernizing the floor – dingy flooring can be refinished or replaced with sleekly tiled floors for a very reasonable price. Those who wish to do it personally can attain basic tile installation instructions from the internet or from handyman books. It is important to choose the tiles according to the style of the kitchen and the color of other kitchen fixtures for best results.
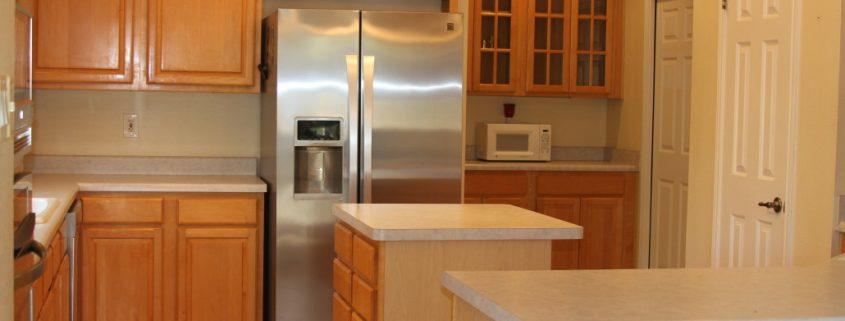
  2. Renewing appliances – there is no need to replace kitchen appliances with new ones when operating under a tight budget, having them refinished will also uplift the appearance of the kitchen significantly. There are companies that do appliance refinishing all over the internet at just a fraction of what it would cost to purchase new appliances.
  3. Replacing or renovating the countertop – unfastening and removing an aged countertop can also be done easily with the right instructions. Replacing the current one with a new one will take the kitchen remodeling venture a notch higher, but for those who can’t afford a new one, it is still possible to modernize the present one through various ways, such as having stone tiles installed.
  4. Molding – improving the molding of a kitchen is also another inexpensive kitchen remodeling tactic that can easily be completed within a few hours.
  5. Refurbishing the cabinets – refurbishing kitchen cabinets will brighten the face of any kitchen in the same way as having them replaced would do when done well. Painting them is a great and cheap way to refurbish kitchen cabinets, but their surfaces must first be cleaned thoroughly to rid them of grease, dirt, and other debris that would make painting difficult and ineffective.
  6. refacing the cabinets – refacing the kitchen cabinets can also be done without the help of a professional. Most home improvement shops stock and sell facing materials at reasonable prices
  7. Redecorating the ceiling and the walls – redecorating the ceiling and the walls can easily be accomplished with a clean coat of paint. Having the ceiling and wall repainted by a professional makes the kitchen appear cleaner, bigger, and more appealing to the eye.
  8. New lighting – new lighting is another inexpensive kitchen remodeling strategy that will make the kitchen to appear cleaner, warmer, and more welcoming.
exterior-home-remodeling-11

Ideas on how you can make your exterior home more welcoming

Exterior home remodeling will significantly improve the exterior of a home and consequently improve its market value. Exterior remodeling doesn’t have to be expensive, something as simple as a new coat of paint can do wonders.

Below are a few ideas that will improve the exterior of any home out there:

  1. Roofing – roofing is generally meant to protect the occupants of a home from rain, sun, and other elements. But the roof can also be used to improve the exterior parts of a home. There is a wide range of inexpensive roofing materials for those operating under a tight budget.
  2. Landscaping – landscape can either work to accentuate the best features of a home or to overwhelm them. Getting any trees or shrubs surrounding the home thinned and trimmed by a professional is a great way of enhancing the exterior of a home. A clear, uncluttered landscape appears larger than it really is and is also pleasant to look at.
  3. Xeriscaping – xerscaping is also among the various exterior home remodeling strategies out there that are both effective and affordable. This strategy involves planting plants that require minimal water to thrive around the home.
  4. Painting – painting is a popular exterior home remodeling strategy because it not only effective, it is also happens to be very pocket-friendly. According to experts, a few factors should be considered when choosing the right color. Such factors include the style of the home, the style of the neighborhood, and the natural landscape around the home if any. The bigger the home, the more serene the colors.   Painting the window trims and shutters, the door front and the porch or deck are also a great ways to improve the outside appearance of a home.
  5. Siding – siding is also another effectual exterior home remodeling for homes with a wooded siding. In such circumstances, the siding can be upgraded to a modern siding such as a fiber-cement composite. A fiber-cement siding will wear well and it can last for 50 years or more. It also has great insulation capability when compared to wood and can resist termite and other insect infestations well.
  6. Walkways – upgrading walkways will also enhance the exterior of a home, especially when the existing walkways are more than ten years old. Cement walkways chip, crack, and sink with age. There are many options in the market when it comes to upgrading walkways with pavers and slate tiles being among them. Lining walkways with attractive lighting after renovating them is also a great exterior home remodeling
living room redesign

A Simple Way to Make New Furniture Look Antiquated

Sometimes homeowners find themselves in need of new furniture but want it to look older or antique. It might look better with the other furniture or it may just come down to taste. With just a little work, you can actually get the antiquated look you’re hoping for without doing any damage to your new furniture.

Step 1: Of course, is selecting the right furniture. If you select a very modern piece, it might not look good with an antiquated feel to it.

Once you have your furniture picked out, determine if it is a solid stain or if there is paint on it. If there is any paint on it, you need to remove it with stripper. About 15 minutes after applying the stripper, scrape off any paint that comes off with a putty knife. When doing this, make sure to work against the grain so you don’t scratch our gouge the wood.

Now you’ll want to wipe the chair down. Use a simple wet cloth or rag or, if you prefer, perhaps even steel wool. Do this as soon as you can so any remaining stripper doesn’t dry on the wood.

You’ll want to sand down the furniture next, making sure you get it as smooth as possible. Once you’ve got it sanded smoothly, you can then put on your primer. Choose your color carefully, though, as the primer is more often than not going to serve as the base of the final color of the furniture.

Step 2: In this step, begin to add your creativity and start to outline the direction for the final look. It can be helpful to use a scrap piece of wood to test different paint colors. This can help you decide whether you like what you see before you commit to the final project.

From this point on, your creativity and vision can run wild. Using tape or paper, place “distress” marks strategically; these will be laid down during the rest of the project and will really add to the look. Add some highlight colors to the surface, but only ones you have tried out on a sample piece of wood and know you like. Some people elect to use sandpaper to wear down the fresh primer, giving certain areas a gritty antiquated look. You can even add another layer of color detail after this step. If you do, be sure to use several light coats as opposed to one very heavy coat to really nail down that antiquated feel.

After everything has dried, remove the tape and paper you used for the distress looks. After that, the final step is applying a clear finish. Then you have a new “old” piece of furniture!

flooring-6

How to Fix Those Loose and Squeaky Floorboards

If you have wood floors, the chances are pretty good that you’ll encounter a loose floorboard at some point in your life. Fortunately, these are fairly simple to fix if you know even the slightest bit about carpentry.

If you know nothing about carpentry, know this: floor boards tend to become loose when the screws or nails that are holding them down to the joists become loose. So if you find that this is the problem behind your loose floor board, take the time to replace the older screws or nails with new ones rather than reinforcing the older ones just to make sure you don’t have the exact same problem in a few weeks.

Some people may not even realize that they have loose floorboards but they do notice a squeak along the floor when someone walks across it. This is a surefire sign of a loose floorboard. If you start hearing the squeaking, pay close attention and look for any areas of the floor that seem uneven, or boards that aren’t quite flush with one another.

To fix the problem areas, remove all nails from the area even if they are not raised. When you do this, have a protective piece of wood or cardboard on the floor to protect the neighboring boards from damage from the hammer. If you have screws rather than nails, just use a power drill.

There’s no need to get fancy here; just place your new nails or screws into the existing holes. The only time to stray from this is if the existing holes are too far towards the edge of the joists. You want them located at the center for the best support. If you do end up creating new holes, make sure you cover the old ones in with the appropriate wood filler.

Once you have the board replaced, walk over it as you would any other time. If you continue to hear a squeak or the board still appears to be somewhat loose, remove it again and use a third nail or screw.

During this process, under no circumstances should you glue a floorboard down. This only ensures that you will have a nearly impossible time getting up when future problems arise or in the event that the entire floor might one day need to be replaced.

contemporary-bathroom

Dream Projects Coming to Life: Your Very Own Outdoor Shower

Looking for a unique and fun summer project to make your home a bit more unique? Why not consider an outdoor shower. As staple of beach houses and lakeside retreats, an outdoor shower is just the project to kick your summer into high gear.

It’s actually easier than you might think.

First, make sure your home and property allows for such a project. Some people’s yards and the layout of their homes’ exterior simply won’t allow for it. But if your home allows such freedom, it’s a great way to add a flair of fun to your home.

Here are some things to consider before getting started:

Where’s the Water Go?

Will local building codes bring up any drainage issues?

Is your property connected to a septic or dry-well system?

What Will It Be Built From?

You’ll want to use a material that is naturally found outdoors and can stand up against a storm. Therefore, think wood and stone before you think tile and porcelain.

Creating Your Outdoor Shower

Be contentious of cost. There’s no reason an outdoor shower should cost much more than having an indoor shower installed. Keep this in mind when you speak to contractors or builders when you are planning out your project.

Be practical. Sure, an outdoor shower is a fun addition, but think about the logistics: make sure there is a placed for keeping dry towels, hooks for hanging clothes, and areas to store shampoo and soap.

Outdoor showers are one of those accessories that people always think about but never follow through on. But coming in at a surprisingly low price and fairly simple for just about anyone in construction that has ever dealt with a bathroom, the reality of an outdoor shower on your property could be closer than you think.

deckpic

Surefire Ways to Keep Insects off of Your Porch or Deck

Have you ever had one of those beautiful spring or summer afternoons on your porch or deck, only to have it ruined by insects? Well, there are several things you can do to keep those pesky insects off of your porch and most of it won’t cost you a thing!

Clean

You’d be surprised at the difference a little light cleaning could do. Make sure you get rid of anything that might be attracting insects to your porch or deck—items like stray bits of food (yes, even pet food) or a varying degree of potted plants.

Keep Trash and Recycling Away

If you live in the city, make sure your recycling and trash bins are located as far away from your porch and deck as possible. If you simply can’t help this, make sure the lids or on tight and that no stray bits of garbage have found their way out of the trash.

Keep an Eye Out for Standing Water

Whether its rain water that has collected at the edge of your porch or a stray bit of water that somehow got into the decorative pail on your porch when you watered the flowers, standing water is a hotbed for insects. Standing water is known for attracting mosquitos in particular and is often used as a breeding ground of sorts. If you have some sort of decorative item that uses water, you can still use this, but try using a pump that will keep bubbles aggravating the surface of the water, as it frightens insects away.

Use Repellent Materials

Very few bug-repellant chemicals do what they say, but anything with citronella is a  sure way to keep the insects off of your porch. Maybe a basic citronella candle is the way to go…or maybe you want something a little more prominent, like tiki-torches or oil lamps with citronella lamp oil.

Speaking of citronella, there is also the possibility of planting citronella grass. Other plants that act as insect repellent include marigolds and rosemary.

Any of these will help keep the insects away, allowing you to enjoy your porch and deck as it was intended!

Beverly Cooper

They were on time, stayed 10 hours to complete the job. So very satisfied with them on the job! Thanks!

John Epley

BEST – Each job is completed with quality and determination.

Edward Hyatt

Our roof leaked after the recent hurricane. We called Handyman On Call as they had worked on this area previously. They inspected the roof and determined that the repair would be performed under warranty at no charge. This was a very responsible and honorable thing to do. They did an outstanding job diagnosing and correcting the situation.

deck-warbor

Restore an Aging Deck

A rustic deck can be charming and quaint, but it’s an entirely different thing to have a deck that has simple gotten old. On older homes, decks can often go ignored for too long and what once would have been simple repairs to fix it up become laborious and expensive.

So if your deck needs to be restored, here are some things to keep in mind when trying to keep it looking good on a modest budget.

If the wood is starting to crack and splinter, just about any wood restoration product should do the trick. But before applying such a solution you’ll want to clean the deck with wood or deck cleaner. Be sure to pay attention to the directions all all cleaners; if they are not properly diluted, they can do much more harm than good. Once this step is done, you should be able to wash down your deck (using a power washer if you have one available, although a nice hit with a strong hose also works).

Let the deck sit for 4-7 days to dry properly, based on your current weather conditions. When you are confident the deck is dry, you can use your restore solution (Restore 10X, for example). Depending on the size of your deck, you can use wither a standard paint brush or a roller. Regardless of what you use, be sure to always spread the restore solution in one direction. Try to focus on one or two boards at a time rather than spreading it all around in order to ensure an even coating.

If the deck has seen a lot of wear and tear, chances are good that a second or even a third coat will be needed.  In most cases, the second coat should be enough but it all depends on the condition of the wood. Make sure the first coat is dry before applying the second coat for maximum results.

If you have children or pets, make sure they don’t step foot onto the deck until the second coat is dry.