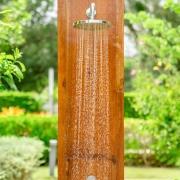
Building an Outdoor Shower
After a long day, nothing feels better than a fresh and relaxing shower. A private outdoor shower is an ideal option for people who want to clean up before entering their home or for those who enjoy the experience of bathing in nature. A simple outdoor shower with privacy can be attractive and practical. This project requires minimal plumbing experience to complete. Plan to get help from a friend and spend a weekend working on this outdoor shower structure.
Instructions
- Dig a hole with an auger or zoom digger. Dig the hole 1 1/2 feet deep. Place an 8-foot pole in the hole and keep it perfectly vertical. Pour quick drying concrete around the post and let it dry.
- Install the shower head arm, then the arm of the shower to an elbow. Use nylon tape on each joint.
- Connect the elbow to one of the long tubes. Fix the long tube to the faucet with a 1 1/2 inch threaded gate valve. This is the lever to turn on the water and turn off. Place the second long tube at the end of the faucet piece. Use nylon plumbing tape on each joint.
- Fix the second elbow to the other end of the long pipe. Connect the shortest pipe to the elbow. This should form a perfect right angle at the end of the pipe.
- Connect the coupling hose to the end of the short pipe. This will allow the easy connection of the hose.
- Use pipe hangers to secure the shower pipe to the post. Connect the hose to the coupling and turn in the water. Examine for leaks and seal with nylon plumbing tape, if needed.
- Place a flat metal piece of metal in the work area. Horizontally align a 2-by-4-inch table on top of the roofing sheet that is even with the bottom edge.
- Repeat step 1 with the other piece of roof and the other board. These will be the privacy panels for the simple outdoor shower.
- Ask an assistant to hold one of the panels against the post with the plumbing. Place the side of the cover without the board against the post. Fix the metal roof to the post with metal screws.
- Repeat step 3 with the remaining panel. Sand all rough edges.


