painting-6

Designer Suggestions for Painting Small Bedrooms

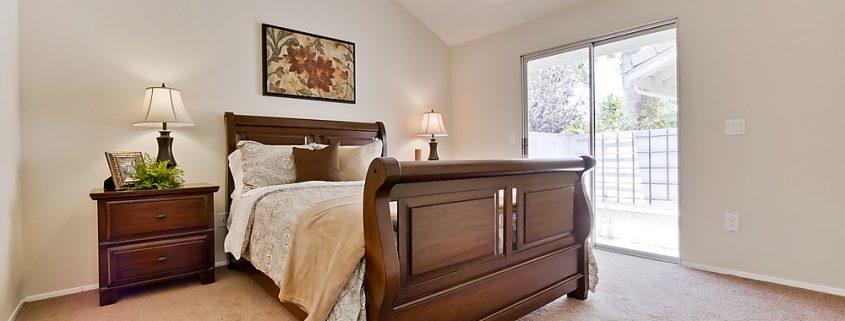
Small bedrooms can feel cozy and comfortable when they are decorated with its size in mind. To help a small bedroom look brighter, use light cool colors and choose decorations, bedding and furniture with little contrast. Make sure the furniture is scaled correctly with the room, opting for smaller furniture and choose only furniture that’s needed.

Tone

Cool colors visually recede, while warm colors advance. To the eye, where a wall looks back, looks away, therefore, the room looks bigger. Cool colors reflect light, while warm colors absorb it. Use these tricks, using cool colors on the walls to bounce the light around, such as blue, green or cool white. Avoid warm colors like red, orange or yellow to make the walls seem farther apart and to make the room appear larger.

Saturation

Lighter and less saturated colors reflect natural light, and the more light that bounces around the room, the brighter and bigger it seems. If you choose a dark color like deep red or dark brown, light is absorbed by the paint colors, which makes it look like the walls recede.

Ceilings

Do not forget the ceiling when you’re thinking about the color of the paint. Lighter colors make the ceiling brighter and seem to be higher, while dark colors make the ceiling feel closer and can make you feel a little claustrophobic. Choose white, cream or light blue for your ceiling to help make the room appear larger.

Brightness

Consider the gloss paint you choose. Most indoor paints are available in a variety of highlights, from flat to high. High gloss paints help bounce light around the room, while the flat paint makes the walls look less bright. However, flat paint doesn’t hide flaws on the walls, so if your room has walls with imperfections, choose a gloss level. Many bedrooms are painted with an eggshell finish, so if the walls are in relatively good condition, choose a semi-gloss or satin.

masonry-1

How to build a wooden roof frame

Frames come in a variety of different shapes and sizes depending on the type of construction of the roof. The types of frames that can be assembled are gable roof, sloping ceilings, vaulted or attic. A residential roof frame can be between 4.5 and 15 m. The size of a frame depends on the length and height, or magnitude of the roof inclination and flown addition if necessary. Due to new technologies and ease of assembly and use, most new homes are built with frames.

Instructions

  1. Find a large open area outside to lie the roof frame as its being constructed. When completed, it will tilt up to be secured on the roof.
  2. Prepare a table saw. Most 2”x4” wood frames will have to be cut to size. Measure and mark the wood and cut it off all at once to have it ready for construction.
  3. Place a piece of wood of 3.80 cm x 10 cm x 7.31 m as the lower strap of your frame. Make a triangle with two pieces of 5.48 m x 3.8 x 10 cm and join them at the top end, protruding 15 cm above the lower edges of the lower strap.
  4. Set the upper straps in the tip with a triangular metal reinforcement and fix the lower ends of the upper to the lower strut with triangular metal reinforcements. Use small nails to fix the reinforcements to the wood.
  5. Prepare two substrates 2.13 m x 8 x 10 cm long and affix between the upper and lower straps for support. Connect the upper ends of the two supports to the tip using nails. Join the lower ends of the two supports dividing the lower leg into thirds. Use triangular reinforcements to secure the brackets to the bottom tie.
  6. Cut two more supports both 91 cm long. Place the bottom of these supports, the same triangular reinforcement of the lower strut to the longer supports, and attach them to the center of the upper straps, one on each side.
siding-2

Cleaning your dryer ducts

The pipe your dryer lint gets sucked into can sometimes get stuck with your clothes. When this occurs, the flow of air from your dryer is blocked and can cause long drying times, incomplete cycles keeping your clothes wet, failures of automatic sensors and even fires. Because of this, it is important to keep your dryer duct clean to avoid problems. You can hire a professional to clean it for you, but this is can become expensive. If you want to save money, you can clean the ducts yourself using little time and energy.

Instructions

  1. Unplug your dryer and detach the duct from the wall. Sometimes, they are joined by a connector that can be squeezed to release.
  2. Remove the detachable part of the duct so it’s easier to clean. Insert the wand tool of your vacuum cleaner to suck inside your duct. You can also use a brush if you prefer.
  3. Also vacuum the tube, which connects the vent from the dryer to the wall.
  4. Put the pieces of your dryer back together and connect the duct back to the wall from the dryer
  5. Repeated cleanings every one to three months

Tips & Warnings

  • Use your vacuum and your crevice tool to vacuum any accumulated lint trapped in the dryer or in other areas that you can’t easily access. This will also help prevent problems with the dryer.
  • The detachable part of the dryer ducts should appear to be covered with vinyl or sheet metal.
  • For particularly dirty or clogged ducts, consider replacing the pipe with a new one. These can be purchased at your local home improvement store and are quite cheap. Depending on the material you choose, the cost will vary.
  • Once every one to three years, hire a professional to clean your dryer completely and breathing system to keep you safe.
fences-9

Building a chain link fence

If you are looking for a quick and durable method for enclosing a portion of your yard, try installing a chain link fence. The wire mesh is less insulating compared to vinyl fence or wood, so you can use wire fences to separate areas for pets or children to play. Short wire fences are also used in areas of high traffic to prevent people to walk through the gardens of a house.

Instructions

  1. Mark the two ends of the segment to surround with stakes. Attach thread to the stakes that extends from one end to the other to create a reference point that you can use when you insert the rest of the stakes.
  2. Measure the length of the rails using a tape measure. Use this measurement and mark it with stakes in order to place the rest of the posts for the fence. Make a hole in each place where there is a stake using a shovel or post excavator. The holes should be at least 1/3 the length of your fence posts. Add a few extra inches and add some gravel in the bottom of the hole for drainage.
  3. A bag of concrete mix is needed for each hole and follow the package directions to prepare it. The two end posts are wider than the rest of the posts, so you should make sure you are installing them correctly. Ask an assistant to hold the post in place while you add the concrete into the hole around it. Repeat this step to install the remaining nearby poles.
  4. Place a tension and clamp on each of the end posts. The tension should be placed about 10 inches below the top of the pole and the clamp should be two inches above this.
  5. Connect one end of the top rail of the fence to the clamp at the first end post. Slide the rail through the frames that are above the middle of the poles. Connect the free end of the top rail with the clamp at the other end post.
  6. Move to one end of the fence and tie the edge of the wire mesh on the tension using a bolt. Tighten the bolt with a wrench. Unroll the mesh along the fence line. Stretch it as tight as possible so there are no bulges. Use a wire tie for every two feet of wire to secure the mesh to the top rail. When you reach the end of the fence, cut the wire mesh with mesh pliers and connect it with the tension that is at the end post. Use the wrench to tighten the bolt.

Tips & Warnings

  • Check with the utility company in your city to ensure that no underground pipes are located where you want to dig post holes for your fence. See if you need to apply for a building permit.
  • Use safety gloves to protect your hands from sharp edges of the wire mesh.
fences-5

Building a beautiful picket fence

A picket fence not only prevents people and animals from entering your yard, it also gives your property an attractive and finished look. Hardware and home improvement stores sell fence panels that simplify the task of building your own wooden fence. Try planting roses or a vine to soften the look of the fence.

Instructions

  1. Dig the first hole for the pole with a hand shovel if you need less than a dozen holes and are excavating relatively soft soil, for harder or more holes than a dozen, consider renting an excavator. Start by digging a whole 10 ” (25.4 cm) in diameter with straight sides using a shovel.
  2. Place a pole at the first hole and add back in 8 ” (20.3 cm) of soil. Ensure that the post is vertical and tamp the soil and press it in place. Add 8 ” (20.3 cm) of soil and repeat the process of leveling and tamping until the hole is full.
  3. Tie a 5” string (12.7 cm) from the ground to the side of the post. Bring the rope to the first corner of the fence and drives a stake there. Wrap the rope around the stake to mark the first side of the fence.
  4. Dig a second hole for the pole at the point marked. Place the second post in the same way as the first.
  5. Use wood shims to prop the fence panel 2”-5 ” (5-12 cm) above the ground, and use 2 screws of 1/2 ” (1.2 cm) to attach the panel to the studs. Continue to place poles and fix the panels until you’ve completed your fence.
bedroom-remodeling-5

Arranging your living room to work for you

The living room is a common gathering place for family and friends. The room has to accommodate several pieces and can be used for various purposes, such as watching television, entertaining guests and play. Factors such as traffic and the size of the room can also play an important role in determining both practical and aesthetically appealing furniture. Take time to plan what your room will primarily be used for before moving furniture in order to reduce the amount of heavy lifting required to place the furniture in your room.

Instructions

  1. Measure the length and width of the room. Record these numbers and make a scale drawing of the room, marking the locations of the windows and entrances. Record the length and width of the space in your sketch.
  2. Measure the length and width of the sofa, chairs, tables and other furniture such as shelves, to be placed in the room.
  3. Evaluate the architecture of the room. Determine the focal point of space, this can be a great window with a view, a fireplace or built cabinet that houses the TV. If there are no significant focal points, in your drawing label the longest wall with a window or an entry.
  4. Arrange the pieces, placing the sofa and chairs to watch the focal point of the room, and position to also form a “U”. If there is no focal point, position the sofa on the longest wall and place the chairs on either side, to create the “U.”
  5. Place a coffee table in front of the sofa and tables on either side of it. This is the conversation area and the anchor for the room.
  6. Allow a gap of two feet between the wall and the couch. Determine if this disrupts any possible traffic that is directed through the room from the entrance. If so, push the couch back as it was. If not, leave it where it is.
  7. Work outward from your conversation area. If the television is the main attraction in the room, position the sofa opposite it. Angle the chairs on either side, to also look at the television. This allows you to rotate if you have company, or in case you gather for a family conversation.
  8. Create small areas in the room. Using your clippings of your pieces for your sketch determine where the remaining furniture would make sense. Some of these may include a game table and chairs, a shelf and a reading chair, or other personalized spaces. Begin with the space between the conversation area and the focal point, and place these areas near the walls. Note traffic patterns; do not place furniture in front of entrances or hallways that are blocking the conversation area.
  9. Use your drawing to scale with the cuts and physically accommodate your furnishings following the plan. Add your accessories like personal pictures, vases and beads. Live with the placement for a few days and make necessary adjustments to your personal needs.


Tips & Warnings

  • Light up your conversation area with table lamps in each zone.
bedroom-remodeling-2

How to design a master bedroom with a bed facing a window

Some master bedrooms have windows in front of the only place where it logically makes sense to put a bed. In most cases, this is not problematic, and natural light is welcomed to the room. However, certain things you need to consider when designing a bedroom where your windows are behind the bed to make sure the room makes visual sense and works properly.

Instructions

  1. Use drapery from floor to ceiling behind your bed to give the room a feeling and a stylish look. The floor to ceiling drapery can also make the room seem larger. For a more contemporary look, do not use drapery with folds and select pleated heavier drapery for a more traditional feel.
  2. Hang curtains or use blinds for a more rustic look. In your bedroom the curtains and blinds work best in a large room that does not need help visually to expand. For a more contemporary look, use Roman shades or vertical blinds made of modern materials such as metal.
  3. Avoid putting tables that are too light next to the bed. They make the windows difficult to open and close.
  4. Keep objects such as lamps and vases with fresh or silk flowers out of the way of the windows. There are both functional and aesthetic reasons for this. You can easily pull and break the items when opening and closing the curtains, and if the items are too high, they will be out of place in front of the window treatments.
  5. Center the bed under the window as much as you can. If the bed is the first thing you see upon entering the room, an off-centered bed will make the decor look crooked and uncentered. Even if your windows are a little off-center, having your bed face the windows will look better.

Tips & Warnings

  • If your windows are a bit off-center and you are using curtains, extend the curtain rods on each side of the window to give the illusion of a window centered properly. That way you can focus your bed against the wall.
drywall-2

How to decorate the walls of the master bedroom

When decorating a master bedroom one of the first decisions you must make is the color of the walls. The color, the design and texture you choose will generate an important aspect in the overall impact of the room and you can use these elements to create a style specific in space. There are several options for decorating the walls of a master bedroom, so you must take into account factors such as the budget, the style you want and the labor required before deciding your final choice.

Painting

Painting, as it is available in a variety of colors and finishes, is an economical option to renew the look of your walls effortlessly. The paint color you choose for the bedroom should be relaxing, with colors like blue, green, lilac, peach or beige. For a small room choose a light shade to make the space look larger. However, if the bedroom is large you can choose more saturated shades. You can also use texturing techniques like painting faux finishes with sponges or rags, so they look as if they were made of stone, marble, leather or other materials. If you prefer a pattern, use templates to apply decorative designs or a border on the top or bottom of the walls.

Papering

Often wallpaper is used to cover the walls of a bedroom, but the application is more laborious than applying paint and cannot easily be changed. However, wallpaper is available in a wide range of colors and designs, so you can completely change the look of a room. Some of these papers are textured and can generate an interesting aspect to the bedroom. If you do not want to paper all of the walls of the room, you can cover only the wall behind the bed with a print paper so it will become the focal point of the room. You can also use a wallpaper border on top or bottom of the wall to create a more subtle effect design.

Cast

If you like the look of textured walls, plaster finish is an attractive option for your bedroom. In general, you can stain or glaze before applying plaster, so you can customize it with a color that matches the decor of the room. Often the plaster on the walls is applied with a semicircular motion, but you can apply with a trowel making the design you prefer. The application process is more intense than that of traditional painting, but is ideal for covering walls that are damaged as you can hide many surface defects.

Wooden panels

For a rustic room with wood panels are ideal. The wood-paneled headboards are an attractive option, but you can get flat or embossed sheets of wood panels. Before installing you can paint or stain them to customize the look of the material. As with the wallpaper, you can apply one or two panels on walls to create visual interest or create a main wall. You can also use only panels at the bottom of the wall as molding.

fences-5

How to decorate a chain link fence

The silver wire fence is very useful for marking the boundaries of many residences, government buildings and businesses. Typically strong and functional, the wire mesh is not intended to be a decorative material. To ensure your privacy, you can place vines with abundant foliage and fragrant flowers in it. If you choose to cover your fence with an evergreen plant, like English ivy, you can also add some seasonal details to add a touch of visual interest. Moreover, the coated wire mesh is also a practical, simple and good looking option.

Instructions

Climbing plants

  1. Select a few climbing plants that suit the location in the sun or shade of your chain link fence. Some climbing species with flowers like roses, wisteria and sweet peas prefer sunny places. Vines like English ivy, honeysuckle and Virginia creeper tolerate dense shade.
  2. Prepare several holes separated by about 6 inches (15 centimeters). Make sure that the holes are at least two times deeper and wider than the root of the individual plants that are going to be planted or transplanted. Mix a shovelful of compost material in the excavated soil. This mixture is known as “base fill”. Loosen the soil at the bottom and sides of the hole and water until evenly wet.
  3. Place the plants in the holes, spreading the roots gently. Cover the root knot completely with the mixture of soil and compost material and water well. Help guide the branches of the vine to the fence with a rope made of natural fibers as they grow.
  4. As the seasons are changing, add some decorative outdoor details. Choose a large wreath illuminated by a series of lights during major winter days and a mass of flowers, as they can be hyacinths, daffodils and artificial tulips for spring. Consider adding a colorful collection of beach toys for the summer. Secures objects to mesh with a piece of natural rope.

Plastic strips to close

  1. Measure the width and length of the area you’d like covered and multiply these numbers to get the total area of the billboard. This is essential when buying plastic strips. This material blocks almost all the view from the outside as it is specially designed for this purpose. You will need approximately 250 feet (76 m) of plastic strips weaved diagonally across each link in the mesh, and thus completely covering an area of about 40 square feet (3.72 m).
  2. Give it a custom look by using strips of color of your university or corporate logo. This material can be achieved by special ordering the color and design you want. –Verde Standard colors, black and White– are available in stores and online major home improvement stores. Try to choose strips of colors and designs that complement the style of your property. Even just using two colors, you can create some pretty creative designs.
  3. Diagonally measure the distance from the top of the fence to the base, using the measuring tape and extending directly along the links line. Remember that you must weave a single strip of plastic on each of the links of each diagonal fence row. Once the length of the line is determined, cut a strip of this size and weave through the links. Pay attention to the way you work and try to leave the fabric loose enough to carry comfortably before continuing the weave. Alternating strips of plastic canvas fragments create business privacy screens. They can serve to represent foliage. Choose warm neutral colors simulate a natural environment.

Tips & Warnings

  • For holidays and special occasions, decorate your mesh fence with white or colored flashing lights.
  • Keep your plants carefully trimmed. The overgrowth can lead to insects and other animals.
Concrete

DIY Concrete finish with gravel

Gravel concrete finish can be performed without problems as a “do it yourself” project by the owner of any house. The mixture consists of gravel and Portland cement and special finish is performed similarly to ordinary concrete. It is possible to finish the project in a couple days. Everything depends on the size and scope of your plans.

Instructions

  1. When preparing the cement mixture, there are two ways to add gravel to your concrete mix. You can order it at a concrete supplier and request that the large gravel is replaced with gravel. You can also add the gravel to concrete and mix everything yourself. If you’re preparing yourself, add half the bag of Portland cement, sand, and 3 gallons (about 11 liters) of water. Mix with a hoe or a cement or concrete mix truck. After the mixture is ready, add 3 to 5 gallons (about 12 to 20 kg) of fine gravel.
  2. Pour into the chosen area for your project and rake until it reaches the top of your wooden mold area. Use a shovel and a rake to evenly distribute the concrete mixture. After leveling the mixture up to the wooden forms, use a trowel to work the concrete until smooth. Rub the concrete trowel in a circular motion until you have a “mud” like layer on the concrete surface.
  3. Work the surface with a float or concrete trowel. This tool can be rented at any home improvement store, hardware store or warehouse building. It consists of an aluminum plate about 4 feet (1.22 meters) wide that is attached to a long handle. The float or trowel generate a completely smooth surface that should cure for at least 20 minutes or until no more water appears on the concrete.
  4. Spray the surface with a hose and a spray nozzle. Use just enough to wash the top layer of “mud” concrete pressure. Try it in an area no more than 12 x 12 inches (30 x 30 cm). If you notice that the cement is clear or leaving deep cracks, pass the trowel or hand trowel along it and then try after 10 minutes. Use a bristle brush to remove medium-hard concrete and to brighten the gravel surface, but do not rub. The purpose of this step is to remove only the thin layer of concrete that covers the surface of the gravel.
  5. Apply a concrete sealer to the surface after 72 hours using a garden sprayer type pump

Tips & Warnings

If the store has no concrete with gravel, purchase the cement and add gravel yourself.