When Would You Use Spray Foam Insulation During Construction?

Spray foam insulation expands to fill gaps and cracks in a home or building. It also seals off areas where hot air can escape or cold air can enter, preventing condensation that can lead to mold and wood rot.

This type of insulation can be sprayed in an attic, crawl space, and rim joist in new construction or in existing homes. However, spray foam insulation must be professionally installed to prevent problems.

Ceilings

A home’s ceiling can fulfill several purposes: it can be decorative or it can function as an acoustic conditioner or thermal insulation. A ceiling can also hide structural elements or installation irregularities. In addition, ceilings can be a good place to add ventilation in a building or structure.

Foam spray insulation is best installed in a new home at the same time as rough plumbing, electrical wiring and heating and air conditioning ducts are being installed but before interior walls have been finished. It can also be used in existing homes in the attic space, as well as basements and crawl spaces.

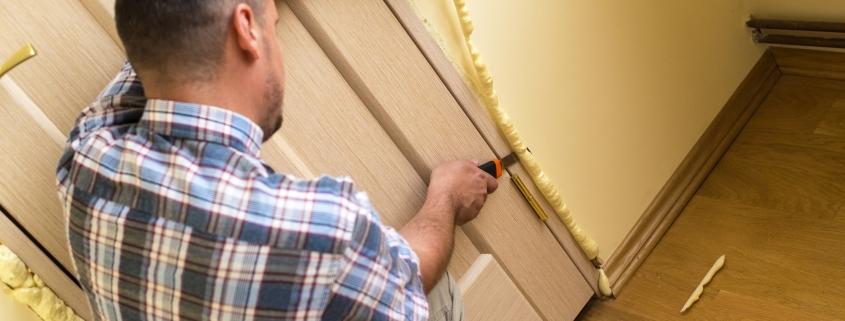
Before foam is applied, the areas to be sprayed should be thoroughly cleaned and free of dust, dirt, oily substances and other debris. The area must be dry as well. A professional applicator will use a respirator and goggles during the application process to avoid getting the foam in his or her eyes or breathing in chemical fumes, which can cause adverse health effects.

Foam insulation has a high R-value, and the maximum R-value is dependent on how it’s installed. Some types of insulation, such as blankets and boards, can be DIY projects, but other types require a professional installer to ensure that the product is properly installed for maximum performance. Ask contractors about their experience with the specific type of insulation you want to install.

Walls

During new construction, walls can be insulated with spray foam after the plumbing, electrical wiring and HVAC ducts are installed but before drywall is placed. This saves time and money compared to installing fiberglass or blown-in insulation after the framing is done, because it’s not necessary to cut, measure and attach the material.

Foam’s great advantage here is its ability to seal tiny air leaks, which can cost energy dollars without homeowners noticing them. For maximum efficiency, the wall cavities should be sprayed at least 2 inches thick, but many builders opt for a lower thickness of 1 inch. This allows them to cram in fiberglass insulation in addition to the foam, which creates an effective vapor barrier.

For a wall with 2×4 framing, the ideal R-value is about R-19, which can be accomplished by spraying just over 2 inches of closed-cell spray foam. Open-cell foam will also work, but is generally cheaper and doesn’t have as high of an R-value per board foot.

It’s important that the contractor is careful to not saturate the stud walls with foam, which can cause the wood to warp or even collapse. It’s also necessary to make sure the foam is sprayed evenly, and to leave plenty of space for the drywall. To prevent this, the installer should use a pin depth gauge to check for consistency and ensure proper coverage before spraying begins.
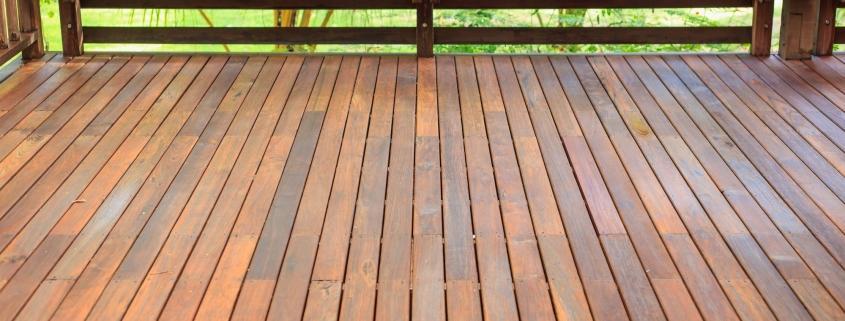
Floors

For new construction, the floors should be insulated with spray foam insulation. Spray foam is easy to install between the floor joists and can stop cold air from seeping through the floor in winter and hot air from infiltrating during the summer.

The floors can also be insulated with blown in loose-fill cellulose or fiberglass. However, spray foam is easier to apply and the R-value will remain consistent over time whereas loose-fill will settle and lose its R-value over time.

Closed-cell spray foam contains high-density cells that are closed and infused with gas that enable the foam to expand. Open-cell foam isn’t as dense and doesn’t fill as well, but it still provides a great barrier against air movement, sound, and moisture.

To insulate the floors, clear out the crawl space, cover any walls or immovable objects with plastic sheeting, and then begin spraying. Be sure to get around any pipes, wires, and cables that run through the floor so they don’t infiltrate the spray foam. The crawl space should be ventilated as you work since spray insulation can give off a noxious odor that’s similar to paint fumes. It’s also important to wear a mask during the installation process, especially when you’re working with open-cell foam.
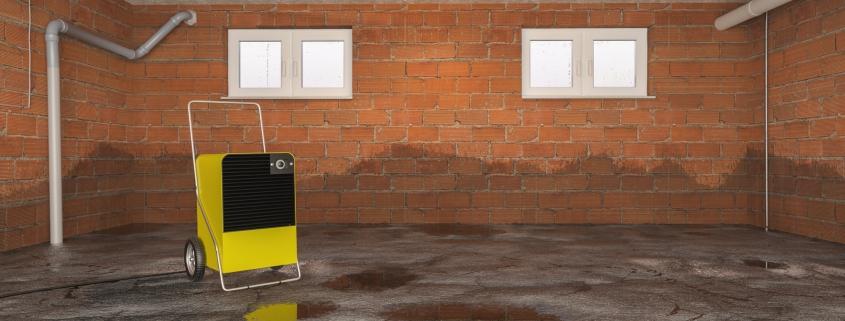
Crawl Space

The crawl space of a home should be properly insulated to prevent musty odors, floorboard creaks and mold. In some cases, a home owner will install fiberglass batting insulation in the crawl space walls. Unfortunately, this can cause moisture problems in the crawl space, including sagging floors above. If the sagging is severe, it can lead to foundation cracks.

In most instances, insulating the crawl space with spray foam is a better solution than batting. The closed-cell structure of polyurethane spray insulation blocks moisture from moving between adjacent cells, which is vital in the dark and moist crawl space environment. Spray foam insulation also makes it easier to achieve optimal coverage in a tight crawl space, where gaps between joists can reduce the effectiveness of the insulation.

The cost of insulating the crawl space will vary depending on a variety of factors. One of the biggest is whether the existing vapor barrier is intact or needs to be replaced. This can add to the overall cost of the job. Another factor is the height of the crawl space walls. If they are high, crews will need to install a vapor barrier before insulating, which will increase the overall cost of the project. If the crawl space is to be conditioned, the supply and return air strategy will also impact costs.

How to Decide on What Fixture Finish to Use in Your Home

It seems like a small decision, but the finish of faucets, sinks, and hardware has a big impact on your home. Choosing the right finish is especially important when it comes to heavy metal rooms like kitchens and bathrooms.

The good news is that it doesn’t have to match exactly. Mixing metals can add character and depth that a matching look lacks.

Brushed Nickel

For homeowners that want the beauty of chrome fixtures but prefer a more traditional look, brushed nickel is a great option. The brushed finish looks more matte and has visible linear brush strokes which provide a textural element to the fixture that is pleasing to the eye. This finish is also very versatile and can fit many different design styles and themes. It is durable and works well with both warm and cool colors.

Brushed nickel is a timeless finish that will likely never go out of style. It is a very popular choice for cabinet hardware and faucet finishes. While it may not be as striking as polished chrome, it is a very attractive option that will stand the test of time.

One advantage of brushed nickel is that it hides water spots and fingerprints much better than chrome. This makes it an ideal option for busy homes with children and/or pets.

Like chrome, brushed nickel is available in a variety of tints. Some brushed nickels have more of a blue tint which works well with blues and whites, while others have a yellow hue that pairs nicely with earthy tones. To ensure that you’re getting a consistent color, it’s important to purchase all of your fixtures and accessories from the same manufacturer.

Oil Rubbed Bronze

With a dark, brownish-black finish and a slightly slick surface, oil rubbed bronze is a classic option that isn’t too modern. It pairs well with Tuscan farmhouse, vintage Victorian, and turn-of-the-century Craftsman décor. It also fits in with Prairie and traditional Southwestern architecture.

It is a great alternative to chrome for those who prefer the more traditional aesthetic. It is also less prone to water spots than other finishes. If you do happen to get hard water stains on your faucet or fixture, use a half-and-half solution of vinegar and water to remove them. Avoid using harsh cleaners or steel wool, as they can damage the fixture’s finish.

Once you have decided on a finish, you can apply it to the rest of your hardware, such as cabinet knobs and drawer pulls. By doing this, you will create a consistent look throughout the room and keep your kitchen or bathroom looking beautiful for a long time to come. You can even add an accent metal, like brushed brass or stainless steel, to add contrast and personality to your space.

Stainless Steel

Stainless steel has long been a popular material in kitchens and other commercial settings, where its durability, low maintenance, and resistance to corrosion make it a good choice. It’s also relatively inexpensive, and its familiar luster makes it easy to coordinate with a variety of design styles.

It is important to note that there are many different grades of stainless steel. They are divided into families based on their composition, physical properties, and metallographic structure. The four major groups are ferrite, martensitic, austenitic, and duplex. Each group has its own unique properties and uses, but most contain at least 10.5% chromium. This minimum level of chromium creates an oxide film on the surface of the metal that is self-healing and far more resistant to corrosion than steel without chromium.

The 304 grade of stainless steel, for example, contains 18% chromium and 8% nickel. This combination of chromium and nickel gives it its resistance to corrosion, strength, and hardness. It is also nonmagnetic, making it an excellent choice for a variety of applications.

While it may seem like minutiae, the decisions you make about fixture finishes will have a big impact on how your space looks and feels. For that reason, it’s important to weigh the pros and cons of each finish before making your decision. If you’re not sure where to start, try consulting with a designer or showing your hardware dealer a sample of the color you want to match.

Home Maintenance Projects to Complete Before Fall

There’s a nip in the air, and it’s time to get your home ready for fall. Start by checking smoke and carbon monoxide detectors (and replacing batteries).

Add a roof inspection to your list to prevent water damage, mold growth and more. Then, seal and caulk cracks around windows, doors and where pipes and wires enter the house.

1. Clean Your Gutters

When leaves start falling and the days get shorter, it’s time to clean your gutters. Gutter debris is one of the most overlooked home maintenance tasks, but it’s vital to keeping your home healthy.

Clogged gutters prevent water from draining properly, which can cause problems like roof damage and foundation erosion. In addition, a buildup of standing water creates moist environments where mold and mildew thrive. Mold is not only unsightly but can cause breathing issues for those with allergies and asthma.

Keeping your gutters clean is a simple and inexpensive way to protect your home from serious damage, so don’t put it off. Depending on the type of trees surrounding your home, you may need to clean your gutters 3 or 4 times per year.

Before the cold weather hits, you should take a ladder and remove any debris from your gutters, eavestroughs, and downspouts. In cold climates, a buildup of debris in your gutters can cause ice dams, which can block melting snow from draining off the roof.

While you’re at it, grab a tube of color-matched exterior caulk and seal any cracks in your home’s siding, around windows and door frames, and where pipes and wires enter the house. This will ward off cold air and unwanted pests and prevent moisture from seeping into your walls and causing costly repairs.

2. Replace Your Furnace Filter

Regularly replacing your furnace filter helps to protect the system and improve air quality in your home. It also saves energy and extends the life of your furnace. It’s a simple project that can be done on your own without an expensive service visit from a professional. It only takes minutes to complete, but you’ll reap the benefits all season long.

Before you replace your filter, make sure the furnace is off by turning on the power switch next to it or at the fuse box. This is to prevent injury or damage to the system. Then open or slide the service panel. Most filters are located in or near the blower compartment of your furnace. You may need a screwdriver to open the panel, so it’s a good idea to keep one nearby.

Once you’ve opened the panel, remove the old filter and set it aside. Be careful not to shake or bang the old filter, as this could release the trapped contaminants back into your air. Place it in a plastic garbage bag before disposing of it. Then put in the new filter, following any arrows or directions on the package.

3. Inspect Your Windows

The onset of fall means sweater weather, football season and pumpkin spice-everything. However, it also means it’s time to start thinking about preparing your home for winter.

The first thing you’ll want to do is inspect your windows. This includes removing any screens, making repairs and replacing any that are worn out, and properly cleaning the window. Then, you can take advantage of the moderate weather to caulk cracks around your windows and doors before the cold air sets in.

This is a good time to test and replace the batteries in your smoke and carbon monoxide detectors, as well. You’ll also want to make sure that any fire extinguishers in your home are still in working order, and that you reverse the direction on your ceiling fans to push warm air down (the opposite of what they do in the summer).

4. Check Your Irrigation System

When the temperature starts dropping, it’s time to prepare your irrigation system for winter. Shutting off the water supply to the entire system, opening the drain valve, and blowing out the pipes with compressed air is a good way to protect your irrigation system from freezing in the winter. Insulating exposed pipes is also important to prevent them from bursting in the cold.

You may also want to consider adding a smart irrigation system that can be controlled from your smartphone or tablet. This makes the job of maintaining your home’s landscape and lawn even easier.

If you have a sprinkler system on your property, it’s a great idea to schedule an inspection for the fall. A professional irrigation specialist can reprogram all the settings to the proper time of year for your lawn or landscaping, which will help you avoid unnecessary water use and wasted money on your energy bill.

In addition to checking your irrigation, you should also inspect the roof and seal any cracks and gaps around trim and siding with caulk. This will keep cold air and unwanted pests out, as well as lower your energy bills. In addition, if your home is located in an area prone to moss growth, add a coat of moss-killing granules to the roof before the first rain storm of fall.

The Most Common Ways Water Can Leak Into a House

A water leak is a huge problem that can lead to expensive damage if ignored. It can cause furniture, books, and clothes to swell or even become ruined. It can also cause puddles to appear in your home or yard.

Many homeowners ignore leaks until they find a puddle on the floor or see their water bill spike. Identifying these leaks is key to saving time, money, and stress.

1. Burst Pipes

A burst pipe is one of the worst home plumbing problems you can face. It can cause major damage to your floors, walls and ceilings, and lead to thousands of dollars in repairs and renovations.

Luckily, you can often prevent this from happening by taking a few simple steps. First of all, you should always turn off your water supply as soon as you notice a leak or puddle on the floor. If possible, mark where the water shut off valve is so that you can find it quickly in an emergency.

Another important thing to do is to check your pipes regularly for cracks or leaks. This is especially important during winter, when it’s easy for the temperature to drop suddenly and freeze existing water in your pipes. When this happens, the ice will expand and create enormous pressure on the pipes, which could lead to them bursting. Ideally, you should install insulation in your house to help keep your pipes warm. This will also prevent them from freezing in the future.

2. Broken Pipes

Our homes are built on a framework of pipes that carry fresh water throughout. They are sturdy enough, but they can become damaged over time. This can happen for a variety of reasons, including age, environmental factors, and stress to the pipes.

If you notice a puddle or damp area on your floor, it could mean there is a broken pipe nearby. It’s important to act quickly so that more water doesn’t seep into your house, as this can lead to expensive damage to your furniture and drywall.

Other telltale signs of a broken pipe include a metallic smell and the presence of mold. The latter requires a moist environment to grow, so if you have mold on your ceilings or anywhere else in your home, this can be a sign that behind the walls, there is a leaky pipe. Make sure you turn off your water supply right away to avoid further problems. Then, call a plumber to find and fix the problem. You can also check your homeowner’s insurance policy to make sure the damages are covered.

3. Frozen Pipes

Pipes are prone to freezing during cold weather, especially older pipes or ones without enough insulation. Frozen pipes may not burst immediately, but over time they can crack or break and lead to water damage.

A common sign of a frozen pipe is turning on the faucet and only getting a trickle of water. You might also notice a bad odor coming from the sink or drain that connects to the frozen pipe.

One of the most important things to do if you suspect a frozen pipe is to shut off the water main at your home’s water supply valve. Next, you should call a plumber.

If you aren’t able to get your plumber right away, start by trying to locate the frozen pipe. Frozen pipes tend to be in areas with less heat, such as the basement, attic, or unused rooms in the house. Open up any cupboard doors so warm air can circulate in those spaces. Then, try to feel the pipes or tap them with a screwdriver handle or other object. If they’re frozen, they will feel cold to the touch and have a hollow sound.

4. Clogged Gutters and Downspouts

Gutter downspouts carry rainwater away from your home to keep it off the shingles and roof. But gutters can become clogged with leaves, dirt, and debris that prevent water from flowing through. Without an effective gutter system, water collects on the roof and seeps into the house at jointed places like the fascia board and soffit, creating serious water damage over time.

A clogged gutter can also invite hearty weeds, grass, and plants to grow inside your gutter. If your gutters are clogged, it’s important to clean them on a regular basis and install gutter guards to reduce the number of clogs.

5. Leaky Appliances

Leaks from appliances such as refrigerator icemakers, dishwashers and washing machines can go unnoticed for some time. But they can lead to hundreds of gallons of wasted water and astronomical water bills. These leaks are also a prime opportunity for mold and mildew to grow, especially if left untreated.

One of the most important things you can do to help prevent water leaks is to make sure your appliances have proper seals and gaskets. You should also regularly inspect your appliances for leaks, especially if they are older.

If you notice a sudden increase in your water bill or water spots on walls or floors, shut off everything that uses water in your home and check the water meter. If the number has changed despite all the faucets, showers and hoses being turned off, there is a water leak somewhere in your home. You can also try using a moisture meter to find the location of the leak. If a leak isn’t fixed in time, it can cause major damage to your home. The best way to avoid this is to have regular plumbing inspections done by a professional.

Wood Options for Decks

When it comes to wood decks, there are a few different options. One of the most popular is pressure treated lumber.  This less expensive wood has been injected with preservative and is durable enough to last for decades.

Cedar is a beautiful option that feels good under your feet and resists rot and insect infestation better than other types of wood. However, it does require annual cleaning and staining.

Pressure Treated

Pressure treated wood is made of softwoods (most often southern yellow pine) that have undergone a chemical preservation treatment. This process makes it resistant to moisture and insect damage, making it a good choice for decking boards.

While it does need yearly washing, sanding and sealing, it can last for over 30 years with proper maintenance. It is also highly versatile, and can be stained or painted in any color you wish to match your home’s exterior.

Some pressure treated lumber is manufactured with a built-in water repellent, which can save you time and money on staining in the future. Look for brands like Ecolife, which use a less-toxic preservative called micronized copper azole, and have no added metals which could leach from the treated wood over time.

It is important to keep in mind that any time you work with a new or existing wood deck, the sawdust can be a respiratory irritant so wearing a dust mask and eye protection is recommended. You should also avoid prolonged skin contact with the wood, as it can be irritating.

Redwood

Redwood is a durable, weather-resistant softwood that resists decay and insect damage. It is a natural choice that will age to a stunning silver-gray color and feels great under your feet, but it also requires annual maintenance to keep it looking its best. Like all woods, it can rot or splinter without proper care.

Like Cedar, Redwood has an excellent strength-to-weight ratio and can withstand heavy loads. It is also easy to work with and accepts stains well. It is more expensive than other natural woods, but less than tropical hardwoods and pressure treated pine.

If you’re on a tight budget, consider the cost of your project and the environmental impact of the deck before selecting your materials. It is important to use a reliable source that sources their timber from forests managed in a sustainable and responsible manner. Otherwise, you may be contributing to deforestation and habitat loss that will take years to reverse. It is also worth considering the option of a synthetic deck made from recycled plastic and wood fibers. This durable, low-maintenance decking will never splinter or need staining.

Cedar

Cedar is a fragrant wood with a unique warm aesthetic offering a variety of natural hues and tight grain patterns. It naturally resists rot and insect infestation without the need for preservative chemicals. It is also dimensionally stable, meaning it resists warping and cupping in response to changes in moisture.

Because cedar is pitch- and resin-free, it accepts a wide range of stains, bleaches and paints. It also nails and screws well. However, cedar is softer than redwood and can be easily scratched or dented by furniture or pet claws. It also requires yearly cleaning and resealing.

Like all natural woods, cedar is a sustainable resource. And unlike pressure-treated wood, it emits fewer greenhouse gases when burned. However, it’s expensive and labor-intensive to install a deck made of cedar, which can add up quickly to an overall renovation budget.

Tropical Hardwood

Beautiful tropical hardwood has a premium look and can last 30 years or more. It is extremely dense, has a dark color and unique figuring, and it resists rot and insects very well. It also has a class A fire rating, making it even more resistant than redwood and cedar.

Because it is so hard, tropical hardwood requires special care. It needs to be oiled regularly to protect it from water damage. It can dull cutting tools, so you should always use carbide-tipped saw blades when working with it. It is also very heavy, so it is best installed using screws rather than nails.

Tropical hardwoods that are good for decking include Massaranduba, Garapa and Batu. These are similar in appearance to mahogany but are less expensive. You can also choose a sustainably harvested species like FSC-certified Brazilian Teak, which limits clear-cutting and helps preserve rainforests.

Alternatives

There are many alternatives to wood decking that can save you thousands and offer a smart, modern look to your outdoor area. Resistant to rot, mildew and pests, these alternative materials will last much longer than traditional timber.

One popular option is composite decking, which is made from a combination of wood and plastics. It’s similar to plastic lumbar and is one of the most popular, fastest-growing decking materials available today.

Another option is natural stone, which offers a beautiful, elegant look. It’s also resistant to rot and insects, which makes it ideal for any backyard retreat.

While no material can be considered “maintenance-free,” modified wood comes close. It’s easy to clean, looks like natural wood and can be sanded down if necessary. It’s also eco-friendly, as it is made from a byproduct of rice processing. It also reflects heat instead of absorbing it, which keeps your back deck cooler than traditional wood decks in the summer. It’s a great choice for homeowners who want to avoid the upkeep that comes with conventional wood decks.

The Process of a Flood Remediation Claim

Flooding can cause a variety of costly problems that are covered by flood insurance. In addition to the building structure and personal belongings, flood insurance also covers relocation expenses if necessary.

Before an adjuster visits, you should make a list of everything that was damaged in the flooding. This includes a description of each item, its value, and any receipts or bills you have.

Remediation

Flood remediation is the process of cleaning and sanitizing water-damaged materials. It’s also the first step in overall recovery. It can include everything from removing mud to sanitizing and disinfecting surfaces and materials affected by flooding.

Before work begins, an inspection will determine the level of contamination and the class of water damage. This information will inform the remediation process. For example, class one water is clean but a category three flood might contain sewage and other hazardous substances that require hazmat suits for safety.

A flooded home may need to be treated for mold and mildew. This is because these organisms thrive in damp environments and will eat organic material such as wood used for walls, floors, ceilings and furniture. If left unchecked they can spread quickly and release millions of spores that affect everyone in the home.

To help owners and professionals in their cleanup efforts, EPA has produced a guidance document called Flooded Homes Cleanup Guidance. The document discusses safe and effective methods for restoring flood-damaged homes, including specific approaches for removing standing water, cleaning and drying contaminated structures and materials, and mold testing.

Repairs

Whether your home or business is flooded by hurricanes, a burst pipe or other disasters, it’s crucial to take steps to restore the property as quickly as possible. The longer water sits, the more damage it can cause to building materials and furnishings.

Flood restoration services typically include cleaning up, drying and sanitizing areas and materials that have been impacted by floodwaters. This includes restoring or replacing items damaged beyond repair. Flood remediation services also include making structural repairs to protect the structure from further damage and ensure that it’s safe for occupancy.

One of the first steps in a flood restoration project involves draining the area. This may be accomplished using large tanker trucks or portable sump pumps. If the floodwater is contaminated, a trash pump can be used to remove sand, silt and other debris that might have entered the building.

The type of floodwater also influences the costs of cleanup and restoration work. Clean water is sometimes referred to as “clean” water and typically comes from sources like bathtubs, sinks or washing machines. Gray water is a slightly dirtier form of water that can contain contaminants but usually does not include fecal matter. Black water, on the other hand, can come from sewer line backups and carries a variety of dangerous bacteria and viruses.

Replacements

Before you begin flood remediation work, speak to your agent about what’s covered by your National Flood Insurance Program (NFIP) policy. Ask about any restrictions or limitations, such as how long the property must be occupied for. Also, find out whether you have an NFIP flood damage rider, which costs extra and can be a good investment in some situations.

Water damage remediation involves replacing damaged or destroyed materials and restoring the structure of the building to its normal condition. This includes disinfecting, cleaning and sanitizing the affected area to reduce the risk of bacterial and viral contamination. It is important that all contaminants are removed to prevent the growth of mold which can create health problems.

During the flood cleanup process, it is necessary to remove standing water as quickly as possible. This is especially important because contaminated waters can carry bacteria, viruses and other microorganisms that pose serious health risks to residents. This is particularly true when contaminated water seeps behind walls and in wall cavities.

Flood water often contains sewage, animal waste and garbage which can cause a variety of illnesses. It is essential to throw away any food that has come into contact with contaminated water and to disinfect foods that have been refrigerated. It is also recommended that you discard all insulation materials, such as fiberglass, cellulose and sponge rubber, that have been wetted by black or sewage water.

Final Inspection

During the final inspection, the inspector will check everything that was completed to make sure it meets local building codes. This includes checking the electrical wiring, plumbing, and ensuring that all work has been done correctly. If there are any problems, the inspector will note them on the report and make sure that they are addressed before the home is turned over to the new owners.

While the best way to prevent flood damage is by having a homeowner’s insurance policy that includes loss of use coverage, many cases of water damage can’t be prevented. If your home has been damaged by a flood, it is important to contact your insurance provider as soon as possible to begin the claim process. It is also important to take photos and video of the damage before any cleanup begins, so you can show these to the claims adjuster.

After reporting your flood damage, an insurance adjuster will inspect your property and write a proof of loss statement listing everything that was destroyed or damaged by the floodwaters. If you have a National Flood Insurance Program policy, it is important to ask about getting an advance payment to help cover immediate costs. These payments will be deducted from your final flood insurance claim settlement. It is also a good idea to review your flood insurance policy and the Claims Handbook, so you can better understand what is covered by your policy and how the process works.

What to Do If One of Your Trees Falls During a Storm

The first thing you should do is make sure that your family is safe. If the tree has hit your home or pulled down power lines, it is best to evacuate and stay at a neighbors house until authorities can assess the situation.

After ensuring that everyone is safe, survey the damage as best you can. Take photos if it is safe to do so.

Evacuate

The first thing you should do if a tree falls on your house is to evacuate the structure and ensure that all members of your family are accounted for and safe. This is especially important if the tree has damaged or destroyed your roof, caused flooding in your home, or created any other hazard, such as fire damage or electrical issues.

After evacuating your home, you should immediately call 911 or your local emergency authorities. It’s also a good idea to contact your homeowner’s insurance company so they can send out someone to assess the damage and determine steps moving forward (delaying this call may void your policy). If it is safe, take pictures of the fallen tree and any other affected areas in your home as soon as possible and from as many different angles as possible.

Contact Your Insurance Company

Depending on the reason the tree fell, your homeowner’s insurance policy may help cover the damage. This includes removing the fallen tree and any other damage it caused.

You should contact your insurance company as soon as possible. They can then send an adjuster to observe the damage and begin determining how to proceed with your claim.

Homeowners’ insurance usually covers storm damage, including damaged trees. However, the specifics of what will and won’t be covered can vary from insurance company to insurance company. For example, if the tree was in poor condition before the storm due to negligence, your homeowners’ insurance probably won’t help pay for it.

Even if the tree only partially falls on your property, it’s still important to notify your insurance company as soon as possible. They may be able to recommend an arborist who can perform an inspection of the tree and determine whether it’s safe to remove. Also, they can provide you with an estimate of the cost for repairing your property and removing the fallen tree.

Assess the Damage

A storm-damaged tree can cause severe damage to your home. If you live in an area that often experiences storms, it’s a good idea to have an evacuation plan in place in case your home gets damaged. Make sure everyone in your household is accounted for, and evacuate to a safe location. You should also consider preparing a “go-bag” with supplies, such as medication and important documents.

Once you’re safely away from the fallen tree, it’s time to survey the damage. Start by determining whether any of the tree or branches have fallen on your house or if they’re touching electrical lines. If they are, you’ll need to turn off your power and gas lines at the breaker box or at the meter.

Take photos of the fallen tree and the surrounding property. This will help your insurance company assess the damage and determine if it’s covered by your policy.

It’s also a good idea to inspect your property regularly for trees that are growing too close to power lines or overhanging your house. This can prevent them from falling during a storm and potentially injuring you or damaging your home. Handyman On Call can trim these limbs to reduce the risk of them falling during a storm. They can also recommend ways to strengthen your existing trees.

Take Photos

If it is safe, take photos of the damage caused by a fallen tree, both inside and outside your home. It is important to have a clear picture of the damage before you call in professionals for repairs or start cleaning up. Take photos from different angles and in good lighting if possible.

Once you have photographed the damage, contact your insurance company. A standard homeowners insurance policy covers damage caused by trees that fall onto insured structures like homes or detached garages.

Even if the fallen tree doesn’t fall on your house, you might still be able to file a claim for damage caused by a neighboring tree. Some tree species, such as Chinese elms, silver maples, sycamore trees, boxelder trees, and Bradford pear trees, have brittle wood that can easily break, especially when they’re grown close to buildings or utility lines. These fast-growing trees should not be planted in residential areas and should be pruned regularly to reduce the chance of them falling during a storm.

It is also essential to know where your power lines run in your yard before a storm hits, as downed trees or branches can become entangled with them, creating a fire hazard and a potential electrocution risk for you and your neighbors. Look for signs that a tree or limbs have taken down a power line, such as flickering lights in your home or no electrical power at the breaker box.

Choosing the Right Color for Your Fence

Your fence is a major element of your home’s curb appeal. It’s important to choose a color that will compliment the rest of your property.

Avoid using a color like purple on your fence because it’s used to mark private property in many states. Instead, use cool colors such as blues.

Lighter colors create the illusion of space

In general, it’s best to stick with a color that matches or blends in with the existing colors of your home and surrounding landscaping. In most cases, changing these elements is expensive and time consuming, so it’s important to work with the colors that are already in place.

A good option is gray, which can be used on everything from edgy modern style fences to traditional pickets. It’s also a versatile choice because you can use it with both stain or paint. Stain allows some of the natural wood grain and imperfections to show through, while paint gives a solid, opaque look.

Another great option is a light green shade, which blends in with most landscapes and can make your yard appear larger. It’s also a practical choice for many homeowners because it accentuates the color of flowers and plants in the garden.

One exception to this rule is if you have a very bright color, such as orange or blue, that you want to highlight on your fence. In this case, it’s a good idea to limit the amount of color you use and apply it only to accent areas. This way, you get the look you desire without making your entire fence an eye-catching distraction.

Darker colors are more dramatic

When it comes to choosing a fence color, you may be surprised at the range of options available. Many homeowners choose to stain their fence instead of painting it, which preserves the classic wood appearance. Stain is more expensive upfront, but it lasts longer and requires less maintenance than paint. In addition, it’s easier to recoat stain than it is to repaint a fence, which can be labor intensive.

When you choose a darker color for your fence, it can be eye-catching and provide an accent to the landscaping around your home. Vivid flowers and lush greenery will stand out against a dark fence, which can create a sense of drama. However, it’s important to keep in mind that your house will still be the focal point of the landscape, so you don’t want to choose a color that clashes with it.

It’s also a good idea to look at the colors of your home and other exterior elements before you start sifting through color swatches. One idea is to try to match your fence color with a trim or window shutter color on the exterior of your home. Doing so will help your home’s architecture blend seamlessly with your backyard and will create a unified aesthetic for the entire property. This can be particularly beneficial if you have to work with restrictions imposed by homeowner associations.

Greens and yellows are good choices

Using a shade of green can help blur the boundaries between your garden and your fence. This can be helpful if your garden is small and you want it to look bigger. This is because darker hues tend to shrink spaces while light ones can expand them.

A good green can also work well on a wooden fence. This is because the color accentuates the wood grain which can make your garden feel more natural. Similarly, a yellow tone can be very effective on a metal fence. This is because the color complements most metal finishes such as rust and corrosion.

Another color that can be very effective on a fence is brown. This is because it works well with most colors and can make your garden feel more homely. Moreover, a brown shade can work well if your garden has a lot of greenery.

If you decide to paint your fence, it is important that you choose a high-quality exterior paint. This will protect your fence from the elements and ensure that it lasts for a long time. In addition, it is also a good idea to sand your fence before painting. This will ensure that the final product is smooth and even.

While choosing a color for your fence, you should also consider the time of year. Different shades work better during different seasons. For example, spring and summer colors will stand out more against lush grasses while autumn tones will be more prominent against a backdrop of leafy trees. Finally, you should also review the policies of any homeowner’s associations or communities in your area before painting your fence. These groups often have rules regarding the colors that homeowners can use on their property and they may prefer more traditional hues.

Blues are calming

In addition to making your garden look bigger, cool colors like blues also help create a tranquil space. Whether you paint your fence with a blue shade or use blue flowers to accent it, the effect is the same – it blends the fence into the landscape rather than distracting from it.

Another option is to match your fence color with the exterior of your home. While this is not always feasible, if it works with your style it can add a cohesive look to the yard that is pleasing to the eye. If you have a traditional cottage or Colonial house, you might want to opt for a white fence while a more rustic ranch or farm-style home might be better suited to a natural wood stain.

Experts agree that choosing a tonal shade is preferable to using several bright shades that could clash with each other. This is especially important if you’re painting a large area, which requires the use of a brush, roller or sprayer. You should also make sure the paint you choose is formulated for outdoor use and that it is labeled as such.

In general, light colors will reflect the sunlight and help your garden seem larger while darker hues can be used to create a dramatic effect. If you decide to use a dark color, try to use it sparingly and to highlight specific features of the garden, such as trees or blooming flowers. Also, consider if your community or homeowners’ association has any policies governing the color of fencing.

Five Ways to Add Lighting to Your Deck

When it comes to deck lighting ideas, subtlety is key. “It’s important not to have lights that are too bright and that are too obvious,” says Mor.

Lights that are built into the deck like stair and railing lights are permanent fixtures, but other options can be moved around to suit your needs.

Decorative Post Lamps & Stair Lighting

Decorative post lamps add a touch of elegance to a deck. Choose models that feature a soft-warm glow and subtle decorative overlays. These fixtures look great on stairs, along railings or as a focal point above a patio door. Some styles have slide-on face plates for easier, tool-free bulb replacement. To reduce glare, these lights should be installed about 18 inches above the deck surface.

If you’re using a stair light to illuminate your steps, install it at the bottom of the tread or about 16 inches from the top of the deck surface. That way, the fixture won’t be pointing directly at your eyes when you sit down to rest or entertain on the deck.

Stair lighting can also enhance the visual appeal of your deck by illuminating railing balusters and other architectural features. For a more elegant look, consider recessed uplights on the side of the steps. These hidden fixtures are controlled by a single switch inside the house or an outside receptacle.

Low-voltage deck lighting uses a transformer to convert household voltage into 12 volts, which is safe for exterior conditions. Most systems have a timer or photocell that turns on the lights when dark and shuts them off when daylight arrives. Identify the location of AC power sockets on your deck or plan to add receptacles for plugging in the transformer. Use a transformer calculator to determine the number and lengths of wire needed. Then, take your deck plan to a professional and ask a salesperson to help you select fixtures and a power source.

Rail Lighting

Like post lamps, rail lights mount on deck railings but they cast light downward for a more subtle effect. They’re also easier to install since you don’t have to drill into deck boards.

If you want to brighten up your railing without changing your decor, try a lighting kit. These kits contain everything you need to light up your railing, including the transformer, lights and cables. Some even include controllers, timers and dimmers to make it easy to adjust the brightness or set special effects.

Aside from a few safety precautions, installing low-voltage LED deck lighting isn’t hard. The key is to make sure you follow the manufacturer’s instructions and never use metal staples or fasteners on electrical wiring, which can penetrate insulation and cause shorts.

Aside from deck rail lights, lanterns and string lights are great options for adding a touch of style to your outdoor space. They can also help bolster or complement other deck lighting ideas and can create a cozy sense of ambiance that’s perfect for summer evenings. Just remember that string lights are mainly intended for ambiance and may not be enough to illuminate areas where it’s necessary, such as stairs or other safety concerns.

Lanterns

Lanterns provide an attractive and simple way to introduce light to your deck. Unlike built-in lights (such as those that are embedded within the railing or on stairs) which can be more difficult to change, lanterns and other portable fixtures are easy to move around to different locations or bring inside for bad weather. These can be solar, battery-operated or simply candles in lanterns and are great for accenting a garden pergola or hanging over dining tables when entertaining outdoors.

While a single lantern can serve as an enchanting accent on your deck, multiples look especially lovely when grouped in trios or more.  A rounded handle makes it easier to carry them from place to place and these would look pretty dotted amongst a tangle of cherry blossom tree branches in full bloom in spring.

String Lights

If you want your deck to look like a cozy cabin in the woods, string lights can add that atmosphere. They’re easy to install and a simple way to create a warm and inviting space to relax.

Consider using LED string lights, which use 85 percent less energy than traditional halogen bulbs and have a much longer lifespan. You can find them in a wide variety of colors and lengths, from 12-foot options with Edison-style bulbs to 750-foot strands with shatterproof cafe-style bulbs that can be linked end-to-end.

To hang the lights, screw in cup hooks to your posts before putting them in the planters. Choose a color that coordinates with your deck, and choose hooks that are made for outdoor use. You can also add a weatherproof wire nut to connect the low-voltage cable to the fixture, and remember to follow the manufacturer’s instructions regarding polarity.

Used for Reclaimed Wood in The Home

Wood in general can make a home feel warm and cozy, but there’s a special type of wood that amplifies that effect — reclaimed wood. Repurposed from old barns and other structures, reclaimed wood is rich in character and history.

But where does this wood come from and what are some uses for it in your home?

Furniture

When structures like barns, factories or ships are demolished or redesigned, there is often a surplus of wood that would otherwise be tossed. Some companies save this material to give it a new life in furniture. Reclaimed wood usually goes through a process to remove any features that could undermine the quality of the finished product, such as excessive rot or irreparable damage. It is then kiln dried to further stabilize the material from cracking or warping.

The result is a stylish and rustic type of furniture that can be adapted to a wide range of design styles. Because of its history, reclaimed wood has character that you can’t find in newer materials. It tells a story about the house that you live in and can become a conversation piece among family and friends. It also adds an element of uniqueness to your home that stands out in a sea of cookie cutter homes. It can even raise your home’s value by making it more appealing to potential buyers. This is especially true when used in shared areas like living rooms or bedrooms.

Flooring

Using reclaimed wood in flooring creates a rustic look that is both unique and beautiful. In addition to the aesthetic appeal, reclaimed wood is environmentally responsible. When used in place of new hardwood floors, it reduces the demand for virgin wood and cuts down on landfill waste. Choosing reclaimed wood can also help curb deforestation by cutting down on the number of trees needed to produce virgin lumber.

Reclaimed wood floors are more durable and long-lasting than floors made from newer wood. This is because the older wood has already been exposed to temperature shifts and humidity changes over time. This makes it much less likely to warp or crack over time.

Another advantage of using reclaimed wood in your floors is the variety of tones and textures available. Unlike newer wood floors, which are often produced from fast-growing hardwoods, old wood comes from slow-growing trees that were harvested more than 100 years ago. This means that reclaimed wood floors have a more varied color scheme and a more rustic appearance. In addition, reclaimed wood floors often have wider planks than those made from newer wood.

Cabinets

Cabinets are a major investment in your home, so it’s important to select a material that will last. Solid wood cabinets are more durable than other materials and can be sanded down and restained if needed. They also tend to keep their value over time, which can increase the resale value of your home.

Reclaimed wood is another sustainable option for cabinets. It’s salvaged from other buildings and barns to give new life to them, and it can help add character to your home. This type of wood may have nail holes or marks from its previous use, but a carpenter can create custom cabinets that will hide these imperfections.

Doors

Many home builders choose reclaimed wood for doors because it adds character and is beautiful. It can also be more durable than standard doors that can warp and discolor over time.

Reclaimed lumber can look just like new wood, and it will hold up well to the elements in your home. It may need a little extra care when it is exposed to humidity, though, since it can swell and shrink in high humidity. Using dehumidifiers and taking measurements during dry weather can help minimize this effect.

Another great benefit of reclaimed wood is its ability to cut down on traveling sound. This can be a real benefit in single-family homes, and even in apartment buildings or college dorms.

Reclaimed barn door styles are a popular trend this year, and they can be an impressive accent to your home. They can add a touch of farmhouse chic, and match beautifully with other rustic home decor. You can leave them unfinished or paint them for a more personalized look. They can even serve as a focal point in your home office or living room.

Walls

Reclaimed wood adds a rustic feel to any room, and a beautiful alternative to new wall paneling. Reclaimed lumber is often milled to create a smooth surface or left in its rougher state, whichever look you choose. It is easy to install and works just like any other wood material.

To ensure a quality finish, it is important to thoroughly inspect reclaimed wood before installing. Look for areas of rot, and make sure they are not deep enough to cause structural damage. Also, check for nails and screws, as they may be embedded in the reclaimed wood.

If you do find nail holes, use a magnetic detector to locate and remove the fasteners. If the reclaimed lumber is painted, consider painting over the paint with zero VOC (volatile organic compounds) paint. This will help to protect your indoor air quality and maintain a fresh, natural looking finish. If unpainted, choose a color that complements the wood paneling, and be sure to use a water-based product. Using a high ceiling and a neutral paint color will help the reclaimed wood stand out and look great in your home.