windows-and-doors-7

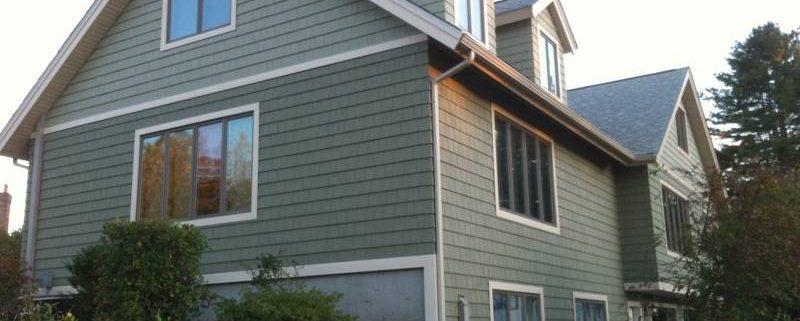
Draperies for Windows

The term “window draped curtains” includes curtains, skirts and any other piece of fabric used to decorate the windows of a house or an office. These draped pieces can be combined in a variety of ways to create designs for your different windows. Discovering what the best design for your draping depends on the environment in which they’ll be put, and the purpose for the covering the window.

Standard Curtains

Standard curtains are ideal choices to cover windows in various circumstances, due to the availability of them. These curtains, also known as drapes or window panels, come in a variety of colors and designs which makes them easy to match with the furniture and decor of a room. If you want to install standard curtains on the windows, place them on rods hanging just above each window. When they are placed on it, the curtains can be opened to allow light in or closed to block sunshine and provide privacy.

Translucent curtains and valances

The translucent curtains have the same basic features as standard: they are installed on a standard rod and can open and close over a window when necessary. The main benefit of the translucent curtains is that they allow sunlight to come in when closed but maintain the privacy that standard curtains provide. If you want to add a touch of color to translucent shades that are white or cream, consider putting a valance on top of the window which will create noticeable character in your draping design.

Design curtain to darken

If you need a room to be completely dark, curtains that darken (blackout) are the best option. These curtains are made with extra thickness to prevent sunlight from seeping through the fabric, making them ideal for bedrooms when it’s brightly lit at night, or if a person needs to sleep during the day. The blackout curtains also work well in rooms with televisions to prevent glare on the screen. Since these curtains usually come in dark colors, some people add a valance to balance the dark or put a different style drape over the blackout curtains.

Partial draping

If you do not need a drape that can close over the window, you can simply concentrate on aesthetics when it comes to the design of the curtains. To create a bright and open appearance, put narrow curtains on either side of the window, and tie a loop or hook so that the fabric is collected back in the side. If you do not like the sight of the rod exposed through the curtains, use a valance between the two sides of the same to cover it.

Basement-Flooring-Ideas-With-Wall-Design

Determining the cost of building a basement

If your new home has a basement, there are several ways to estimate the cost of completing it. Although basements are one of the least expensive parts of a house, when planning according to the square meter, finishing can represent a significant investment. Follow a few simple rules to determine how much it will cost to build your basement.

Instructions

  1. Calculate the cost of excavation. You might not realize that digging to build a basement is quite expensive. The required investment depends on the type of soil that has to be removed. If the construction site has many rocks, the price will be higher. Request for the excavator to evaluate the area and give you a cost per square yard. Make sure they include your equipment, transportation fees and charges for the supports.
  2. How much concrete do you need poured for the basement? Calculate the amount of concrete you need in cubic yards. This is determined by the thickness of the wall that will be poured. The minimum wall thickness is 8 inches for a standard construction or 10 inches thick if your house has stone applied to the outside layer. Basement ceilings 8 feet tall need a concrete wall that is 9 feet thick.
  3. Add in the concrete foundations on which your walls rest which are 2 feet long and a foot wide under all portions of your walls. Check with your local building code inspector to see if you need longer bases in your area.
  4. Find the volume of concrete needed for the floor which will have a thickness of 4 inches. Add this to your previous cost for concrete calculations.
  5. Calculate how much steel reinforcements are needed to give your basement walls strength and integrity. All walls must contain rebar. Find out how much it costs to install a vertical reinforcement, 94 inches long, every two linear feet into the basement walls and plan to use nine horizontal rebar levels. Add connections to your calculations bars.
  6. Finalize your calculations for computing rebar rods that pass through the ground in both directions at the centers of two by two feet. Like before, add the connections you need to ensure the bars.
  7. Let the proper technician stabilize the concrete floor with a minimum of 3 inches before pouring. In addition, depending on the code, you may have to use sand to fill around the basement to prevent movement. The sand provides 100 percent compaction and is regularly needed in areas where the soil is in constant motion.
  8. Check the price for installing drainage tile around the perimeter of your basement and add the cost of a bucket sink to filter the water away from your foundation. If you are in an area where you should use sand to fill, calculate the price to install rock on the tile drains to prevent the sand from seeping into the holes and create obstructions.
  9. Add the cost of hiring experienced workers to help you build your basement. Pouring the concrete for the wall is labor intensive, as it tends to dry quickly and it does, it cannot be fixed.
kitchen-82

Designing modern kitchen cabinets

Cabinets in a kitchen need to be updated every few years to maintain an overall modern look. The type currently used are called hybrids because they include colors and contrasting styles being used together. The home design magazines can give you ideas about what is hip regarding cabinets. However, you should match the architecture of your home.  Appliances must also be taken into account.

Instructions

  1. Draw your kitchen space and includes all the openings for windows, doors and any other openings you might have. Using graph paper allows one paper box to represents 4 inches (10 cm) of real space. Start with the sink area to design cabinets and show the plates to help you visualize your final design. Draw the plates with smooth fronts, rather than with sunken surfaces, and elegant handles so everything has a modern look.
  2. Choose designs in two different colors or finishes that complement each other for a hybrid effect, if desired. Check books and interior design magazines for ideas. For example, use dark cherry cabinets with other light oak. Another popular set of contrasting finishes are black and white. Designing with stainless steel metal cabinets and mixing with wood gives a more luxurious look.
  3. Plan your cabinets around your appliances, as you’ll want space for the dishwasher, refrigerator and stove in a convenient location for food preparation. For example, you might put three cabinets to the left of the dishwasher and three above them to keep it balanced. Draw doors and drawers beside the sink area two cabinet doors under the sink. Choose a wider cabinets, since the narrow ones make it more difficult to access plates and serving dishes.
  4. Use colored pencils to add color to your kitchen design. The way cabinets, floor and appliances are combined, in terms of color, help you decide how your kitchen looks. Plan to incorporate knobs and handles on the doors, drawers and cabinets that match the metal of your appliances. Using elongated stainless steel handles for drawers and doors, for example, give you a high-tech look.
  5. To give your kitchen a modern look, avoid using decorated wooden molding along the top of the cabinets. Use tile or granite countertops, along with a modern faucet on the sink, to emphasize modern cabinets. Installing tile, wallpaper or floor that has lots of patterns or design, or an old design, can cause the cabinet design to look outdated. Look through design books to establish a fresh, modern look that will look fashionable for years.
fences-4

Alternative ideas for fences

All fences have the main function of dividing areas, however, they can differ greatly when you consider them as decorative elements for your garden. Alternative materials to build fences such as recycled bottles and wooden boards, are cheap and generally represent environmentally friendly choices. Using common materials also allows you to express your creativity and artistic qualities.

Pallets

Pallets are made ​​of treated wood and offer an alternative ecological material to build a fence because they are usually burned or thrown into landfills. They are also a cheaper option since you can probably get them at no cost.  According to the internet site “Self-Sufficient,” you can build a fence simply by attaching the pallets with nails or dismantling pallets and using separate boards.

Plastic or glass bottles

Build a fence using empty bottles by binding them together horizontally or vertically with wire or other material. For a fortified fence, you can use fuse glass bottles together with cement, to give the look of a wine cellar. According to the website “Gardening Tips ‘n’ Ideas,” you can create designs if you have glass bottles of different colors or use pigmented cement. The side of the fence that shows the necks of the bottles can be used for hanging potted plants or other decorative materials.

Bamboo

Build a modern-style fence using bamboo poles, which are quite strong, accessible and have become harmful vegetation in many areas. If you do not have time, or inclination, to tie poles to form a curtain of bamboo, you can buy them ready-made in garden stores.

concrete

Advantages and disadvantages of concrete construction

Most of the business buildings such as malls and individual stores are built with concrete construction. In some places, residential houses have exterior walls of concrete, designed to improve safety and provide a higher resistance to strong winds and storm levels. Although there are benefits of using concrete in construction, there are some considerations and limitations.

Benefits

Concrete provides protection against storms and superior criminal activity. A high percentage of new banks use concrete, reinforced with steel in the construction process, including the interior concrete walls. Additionally, concrete building offers a high level of fire resistance and reduces unwanted noise.

Types

There are two basic methods used in concrete construction. The first is the erection of pre-cast concrete walls that come from a manufacturer with a predetermined window and door and already installed pipes for mechanical applications. Many franchises use this type of building for their stores. The second method requires the formation of individual walls and pouring concrete in place. If a residence requires concrete walls, the second method is employed, often using a foam insulation in the walls.

Function

Concrete walls provide low-maintenance, permanent construction. In commercial applications, concrete is superior to wood frames when the structure must be completed quickly. A wall that takes two weeks to complete with a wooden frame can be poured in a couple of hours with concrete and cured in two days. Where street noise is a problem, the concrete provides an acoustic absorber for those inside the building.

Considerations

Before pouring the concrete walls, all mechanical aspects should be taken into consideration during the training process. Doors, windows, electrical outlets, plumbing and pipelines are required to be inspected before the walls are poured. Spend a little extra time developing the building design as remodeling a concrete structure is cost prohibitive.

Caveat

A concrete construction is not recommended for places where the ground sinks, unless a floating foundation is part of the design. Because even a slight movement can result in cracks and fissures, concrete buildings in this soil type require a special foundation or the use of posts installed deep in the bedrock, beneath the structure.

roofing-6

What materials are used in roofing?

The materials used in the construction of roofs vary in cost, design and durability. The style of the residence or building, the color, the ecological factors and economic factors lead to the selection of materials. Therefore, understanding the numerous available materials allows for a clear selection process. Whether you choose a green (organic) or a historically correct option, there are many possibilities in the 21st century.

Environmentally friendly

European turf roofs have been in use since the early times of last century, something considered unconventional in the United States in 2010. This material provides a good insulation for cold winters while maintaining cool temperatures during the summer heat; these green roofs, besides being attractive, also have low maintenance.

Asphalt shingles

The variety of colors and range of prices varying from cheap triples (three sections per unit), to the more expensive and durable tiles, are still popular. Easy to repair, asphalt shingles are petroleum-based, non-organic and not recycled and generally end up in landfills. In warm climates cracks, mold and moisture form on or in the shingles which translate to a short life of 15 to 30 years.

Wood

Unless they are not pressure-treated (infused with chemical protection against weather and insects), wood rots due to the growth of mold and mildew. Very useful for bungalow roofs, cottages and historic houses, wooden tiles mix well with the environment while providing some insulation. When making your choice, please note that wood shingles are expensive and need constant maintenance to achieve a life of 30-50 years.

Metal

A steel or aluminum roof has a long shelf-life of over 50 years. This choose is lightweight and available in a variety of colors and styles (cedar shingles or sheets) and because it’s a recyclable material, it is actually a good investment. Although it can be expensive, this material can be easily installed over an existing roof.

Concrete and clay

Both fireproof, concrete roof tiles and clay go well with buildings that reflect a Mediterranean style or those residences of contemporary or country style. They need regular maintenance and are durable. Often used for new construction because of the special requirements of their weight structure, these expensive materials are easily broken when walking on it; therefore, keep in mind that repair and installation require certain skills.

Board

More visually suitable for homes reflecting a French and Italian colonial style; slate roofs offer beauty, fire resistance and have a long life. However, they need a professional with the right equipment for installation due to its weight and fragility.

Rubber and plastic

New in the 21st century, the roof of engineering plastics and rubber fit with any architectural style and has life duration of 30 to 50 years.  It’s a profitable material that’s constructed of recycled materials.  This roof has a light weight and comes in a range of colors.

roofing-1

Different ways to build a roof

You can build a roof in six basic ways: flat, shed, gable, hipped, attic and attic. The most common types of roofs are flat, shed, two and four waters, while the sloping of a roof incorporates many of the building techniques applied in the construction of roofs with two and four waters, the final appearance is based on the method you use to build and the style – one of the elements that will give character to your home.

Main components

Most common components used to build roofs include primary and secondary beams in addition to the blinds. Generally, the central beam is used when a roof has at least two slopes. It is a long horizontal piece which is the most important element of the structure. The central beam helps align the secondary beams. The latter – are already common, capping, for overhang, valley or ‘V’ – are structural components that provide support for the weight of the roof. Not all beams are necessary in the construction of every roof. The scaffold, usually made at a factory, are structural supports that can be used instead of beams. On top of the scaffold, the entire roof is covered with roofing material, which is usually an overlay of 5/8 inch (1.6 cm) plywood.

Flat roofs

Flat roofs are common in commercial buildings and can be completely flat or have a slight inclination; the latter allows water to drain from the ceiling. They are also found in some single-family homes, but residential construction consists of two or three floors so flat roofs are not usually seen. A waterproof cover used for flat roofs is a simple rubber-like membrane, called Ethylene Propylene Diane M or EPDM. The installation of this cover does not require special skills or equipment; just apply the adhesive to the inner side of the membrane and place the membrane down.  The joints are sealed with a special tape.

Gabled

The gable roof consists of two sections that are joined in the middle. The two equal sides bow down from the main beam and the roof starts at one end of the house and ends at the other. Typically, equidistant beams are cut and align with the wall. Adjacent beams have to be cut at right angles to ensure a proper fit. Tiles are widely chosen as the material for pitched roofs. The installation procedures are not difficult and the materials are not expensive, compared to other options. You can also choose to install metal on new construction as long as it’s properly reinforced; you can install tile, slate or concrete tiles as well. Specific tools, specialized equipment and knowledge for proper installation are required.

siding-4

Keep Your Foundation Healthy

The great importance of keeping the foundation of your home healthy should not have to be explained, after all, your entire house rests upon it. The greatest threat to the foundation is moisture and cracks forming which may need foundation crack repair, but other factors can also cause it to deteriorate rapidly and it is very important to keep it healthy to keep the house healthy. The following tips and warnings address the major threats to the foundation.

1.  Check your foundation for cracks regularly.

Minor cracks should be caught quickly and fixed before they start to expand and pose a real problem. These cracks develop naturally in concrete slabs and can be fixed by one of the many commercially available crack repairing agents for concrete. Epoxy glue specially made for the purpose is especially useful for repairing cracks.

2. Keep moisture levels constant.

More specifically, keep the moisture consistent. If the foundation gets too dry, it may pose problems and cause cracks as soil around it shrinks. Installing rock beds near the foundation will help water seep into the soil around the foundation and keep it healthy. Foundation watering systems are also available to keep the foundation healthy.

3. Keeping away excessive moisture.

Make sure your drainpipes and gutters are well sealed and lead at least five feet away from the foundation when discharging. Make sure there is proper gradation around the house so that the rainwater does not accumulate near the house and is instead led away by the slope. A moisture barrier can also be installed to make sure that the moisture is not migrating towards the foundation and these barriers should be at least six feet deep.

4.  Inspect your plumbing systems regularly.

Get a professional to come in and inspect all the plumbing lines in and around the house. This includes sewage lines and sprinkler systems. Any leaks that these lines may have should be fixed immediately to stop excess moisture from making their way towards the foundation and causing a real problem.

With these tips you can take the first steps towards guarding the foundation of your home against damage to make sure that it holds up year after year and no major and expensive repair is needed in the near future. As always, it is best to consult a professional before making any of these changes and they can advise and help you to install the necessary safeguards.

concrete

Concrete polishing techniques

Concrete is a popular material used for floors and roofs, thanks to its durability, easy maintenance and attractive appearance, when polished correctly. Concrete surfaces can be polished to a finished sheen requiring no coating or waxing. However, this process requires equipment and special techniques. Learning the basic methods for polishing concrete can help homeowners tell the difference between a well-polished surface and one that was not properly polished.

Wet polishing

The wet grinding of concrete involves using diamond abrasive grains to gradually soften the floor, deck or concrete surface. The water is used to cool the abrasion and keep dust levels low making the process safe. According to Red Concrete, wet abrasive polishing processes tend to last longer, because water acts as a lubricant. Unfortunately, the polished concrete in wet environments creates a disaster.

Dry polishing

Dry grinding is becoming increasingly common as dust container systems improve. This technique involves grinding the floor with a polisher hooked to a vacuum system. The system contains a lot of dust so you need to improve air quality and make it cleaner. According to Red Concrete, many workers use dry polishing in the early stages and then change to a wet one.

Polishing banks

Decks and other concrete forms with edges and corners require special techniques to soften correctly. Small, manageable polishes work best on the edge of concrete and are adjustable with flexible polishing fillings for curved areas. Workers should avoid tilting or rolling the polish, as it can cause a rippling surface. Instead, a horizontal movement with even pressure should be used to provide the best surface. Performing work on banks require greater care to polish large flat surfaces as small imperfections are more obvious.

basement-2

Basement Renovation Ideas

There is no point leaving a basement unfinished. Apart from the value that a finished basement adds, one of the main reasons to go in for a basements remodeling job is for the great addition of another desirable room to the house. Basements are incredibly versatile and can be turned into a room that can be used for almost any purpose. Here are just some of the many ideas that can make your basement the best loved room in the house.

1. An extra bedroom.

Whether you are about to welcome a new member to the family or just as a guest room for visiting family and friends, an extra bedroom is always useful and any family home will always have a great use for it. You can also add a en suite bathroom to the bedroom downstairs to make it a complete living quarter for visiting guest.

2. A separate apartment.

If your basement has a separate entrance (one can also be added without much effort,) it is a perfect candidate for a studio apartment. Not only will this be great for the privacy of long term guests but it can also be rented out for a little extra money for the family.

3. Kid’s playroom.

If you are about to welcome a new tyke into the family, why not convert the basement into a playroom for him or her. They will enjoy the coolness in the summer and with the addition of kid friendly furniture and a friendly color and aesthetic scheme, they will love spending their time there. A separate study area with a desk and charts can also make it a complete room for your kids where they can work and play.

4. Media room.

This is one of the most common uses for a basement, since there is very little need to soundproof or lightproof the room, it is already ideal as a place to host home movie nights. Adding a projector or a large television and a good sound system will make the basement one of the favorite rooms for the movie fanatics in the family.

5. Game room.

A game room for the family and visitors is the perfect project for a basement. A pool table and other games like foosball and arcade games can be put down there as well as a bar for the older patrons. If building a combined media and game room, video games can also be played on the big screen installed and the room will fast become a favorite among friends.

There are many other uses for a basement and these five are just some of the many ideas. They should inspire and help you decide what you want to do with your basement instead of just leaving it unfurnished. A professional contractor or interior designer can help you plan and decide on the best use of the area.