Decorating Your Home with Indigo

Decorating your home in different colors can create a totally different atmosphere. It does not give off the same feeling when you use pastel tones versus strong colors, since with the first transmits serenity and the second energy. In this case, we will see what the use of indigo blue brings us when used in decorating.

Blue tones are considered cool which contributes to relaxation. Blue is the color of serenity, but in its more intense tones can give much strength to spaces. Indigo is precisely one of the most intense and strong blues, a color that does not go unnoticed and can be used in the decoration as an absolute protagonist.

Indigo blue

This color is within the range of blues. Blues are used to give freshness to a space. They are cold tones, so they are often used in hot places to give the feeling of a cooler environment. If you want the feeling to be warm, it is better to opt for warm tones such as orange or yellow. Blue is also a color that is associated with tranquility as it is used to create relaxing environments. Indigo is one of the most intense blues, so it does not give much in terms of calmness. It is a deep and intense color, which is mysterious and elegant at the same time. While perfect for any type of environment, if you want to lower its intensity you should include the use of light tones or white.

Indigo for the outside

This intense blue color has also been used on the facades of houses, around windows or on front doors. No doubt it is a color that brings an original touch to the home but can also withstand the passage of time in the areas outside ​​the house.

Indigo blue in fabrics

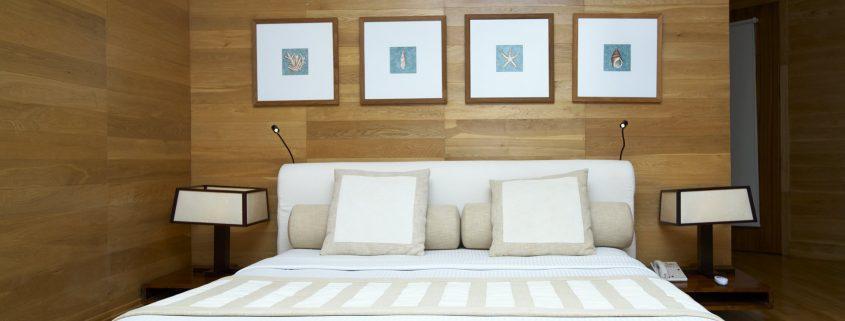
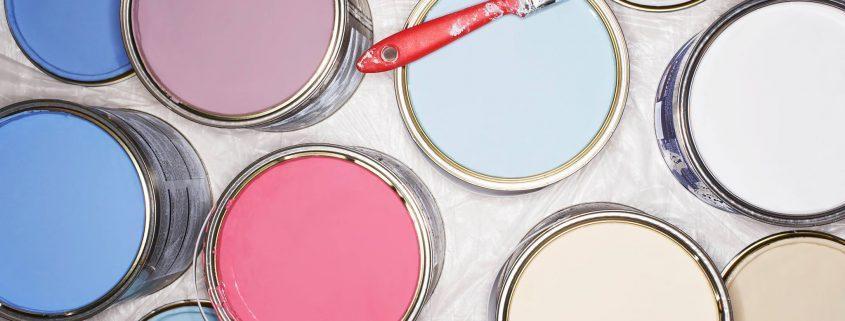
If this color seems excessive to use on walls because of its intensity, you can always use it in the details. The most functional decorations are made with base tones, white, gray, beige or black, and on them is another color to add to the decorating. In addition, if you get tired of this tone, you can always change the fabrics to a warmer color for winter or for a softer pastel tone. By using indigo in only textiles, possibilities are much wider.

Indigo blue on the walls

The most daring way to use indigo is on walls. Several things must be taken into account if you are going to paint one or several walls in this color. It is such an intense and dark color, so if you have a room that does not have natural light, it is best to avoid it. Being a dark color, spaces will look smaller. One trick to expand them visually is to add a mirror on the blue painted wall, as it will reflect the light and the space will appear larger. If you still want to paint the wall with this color, you can always paint only half, as it is a very current trend and add brightness with a white tone at the top.

Indigo in the bathroom

Blue tones are very common in bathrooms, but in general are usually used in medium or light tones to give a freshness to everything. Indigo can be a great choice to create an elegant style bathroom. Adding touches like fixtures in golden tones can be a great idea, and also mix white tones in the tub, walls and toilets to subtract the intensity of the blue.

Mix colors with blue

Indigo blue is usually mixed with a warm tone to remove a bit of coldness. Brown, beige, yellow and mustard tones look great with this type of blue, because there is contrast. Sometimes you’ll see more daring mixtures, with pink and green, for a salon which is totally original.

Furniture in blue indigo

This blue is very original, so it is a great option if you want to give a different touch to a space. Furniture can be painted to give them a very different look, and this color is very interesting for antique wooden furniture. It will give a new touch and even bohemian style, and the furniture will stand out wherever we put it.

Carpet Cleaning Services

Cleaning Dog Urine from Carpet

As soon as you open your home to a dog, the possibility that the carpets have an occasional puddle of urine arises. While there are many commercial products that can be purchased at pet stores carpet, the stain will not wait for you to buy one. Having a recipe to solve your own dog urine crisis could save your carpet and day.

Cat litter

However improbable, the first ingredient for the elimination of urine is cat litter.  Scatter cat litter on the carpet to absorb moisture, then take it up and throw it in the trash.  If you have cat litter, use old towels. Dry urine as much as you can, stand on the towels to make sure you not only absorb urine from the carpet, but also the pads below. When the towels are not absorbing any more, it’s time for carpet cleaning solution.

White vinegar and powdered laundry detergent

Mix 1/2 cup of powdered detergent and 1/2 cup white vinegar. This formula comes from the University of Maine.  White vinegar neutralizes the uric acid in urine. Dog urine contains water, ammonia, uric acid and germs. After removal, there will still be traces of uric acid. This eventually crystallizes when combined with hydrogen and sulfur dust and gas is released. Using the solution to neutralize the uric acid and eliminate the possibility of it turning into gas. Pour enough solution on the area to absorb the urine completely from the carpet to the pads. White vinegar also has antiseptic to disinfect your carpet and floor.  Dry it with towels or with the use of cat litter.

Sodium bicarbonate

The final step in cleaning the urine stain on the carpet, according to the University of Maine, is using additional vinegar and sparkling water. Use a spray bottle to spray the area with sparkling mineral water and vinegar. Put dry towels down and cover with something heavy to absorb the maximum amount of residual moisture.

Follow up

You will not be sure you’ve solved the problem until the carpet is exposed to high humidity. Wait until a wet day to see if your carpet is kept fresh. If the smell of urine is significant, repeat the process.

roofing-9

Why Is My Plumbing System Bubbling?

A house plumbing system can bubble up from any small obstruction in drains or ventilation pipes or may be caused by a larger blockage. Ignoring the bubbles can produce sewage bubbling up through your fixtures drains, as the bubbles could indicate a major obstruction in the pipes that should be released by a professional.

Drain Line Clogs

Clogs of one or more may exist in your drains, creating air bubbles in the pipes. These clogs are only partial clogs, meaning water can still flow down the unclogged portion of the pipe opening. These obstructions cause the water to shake and beat in ways it normally would not, producing bubbles in the water that find their way to the drain hole of your fixture. A partial obstruction may sit near the drain opening, or may exist in the drainage line.

Ventilation pipe clogs

All plumbing fixtures in your home connect to the plumbing ventilation pipes, otherwise the fittings will not work properly. When you wash, the waste water takes some of the air in the pipes with it. The ventilation pipes rise vertically through the roof of your house, with the opening on the exterior. The ventilation pipes draw in new air to replace what was lost with wastewater. In addition, ventilation tubes act as exhaust pipes for sewer gases trapped in the drains of the pipes. With an obstruction in the ventilation pipes, bubbles can get into plumbing fixtures.

Clear ventilation tubes

If it is suspected that a ventilation pipe is obstructed in your home’s plumbing system, you should climb to the roof to examine the ventilation pipe in question. If you do not see an obstruction in the top of the pipe, shine a flashlight inside the pipe to find the obstruction. Twigs, leaves and even tennis balls can clog a ventilation pipe. If you cannot reach into the ventilation tubing with your hands or a tool, you can break the clogs with a garden hose and a high pressure fitting.

Maintenance of drainage lines

Start by cleaning the drain pipe for the fixture where you saw the bubbles. Use a plunger, which covers the drain, and pump up and down several times. The plunger sends pressure shock waves down the drains, which can strike a nuisance for free. If the plunger does not help, send a drain snake down the drains to hit the free clog. If you cannot remove the clog, it can exist in one of the large drains in your plumbing system, which requires a plumber to clear the clog.

hero section

8 Ideas for Making Your Home Safe for Seniors

Older people gradually lose their faculties and increase their insecurity in any situation simply because of the passing of time. It is important that this impairment of their abilities does not generate problems or accidents. This is why it is essential to adopt measures that allow a safe home for the elderly.

Lighting

Taking care of lighting is fundamental because eyesight of the elderly is not as good as those that are younger. Always try to ensure that the house has good lighting so that seniors can easily see what is around them.

Also, try to make sure that outlets and plugs are within reach, avoiding extension cords which can cause tripping. And make sure there are enough switches to move around the house. It is essential to have a spot of light near your bed that can be operate without having to get up and avoid moving in the dark.

Obstacles

Try to get rid of furniture you do not need and avoid unnecessary decorations. This is one of the home improvements that will help ensure safety for seniors. The excess of furniture in areas of the house can be an insurmountable obstacle and cause accidents.

Bathrooms

The bathroom is one of the most dangerous areas of the house for an older person. Changing the bathtub to a shower will facilitate access and mobility for the elderly.

In addition, placing support points and chairs with non-slip mats in the shower will increase safety. Outside the shower, around the toilet and sink, support points are also useful to make movement easier and safe.

Kitchen

In the kitchen non-skid floors are important to avoid slipping. Also make sure that kitchen utensils are within reach and those that are least used in the farthest area of the kitchen.

A safe home for older people prevents you from having to climb stairs or stools to access elevated areas. The smoke detectors are also a good idea in the kitchen to avoid possible fire if the older person by mistake left the burning stove.

Carpets

On the floor, it is also advisable to remove carpets and mats as they can often cause slippage. Otherwise, they should always be attached to the floor.

However, attached carpets can also cause falls because an older person is more likely to stumble because the ability to lift their feet is reduced.

Bedroom

The bedroom bed should fit the needs of the person in question and it is advisable that the mattress does not sink too much as this makes it difficult for the older person to get out of bed.

It is also important to avoid clutter in a safe home for the elderly. The presence of obstacles in their way which can cause them to stumble when rising, mainly at night, is a risk to avoid. This is applicable to all rooms in the house. The less disorder there is, the less chance of an accident.

Signaling to achieve a safe home for the elderly

Highlight the areas of the home that can generate problems such as stairs. The steps should be comfortable and have handrails to help the individual move up and down safely.

Also the door opening systems should be easy to operate and manipulate.

The best measure: do not wait to take action

There should not be an accident for someone to take these measures seriously. Experts recommend that work must always be done taking into account the physical or mental capacity of the people who are going to inhabit the house. Only thus, with suitable home reforms, you can get adapted homes.

bedroom redesign

Where to Place the Bed in a Master Bedroom

In the design of a master bedroom, the colors you choose for the space are the most significant in the overall look of the room impact. However, the way you choose to organize your furniture also affects the style and atmosphere of the space. Placement of the bed is especially important because you want to feel comfortable in it to ensure a good night’s sleep. You can choose from various places for bed, but the size of your bedroom can limit your options.

Wall opposite the door

The traditional place for the bed in the master bedroom is on the wall opposite the door. The bed is usually focused on the wall, but can be placed off-center if a window or any other fixed element limits your choices. The placement of the bed along the wall opposite the door is ideal if you have an elaborate headboard, because it will be the first thing seen when you walk into the room. This position works well for large and small bedrooms, provided that the wall opposite the door is sufficient to accommodate your bed.

Door wall

If you cannot put your bed on the wall opposite the door due to windows and other fixed features, you can place it in the same wall as the door. While this placement is not recommended by the design principles of feng shui, you can create, however, a private intimate space for the bed, as it is hidden from view of the door. It can also provide panoramic views from your bed if there is windows in the wall opposite the door.

Corner opposite the door

For a more unusual arrangement, try placing your bed diagonally in the corner opposite the door. This position requires more space than the centering of the bed to the wall, so it works best in a large room. As with the centering of the bed in the wall opposite the door, a diagonal arrangement allows the bed and headboard to become the point focal of the room, because the location is unique and striking. It is also an easy way to add interest to a room that has a simple design, as a neutral color palette and minimalist furniture.

Center of the room

The most dramatic placement for a bed is located in the center of the room, away from the walls. Instantly the bed is the focal point of the room. This position makes an impressive setting for a poster or a canopy bed. However, this arrangement only works in a spacious bedroom, and you should have enough space around the bed for other furniture. To prevent bed look like it was floating in the middle of the room, you can “anchor” it by placing a carpet underneath it or add a bench at the foot of the bed.

bathroom services

Replacing Shower Tile Grout

Constant exposure to water and sedimentation or displacement of the walls of the bathroom can make grout around the tiles to crack. When this happens, it must be repaired to keep water away from the cracks. Over time, water may damage the structure and decompose the underlying layers. This will trigger costly repairs which could have been avoided by repairing the broken grout. This type of repair is a job that you can do yourself without hiring a professional.

Instructions

  1. Cut the grout lines with a saw meant for that purpose. This is a hand tool that has a narrow diamond leaf. The blade is designed to fit inside the grout lines between the tiles. Move the saw back and forth as much as you can along the old grout.
  2. Use an industrial vacuum to get up all the pieces and wet the tiles with a damp cloth.
  3. Fill a 1-gallon (3.78 L) bucket with water to a depth of no more than 1 inch (2.54 cm). Pour the grout mixture into the bucket a little at a time. Mix the grout in the water with a 3 inches (7.62 cm) spatula. Continue adding the grout powder to the water until the mixture is slightly thicker than cake batter. The grout should be thick enough to stay on the spatula but thin enough that it can be spread.
  4. Spread the grout between the tiles using the spatula. Do not cover larger than 3 by 3 feet (0.9 by 0.9 m) areas. Keep the leveling to 45 degrees and drag on the tiles. Collects excess grout with a spatula and place the surplus back into the bucket.
  5. Fill a 5 gallon bucket (18.90 L) with hot water. Dip a sponge in water and wring it out. Hold the sponge flat on the tile, passing over the grout lines. Apply gentle pressure to the sponge and pass through the grout lines to soften. Move the sponge horizontally for horizontal grout lines and vertically for vertical grout lines.
  6. Rinse the sponge often and repeat steps five and six for completion of the grouting.

Tips & Warnings

  • If the grout is old and stained, replace the entire shower grout. Cut the grout lines with the saw deep enough so that it can contain all new grout.
  • You can use a 4 1/2 inches (11.43 cm) grinder with a diamond carbide wheel to the extent that there is enough space between the tiles. If you use this method, be careful not to get too close to the tile as you can break it.
  • Do not grout areas larger than 3 by 3 feet (0.9 by 0.9 m). The grout dries quickly and is extremely difficult to remove once it has dried.
handyman-services-9

Plumbing Tips for Beginners

Some homeowners avoid plumbing tasks because they can be difficult and messy. As a result, a plumber is called for minor problems that could easily be handled. Others address complex plumbing projects, often with disastrous results.

Plumbing advice

You can determine which projects you feel comfortable with. Step-by-step instructions will help you to successfully complete the projects you decide to accomplish.

Normally all exposed pipes (which are not hidden in walls) can easily be worked on by a skilled person with no special knowledge or skills. Taps and traps can be disassembled and clogs can be repaired or replaced using low cost tools. On the other hand, trips to the hardware store to get spare parts usually take more time than the task itself.

You can replace a bathroom sink quickly, but a sink in the kitchen, with its mass plumbing underneath is a big job. The plumbing and accessories that are partially hidden, like a shower faucet and supply lines may require carpentry, tile work, and other skills.

Every time you install a plumbing fixture where there was not one before (in other words, every time you need to place new pipes) a new difficulty is introduced into your task. In addition, new plumbing must meet codes and must be inspected by the local construction department.

How to do plumbing work

Often, the most difficult part of a job is not the actual plumbing, but to mediate with the obstacles. You may have to get into small rooms; Use a knee pad, canvas, or even an old pillow to make the workplace as comfortable as possible. Use a flashlight so you can see clearly.

There is a basic rule for most plumbing projects: Turn off the water and try to make sure the water is off. Keep a bucket and some old towels on hand to pick up the small amounts of water that may drip from the pipes.

Do it yourself with these plumbing tips:

If you are skilled and able to work methodically, most plumbing projects are within your reach. However, some require a lot of time and involve skills beyond plumbing. Understanding your limits and time constraints can ensure a pleasant project.

Plan your time carefully; your family will not be able to use a plumbing fixture until you have finished repairing or installing. The checklist at the beginning of each project will help you gather the necessary tools and you can assess the time needed to complete the project.

Even a well-planned project may have unforeseen problems. You might need additional tools or pieces, so working while shops are open is a great success.

Working safely and comfortably

Before performing any plumbing work turn the water off. Then open a tap to confirm that the water supply is turned off.

Be careful not to touch the electrical outlets nearby, especially if you are wet.

Plumbing can be physically demanding, because they often have to work in tight areas. Making the workplace as comfortable as possible is very important.

Hiring a professional

Even if you think you are competent to do the job, you may not have the time. Instead of forcing your family to live in a work space for days to months, it may be worth the extra money to hire someone who can get the job done quickly. More importantly, local codes may require licensed contractors to perform certain types of work.

Choosing a Plumber

For extensive work, get quotes from two or three plumbers. Ask for referrals and talk to previous clients to see if they were satisfied. Make sure the plumbing contractor is licensed and able to work in your area and that they have liability and worker’s compensation insurance so you will be protected in case of an accident.

The levels of plumber participation

Most professional plumbers prefer to do all the work themselves. However, if you feel confident that you can work on a project and need only a little peace of mind, a plumber may agree to work as a consultant.

If you are not satisfied with the work of a plumber, or if you do not understand what the plumber is doing, do not hesitate to ask questions.

Be firm but polite. Whenever possible, save all your questions for the end of the day so it will not be a bother. If you feel that the work is of poor quality or the plumber ignores your concerns, make it clear that you will not pay until you are satisfied and have all the work inspected.

Tools that protect

Most projects do not put you in danger. However, use common sense and take precautions to protect yourself and your home. If you are going to do a job that will make you wet, keep everything away from any receptacle or electrical accessory. To be safe, turn off the power at the service panel.

Make sure you know what the pipes are for each thing. In addition to plumbing pipes, your house may have gas pipes and pipes carrying hot water from the water heating system.

When working with gas pipes, turn off the gas at an earlier point where you are working and open the doors or windows to provide ventilation. Temporarily seal pipes with a cloth and keep the area ventilated.

masonry-6

The Benefits of a Rustic Fireplace

There is nothing better than being cold and being able to curl up next to a fire with a good blanket and the company of loved ones. If you want to integrate a chimney into the decoration of your home, do not hesitate to do so because the warmth and the feeling of well-being that they bring will be unmatched.

In addition to these two advantages is a heat source allowing you to use natural heat in addition to the radiators in the room that you install. To ensure heat for a few hours or days, you will need a place to leave logs or coal next to the fireplace so you don’t have to go outside to find material to source the heat.

Enhancing a room with chimneys therefore has an endless number of advantages. A rustic type is a decorative option depending on the style of your house. In rural homes or those located in the mountains this choice is the perfect solution. In addition, you can make the chimney the size you want and with features to your liking.

You must install a protective glass to prevent the flames from going outside. This glass will be of a special type that does not allow the material to overheat avoiding contact burns. In addition, it allows to remove the heat in such a way to create a pleasant and well-heated room.

Kitchen remodeling

Techniques for Painting a Faux Granite

The actual cost of using granite is much higher than the cost of painting imitation granite. Contractors and do-it-yourself remodelers know that the granite look can be achieved with appropriate materials and correct technique. First, decide on a color scheme, and then apply the paint using a spray technique, or sponge.

Color scheme

Anyone interested in painting granite must first decide the color scheme. The painter should know what colors work together and in what order they should be applied to replicate the look of real granite. Painters should use a minimum of three colors, one light, one dark and one medium. Metallics are a common choice for a base color because of the bright appearance of real granite. Using a piece of real granite as reference can take the guesswork out of choosing a realistic color scheme

Spray

Painters often use spray paint as a technique to create the appearance of granite. They must purchase an imitation granite spray finish. Apply the finish straight from the can on a properly prepared surface. Multiple layers are often necessary to achieve the desired look. Once the finish is dry, the painters apply a clear layer for brightness and ease of maintenance. This method works well for countertops, but can be used for walls and pillars as well.

Fluff

Sea sponges make impressive granite paint tools. Painters using the sponge method after applying a basecoat with a brush. The darker color is obtained by passing the sponge on the base first color, then the painters use a sea sponge to apply the next darker and finally the lighter. The lighter color ultimately acts as the dominant color. However, proper technique involves applying each sponge layer in a seemingly random pattern, so that the natural texture can emerge. The painters work with the same hand and sponge each layer in the same direction end up with surfaces that look cleaned with sponge not like granite.

Penetrate

Penetrating refers to the use of a plastic bag and a wrinkled appearance. Painters use this technique in combination with mixing nonlinear enamel paint. The glossy finish of this imitated granite finish is created by wrinkled plastic bags and helps avoid common sponge modeling technique.

Five Tips for Buying Your First Home

The real estate market offers a unique opportunity for buyers looking for their first home and have the means to do so. Prices have been reduced considerably, there are a large number of properties for sale to choose from and the negotiating ability of the parties involved is very high. However, it is worth taking into account some basic points when buying the first home.

An affordable budget

The budget is an essential element that should never be forgotten. Many buyers are not aware of how much money they have to buy a home. Falling surrender to the charms of a home that is not economically affordable is simple, but it could be a waste of time and illusion. In many cases, it can lose sight of the initial goal and budget.

Before shopping for a mortgage, make sure you have a thorough knowledge of the monthly expenses, as well as make a projection of income in the short and long term. All factors are important, whether the stability of the work that is available, the possibility of salary increases or reductions, and the mortgage index to be applied, etc. Ultimately it comes to analyzing the numbers and finding a comfortable mortgage payment.

Usually, unforeseen events always happen, so the goal is not to worry every night about having to choose between paying the mortgage or, for example, to undertake unexpected work or arrangements.

Realism first

Another virtue is to be realistic about the characteristics the future housing should bring. From your available budget, it is advisable to make a list of what would be desirable in the house you’re seeking.

Research is useful when developing this list. It is highly recommended to take a look at other houses in the same price bracket and see what features they have. For example, if the researched houses do not have a renovated kitchen or pantry, it may be logical to think that it will be difficult for the future house to have them.

In addition, the list can always be updated later, if you are lucky enough to find the house with everything you want.

Preview step to purchase

Have a professional perform a technical inspection of the property to be purchased. The objective is to determine the state of all elements of the property: mechanical systems, general layout and aesthetic-environmental conditions.

Certificates of Professional Housing Inspection can therefore be a decisive factor in closing on the property. For the first purchaser this certificate assumes the security that the property that you’re interested in is in perfect condition, or perhaps the possibility of raising a possible discount if there were any defective element.

The expenses come later

Understand the real economic cost of maintaining home ownership. At times, first-time homebuyers are so unaware of the purchase process that they forget what happens after signing the contract of sale. In reality, the most common expenses begin after the move. In addition to the mortgage payments, you must pay the corresponding taxes, homeowners insurance and possibly HOA fees. Not forgetting that maintenance problems arise from time to time. These expenses are one more reason not to invest until you’re 100% ready.