How to Build Deck Stairs

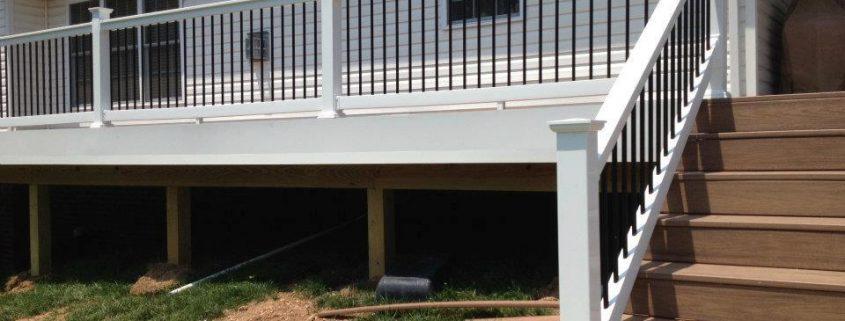
Normally you wouldn’t have to build some deck stairs, but if you end up having to, you don’t need to take a class to do it. These tips will help you build the stairs you need to access your deck.

Check with local requirements to determine the measurements you should use.  An example is a minimum width of 36 inches, the depth is 10.5 inches and the height is 7 to 8 inches in its design. The stringers should not be greater than 16 inches apart. Foot adjustments should be 6 x 6 inches of treated wood or roofing paper to prevent rotting.

  • Ideally, the staircase should be constructed with a material designed for exterior use.

Measure the height of the stairs from the bottom of the deck to the ground. Then divide that measurement between 7 or 8.  This will give you the number of steps you will have to make.

  • Adjust the height to achieve the necessary balance. Take the number of steps and multiply them by 10.5 inches. This will give you the length which includes the stair stringer. Take that length and project it out. Now you have the location for the feet of the stairs.

Place the steps on the crossbar, by means of 2 x 12 inches of treated wood, with a square. Adjusts the height to the determined height.

Cut the high with a circular saw. Use a handsaw to finish the cut.

Install the stringers by placing them on top of the overlay, outside the metal frame. Set up vertical cards using 1-inch thick screws in the treated wood.

  • By placing the stringers and bands in place, the installation of the rungs begins. Secure all with screws.

Tips

  • Check frequently the stringers with the T-square.
  • Place the boards face down to avoid tripping.
  • The wood may require you to make holes before drilling the screws in to make it easier to screw.
masonry

Applying Stucco on Concrete or Masonry

Prepare the surface of the wall. You can apply stucco directly on rigid and solid surfaces, but only if the surface is more or less rough and absorbent. If the wall does not absorb even a little water, or if there is surface contamination, wash the surface evenly. If the wall is covered with paint or sealer, or if it is too soft to withstand the stucco, try some of the following methods.

  • Acid etching
  • Sandblasting
  • Roughing machine (for unpainted and smooth surfaces).
  • Apply an adhesive agent, consult the specific instructions of the product. Do not use over water-soluble paint.
  • If you have doubts about whether the wall will support the stucco, follow the instructions in the section of the stucco wall, add the metal strip and apply plaster on top.

Moisturize the surface. Moisten the wall just before applying the first coat or plaster, preferably with a sprayer. This improves adhesion and reduces the amount of water that the wall absorbs from the plaster, preventing it from drying out prematurely. The surface should be wet, but not soaked.

  • Delay work if in the following week the temperature will be cold, warm (above 32 ° C / 90 ° F) or have strong winds. These conditions will interfere with the drying process.

Mix the scratch layer. This should be 1-part cement (with lime) and 2¼ to 4 parts sand. Plastic cement, premixed with lime, is usually easier to mix and work with. Combine it with gypsum sand from a dry material.

  • Just add the water needed to spread the plaster, otherwise the wall could fall or fall apart.

Apply and mark the scratch layer. Spread on a ¼ inch (6.4 mm) thick layer. Mark the surface with horizontal lines using a palette with slots and keep the tool perpendicular to the wall. These grooves will allow adhesion of the next layer on the surface.

  • The etching surfaces (among others) cannot be rough enough for good adhesion by this method. Instead, hit the scratch coat with a gunner, or shake it with a fiber brush or swab. This releases the air to create a more resistant adhesion.
  • Some builders combine the striped layer and the brown layer into a single base layer. If you choose to do so, plan a total thickness stucco approximately 3/8 inch (9.5 mm) for concrete, and ½ inch (13 mm) for masonry. Leave a thickness of about ¼ inch (6.4 mm) for the final coat.

Apply the brown coat after a few hours. With modern cement on a rigid surface, there is no need to wait for the scratch coat to dry completely. For good adhesion, spread over the second “brown” layer as soon as the scratch coat is rigid enough to resist cracking, usually after four or five hours. Soften this surface until it is level and ¼ inch (6.4 mm) thick.

  • The mixture of the brown layer must contain 1 part of cement and 3 to 5 parts of sand.
  • It may be useful to compact this layer by softening it with a splint.

Preserve the moisture of the brown layer while it dries. During the next 48 hours, it is important to maintain the stucco humidity. If the relative humidity of the air is below 70%, you will have to spray or moisten the surface once or twice a day. Wait at least seven days for the brown coat to dry, moisten it periodically if it begins to dry prematurely. Some organizations recommend 10 or even 21 days for drying for greater resistance to cracking.

  • In extremely hot conditions or with strong winds, place a windshield or umbrella over the area. You may even need to cover the surface dampened with polyethylene.

Apply the last layer. The last decorative layer contains 1 part of cement and 1½ to 3 parts of sand. Optionally, it can include a pigment and color. Soften it into a thin layer about 1/8 inch (3 mm) thick. Let it dry completely before painting (if desired), follow the same moisture drying instructions described above if the weather is warm.

Tips

While stuccoing a house, work on the back and sides before starting with the front. It will allow you to improve your technique before working on the walls of the facade that faces the street.

Things you will need

  • plywood
  • galvanized nails
  • nail gun
  • construction paper
  • mesh ribbon
  • nails with coating
  • hammer
  • adhesive agent (optional)
  • large bucket
  • masonry cement
  • Portland cement
  • medium grain sand
  • pigment (optional)
  • palette
  • Stucco spray (optional, but necessary to save time)

Traditional Garden Structures to Add to Your Garden

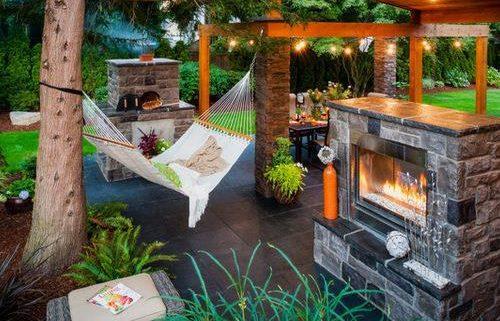
Adding a structure to your garden is an excellent way to incorporate color, style and even practicality. The right garden structure serves as a focal point to tie together a landscape. Many cultures have developed their own traditional garden constructions, so if you’re looking for functional or purely aesthetic features, there are many to choose from.

Functional structures

Many traditional garden constructions arose from practical needs, making it possible to grow plants that do not survive if fully exposed to the open air. For example, the Conservatory was initially built as an interior garden room, intended to display and store plants or even food. Like many greenhouses, it has a glass and metal structure. However, unlike a greenhouse, the main function of a conservatory was not to grow the plants, but to store them. This function is evidenced by the etymology of the word, derived from the Italian “l”, to store or preserve. As early as 1650, the word refers to food and product storage structures.

Decorative buildings

Traditional garden structures often draw their extreme designs for pure decoration. Often the constructions are designed in a specific style, very ornate, like those that evoke ancient ruins. A pergola is also a structure that serves mainly to decorate a garden. It consists of pillars that support a horizontal lattice overhead. While vines can grow on the structure, their open design offers little shade. Originally erected in ancient Egyptian gardens, modern pergolas come from Italy, where they were used in gardens during the Renaissance.

Traditional buildings of Asia

Asian gardens often feature traditional constructions. For example, a Japanese garden may feature a tea room, intended to practice the cultural tea ceremony within a tea garden. The structure has a very special setup, with certain elements related to the ceremony – including a pair of shoji doors, which must remain closed during the ceremony. One of the corners of the teahouse has a hole called a tokonoma, to hold a parchment, incense and an arrangement of flowers. The pavilion, another traditional garden structure, comes in many forms. Chinese gardens may have outdoor or enclosed pavilions; an outdoor, six-sided pavilion is a traditional design.

Unique structures

Several traditional garden buildings have unique shapes or made of unique materials. For example, the strombrella consists of a covered structure with a swing below, designed for two people. The Stromboli often has intricate “gingerbread” style carpentry along its roof line or support beams. The wattle is unusual, not because of its design, but because of the construction materials it uses; popular in medieval gardens, it implements small branches, branches and reeds to create a woven framework for walls and ceilings. A slightly more substantial version of the structure uses mud to hold the branches in place.

handyman at home

How to Paint Over Varnish

Furniture and walls that have been previously painted with varnish have a stained surface. At some point, you may decide that you want to paint over the varnish. The stained surface is difficult to paint. Often, the paint does not adhere to the varnish and will easily peel off. It is possible to paint over the varnish by following these steps to prepare the surface before painting.

  1. Clean the area you want to paint completely with some liquid soap. You can clean the area with a scouring pad while you clean. Clean as much waste as you can; You want the area to be free of dust.
  2. Check if that the room where you are going to paint is well ventilated. Make sure you prepare the floor of the surrounding area so you do not damage anything while cleaning or painting. You can cover the floor with painter’s cloth.
  3. Remove any accessories from the furniture you’re working with.
  4. Sand the area or piece of furniture with fine sandpaper. This will give the surface a texture so that the paint can adhere. Try sanding in the direction of the grain. Completely clean off any residue.
  5. Fill the scratches in the wood with a wood filler. Sand until it is dry.
  6. Clean the area or furniture you want to paint again with paint thinner or denatured alcohol. The surface must be clean and dull and these products will make that happen.
  7. Apply the first coat of paint. If the varnish is very dark and difficult to cover, you may want to apply 2 coats of paint. It is better to use a base coat over the varnish. The oil-based paint will create a good surface for the paint to adhere to.
  8. Paint the area you want to repaint or piece of furniture with oil or latex-based paint in the color you want. Apply as many layers as necessary with a brush to cover the varnish completely.

Tips

Skip the previous preparation and choose to remove the varnish from the furniture. This way you will be sure that the surface is well prepared to paint. Removing the paint takes more time and patience, but you will not have to worry about the paint coming off through the varnish below. You can buy different types of products that help you with this.

Things you will need

  • Paint thinner
  • Painting
  • Paint remover
  • Fine Sandwich
  • Multi-use cleaner
  • Scourer
  • Cloth
  • Brush
  • Oil paint

How to paint with enamel paint

Enamel paint is a general term for paints that dry to a firm and durable finish. They are an excellent option to paint things that are going to be used outdoors or in places prone to a lot of wear, such as garden furniture, molding and stairs. To work with enamel paint, it is necessary to know if it is the most suitable for your project, and to learn where and how to apply it.

Select the right materials for the job

Decide if enamel paint is appropriate for your project. Enamel paints are best suited for outdoor places that are exposed to adverse weather conditions and temperature fluctuations. They are also useful indoors in areas exposed to much wear. Due to its dense and high gloss finish, surfaces painted with enamel paints are easy to clean and resistant to stains and damage.

  • If the project you are going to work with must withstand a lot of wear and tear, it is likely that enamel paints are your best option.
  • Enamel paints are also a good choice for any material that needs an impeccable finish that protects the surface. Bathroom accessories and metal appliances are often painted with enamel paints.

Choose the right type of paint. Normally, enamel paints are made from oil. The oil content allows the paint to mix and be applied more smoothly, as well as adhere to surfaces for longer. With the recent increase in demand for non-toxic paint alternatives, water-based enamel paints have become more common. Water-based enamel paints may be easier to work with, since they dry faster and are not very difficult to clean, while oil-based enamel paints last longer and provide a softer finish and are more durable.

  • The decision to use water-based or oil-based paint basically depends on your preferences. Water-based paints will serve you for basic projects, while high-strength oil-based paints will withstand constant wear and tear and rigorous exterior conditions.
  • There is a wide variety of enamel paints. Before buying the paint, check out the different types until you find the one that best suits your project.

Use good quality brushes. You should not just use any type of brush to work with enamel paints. To get the best results, choose a brush with the correct type of filament and the proper stiffness for the paint you are going to use. For example, a Chinese or ox hair brush has soft bristles that help to spread the thick oil-based paints effortlessly. When working with water-based enamel paints, it is better to use synthetic fiber brushes, as the filaments will not absorb the water contained in the paint or become soaked.

  • Some brushes are designed with angled bristles which help paint softer lines. This type of brush would be ideal to work with enamel paint since it requires a uniformed finish.
  • Use only one type of brush for a particular type of paint. For example, although you can use a synthetic filament brush with oil-based enamel paint, it is better to opt for a new brush if you have already used that same synthetic brush with a water-based paint.

Apply enamel paint

Start with a primer. Primers are special products that prepare the surfaces that you will be painting later with a last layer. A primer coat will fill the cracks in the grain of the wood, cover inconsistencies in the unfinished materials and give the paint a more uniform area to adhere to. Most of the primers are made with oil, which allows them to seal better against the wood and, after drying, helps the paint to adhere in a better way. It is recommended to use a layer of primer before applying the enamel paint, especially on interior surfaces, furniture, cabinets and molding.

  • Look for approved primers to be used on the type of surface you are going to paint. Some brands of enamel paint are even formulated with built-in primers that improve adhesion.
  • You should always use a primer when painting wood and other irregular natural elements, as well as walls, cabinets, moldings and any surface with different dimensions and textures.

Use the right type of brush. Due to their smooth and shiny consistency, enamel paints tend to make the imperfections more noticeable when painting. For this reason, it is better to use a second brush after applying the last coat of paint. To do this, make sure that the bristles of the brush are full of paint (but not saturated) and tilt the brush as you take the second pass, so that only the tips pass along the area you just painted.

  • When using the tip technique, be sure to drag the brush along the entire length of the surface you painted (following the direction of the natural grain if you are painting wood) to maintain the thickness and orientation of each smooth brush.
  • Try to make your brushstrokes as fluid and uniform as possible. Some surfaces, such as furniture and handmade crafts, will be more difficult to paint than others due to their irregular contours.

Use a sprayer. Enamel paints can also be applied with a sprayer, which is a manual device that sprays paint through small holes in the end of a nozzle. A sprayer will help you apply the paint in even layers. Using a sprayer can save you time in jobs where there is a large area to cover, such as redoing the finish of outdoor furniture and appliances.

  • A sprayer will help you work quickly on painting projects on uneven surfaces.
  • You may have to dilute thicker types of enamel paint before you can use them in a sprayer.

Apply two layers. Most experts recommend applying a second coat on home improvement projects, where enamel paints are used because they need a protective cover. Let the paint dry between layers and apply the last layer with the tip of the brush to achieve a uniform finish. If you are looking for absolute continuity, durability and color integrity, then two layers of paint will be better than one.

  • Use two layers of paint on stairs, outdoor work spaces and any surface that is regularly exposed to weather conditions.
  • Although you must apply the first layer in the most uniform way you can, it is not necessary to use the tip technique of the brush, since it must be reserved for the last layer.

Dry, clean and remove paint

Take into account drying time. Under normal conditions, oil-based enamel paints will need between 8 and 24 hours to dry completely due to their thickness. Water-based paint may become dry to the touch in 1 to 2 hours (or less). Temperature and humidity affect the drying time, so outdoor projects can take longer to dry. Freshly painted surfaces should not be handled while drying to avoid stains and other contact imperfections.

  • Whenever possible, time the outdoor painting projects to coincide with a warm and dry climate, thus avoid excessive humidity, temperature peaks or precipitation ruining the drying process.
  • Some companies produce special quick-drying enamel paint formulas that dry in only 15 to 20 minutes.

Retouch the worn paint with great care. When you re-apply enamel paint in worn and discolored areas, use only one thin layer at a time. Apply the new coat carefully to make sure the surface stays even. It is not necessary to use primer to do retouching, unless you intend to remove the previous paint first.

  • In general, it is a good idea to apply a new coat on the entire surface you are going to paint, as long as it is not too large. This way you can avoid variations in thickness or an uneven “line” in the place where you applied the new layer.

Clean enamel paint when necessary. Another benefit of the smooth finish created with enamel paints is that they can be cleaned without problems. In case an enamel painted surface gets dirty, simply wet a towel with a mixture of warm water and mild liquid detergent and clean the debris adhered to the outside of the paint. Oil-based enamel paints can be more difficult to clean and require the use of mineral spirits or diluted acetone.

  • Mineral spirits are delicate solvents that are used to dilute and remove paints. You can apply them with a brush or a damp towel. Due to their solvent properties, mineral spirits are very effective in removing dust and dirt from dry enamel paint.

Remove the paint using chemical strippers. If you have to remove a layer of paint, you will most likely need a very strong paint stripper. Chemical strippers come in a variety of forms and are one of the few methods strong enough to remove thick paint that has already hardened. Apply the stripper on large amounts instead of even coats and give the solvent time to act. After the chemical stripper has dissolved into the enamel paint, remove any remaining paint by passing an intermediate grain sandpaper over the area.

  • Chemical strippers tend to be very caustic and some types can emit toxic fumes. You must be careful when using chemical strippers if you are going to remove the enamel on your own.
  • If possible, hire the services of a professional to remove surface paint with an enamel paint finish.

Tips

  • Use primer whenever possible before working with enamel paint. Paint applied without a primer base is more susceptible to squeezing, cracking and peeling.
  • Some enamel paints have lacquer components that increase the gloss and waterproof the finish.
  • Be sure to cover the work area with painter’s tape before painting precise lines and corners.

Building a Gable Roof

The gable, also called a gable roof, is simple to design and cheap to build. Its symmetrical shape is attractive, it sheds water from rain and snow efficiently, and provides a large attic space. It is a good option in climates that receive snowfall, but it may not work as well in areas with strong winds. If you have knowledge in carpentry, you can build a gable roof of a simple rectangular structure, such as a shed.

Nail the upper plates to all the outer walls. The upper plates should consist of 2 boards of sufficient width to cover the upper part of the walls.

Measure and cut the roof beams of 2-by-4 wood. You will attach these to each pair of beams so that they resist the pressure to the outside of the beams in the walls. Install the roof beams on the top plates to span the structure from one long wall to the other.

Cut a 2-by-6 ridge shaped wood. The ridge forms the top part of the roof. It is parallel to it, as long as they are the longest walls of the structure.

Place the plates through the roof rafters. This will give you something to stand on while you arm the roof. Later you can move them to the outside of the roof.

Calculate the rise of the gable roof. You want the inclination to be between 25 and 45 degrees.

You can use the Pythagorean Theorem to calculate the slope of the roof and the length of the beams if you know the distance of the ridge board to the outer wall and the rise of the roof.

If you do not want to do the calculations for the beams, you can buy a copy of the The Roof Framer’s Bible, which contains tables that will tell you how long they should be.

Look and cut the 2-by-4 wooden beams. The beams will be attached to the ridge beam at intervals of 16 to 24 inches (41 to 61 cm) and will sit on top of the walls. The length of the beams depends on the elevation (height) of the roof and even beyond the walls you wish to extend the beams.

  • Use a miter saw to cut the beam plates so that you can attach them to the ridge beam at the correct angle.
  • Create a triangular notch in the beams in the place where they will rest on top of the walls.
  • Cut the end (the end that protrudes from the wall) so that the beams reach a point.

Make a neck loop for each pair of beams. You will connect this to the boards of the beams near the top of the roof inside, stabilizing the beams. It is not necessary to cut the neck ties.

Mount the roof. Make sure that by doing so the top plates of the walls fit well into the notches in the beams. To do this better, get an assistant and use temporary support.

Clave boards to the beams to run parallel to the ridge beam.

Cover the ends of the gable roof with the beveled boards. Leave space to install vents so hot air can leave the roof and help keep the structure cool.

Stretch asphalt paper and nail it on the boards. Start at the bottom and overlap the leaves. Cover the ridge with an additional sheet.

Add asphalt shingles and roofing nails. Start at the bottom and overlap your rows. You will also need to compensate the rows so that the edges of the tiles are centered on the tiles above and below them.

Things you will need

  • Hammer or nail gun.
  • Nails
  • 2-by-4 wood
  • Wood plates
  • 2-by-6 wood
  • Miter saw
  • Measuring tape
  • Team of carpenters
  • Ladder
  • Protection for the eyes
  • Asphalt paper
  • Roof tiles


Painting an Exterior Door

Exterior doors, especially main doors, are usually the first thing that someone notices on your house. If you want to add a touch of character to your home, painting the exterior doors is an effective and simple method to change the appearance of your space. For this, it is better to remove the door from the frame and remove the fittings, but you can also do a simpler method that consists of covering the hardware with adhesive tape and painting the door without moving it from its place.

  1. Sanding and cleaning the door

Gather the materials. Before painting the door, you will have to clean it, sand it and apply a primer, for which you will need some tools. In addition to painting and priming, you will have to gather the following:

  • 220 grit sandpaper
  • screwdriver
  • putty or sealer
  • solvents, such as acetone or mineral spirits (for metal doors)
  • sponges or rags
  • painter’s tape
  • paint tray
  • paint stirrers
  • small sponge roller with handle
  • small or medium brush

Remove the door from the hinges. Insert a flat screwdriver between the hinge and bolt blades. Tilt the screwdriver at a 45-degree angle and hit the back of the handle with a hammer. When doing so, the bolt will come out of the hinge blades. Finish removing it and repeat the same process with the other hinge.

  • Ask someone else to hold the door while you remove the hinges.
  • Once the door is loose, place it horizontally on a bench or a pair of easels.
  • You can leave the door in the frame, but this will make the painting process more complicated.

Remove the fittings. Use a screwdriver to remove the fittings from the door you are going to remove. Among these are the handles, latches, hinges, mail box, latches and lock mechanisms. You have to be careful not to damage the fittings.

  • You may need a Philips screwdriver or a common flat screwdriver to remove the fittings.

Clean a metal door. To make the surface as clean as possible, apply acetone or mineral spirits to remove dirt, grime and old paint residue. Soak a rag with acetone or mineral spirits and rub the surface of the door.

  • This step is not necessary if you are going to paint a wooden door.


Prepare the door. In order to create a surface where the paint can adhere, it is important use sandpaper on the surface of the door. This will also get rid of dirt and debris from the surface. Go over the entire door with 220 grit sandpaper and make sure you work the corners and nooks.

If you are going to paint a metal door, wait until all the aromas of the solvent disappear before starting to sand.

Clean the door. Before painting your door, you must clean it to get rid of dirt and dust. Use a brush and vacuum the corners and recesses of the door.

  • Use a slightly damp cloth and clean the surface of the door to get rid of any remaining dust that remains after vacuuming.
  • Leave the door aside to dry for about an hour.
  • If you clean a metal door with a solvent, wash it with a solution of water and a few drops of dish soap. Then rinse it and let it dry before continuing.

Use tape and paper to cover the fittings and windows. You must protect the parts that cannot be removed, as in the case of windows. Cover windows or other items with newspapers and attach them with painter’s tape.

Make sure the tape or paper covers each surface you do not want to paint.

If you leave the door in the frame, cover the adjacent walls, the frame and the hinges.

  1. Paint and apply primer

You will need a special exterior paint, since an exterior door is exposed to different elements of nature than an interior door. The best option is an acrylic or water-based latex paint, or an oily alkyd based paint.

  • Water-based paints tend to dry faster than those that are oil based, but the latter have better protection for the surface under the paint.
  • If your door currently has a water-based paint, you will have to apply another layer of the same type of paint. But if you have an oil-based painted door, you can use either of the two options.
  • Make sure that the paint you choose is formulated for exterior surfaces.

Before painting the door, you will have to apply a layer of primer, which will help the paint to adhere more easily to the surface and have better coverage. You can use an oil-based primer for oil-based or water-based paint, but if you apply a water-based primer you can only use a water-based paint.

The color of the primer should be neutral or a shade lighter than the color you are going to paint the door.

Choose the right day to paint. Ideally, the temperature should exceed 50° C (10˚ C). Also, if you’re going to paint outdoors, choose a day when the sunlight does not fall directly on the door. You will have to make sure that there is no rain, wind or too much humidity.

If it is very cold while you paint, the paint will not dry. If there is too much sun or too much wind, the paint can dry too quickly, while moisture can prevent it from drying properly.

Apply primer to the door. Open the can of primer and mix the contents with a paint stirrer. Pour some of the product into the paint tray. Use a brush to paint the moldings and details that surround the split panels. Then use the roller to paint each panel. Continue until all the panels are covered. With the roller, finish painting the rest of the door; the upper part, the sides and the lower part.

  • If the door is only a flat sheet of wood or metal, use the roller to paint the entire surface.
  • Once the primer dries well on one side, flip the door over and paint the other one.

Paint the door. Fill a clean paint tray with the paint of your choice. Use a brush to paint the moldings first and then the roller to paint the larger panels. Once all the sections and panels are painted, finish painting the rest of the surfaces.

Let the paint dry before turning the door over to paint the other side.

Apply a second layer if necessary. If you must paint a second layer, check the instructions for use of the product to know the drying time. Water-based paints are usually dry in a couple of hours, while oil based can take up to 12 hours.

  1. Finishing up and rehanging the door

Remove the tape. As soon as you finish applying the last layer, remove the painter’s tape that protects the window and other adjacent surfaces. Pull the tape towards you at a 45-degree angle to take it off.

  • It is important to remove the tape before the paint dries. Otherwise, it could be dried on the tape and peel off when removing the adhesive.

Allow the paint to dry completely. Before replacing the fittings and installing the door in the frame, it is important that the paint is completely dry. Otherwise, the surface could be dented, stained or peeled.

  • Check the instructions for use of the paint to know the specific drying time. For most paints, you must wait around two days before reinstalling the door.
  • Generally, when the paint no longer feels damp to the touch, it means that you can now put the door in place.

Reinstall the fittings. Once the paint dries, replace the hardware before installing the door in the frame. The hardware is the handles, the knocker, the mail box and any other element stuck to the door before starting.

Reinstall the door. As soon as you replace the hinges on the door, you can install it in the frame. Align the hinges to the corresponding place in the frame. Insert the bolts into the hinges and tap them with a hammer or the handle of a screwdriver to secure them.

It’s easier if someone helps you. One person can hold the door while the other puts in the bolts.

Tips

While you paint the door and wait for it to dry, you can use a back door or a piece of plywood to replace it to keep the bugs and elements of nature out of the house.

To paint a door without removing it from the frame, clean it and prepare it one day, apply the primer the next morning and allow it to dry to dry the door at night. Finally, apply the paint the next morning.

If you are going to paint the door without removing it from the frame, do not close it until the primer or paint is completely dry (check the instructions for use to know the exact drying time). The paint may take between 4 and 8 hours to dry enough to close the door.

How to Apply Stucco

Traditional stucco is simply a variety of concrete, which is applied in several layers to create a strong adhesion to the wall. Stucco is popular for many reasons, including its low cost, resistance to earthquakes and its permeability in humid climates. This article explains the exterior applications of stucco on wooden or steel frames, or on a solid wall. This project is truly advanced, but within the range of an experienced amateur in domestic do-it-yourself jobs.

Apply stucco to a framing wall

Check the weather forecast. The ideal climatic conditions to apply stucco are a cloudy day with little wind and temperatures of 50˚ to 60˚ F (10˚ to 16˚ C).  Delay work if the forecast predicts the temperature will be below 40° F (4° C) or above 90° F (32° C) over the next week.

Place the coating materials. You can put the stucco on any rigid material attached to the support beams. The most common surfaces for stucco are plywood, oriented chipboard (OSB), cement slab and gypsum exterior cladding. Be sure to follow the building codes of your location while installing the siding material.

  • It is possible to stack over an open frame, but it results in a less level and structured wall. If you wish to follow this path, place nails in the middle of the beams, accommodate vertically in intervals of 5 to 6 inches (13 to 15 cm). Extend a wire horizontally along the protruding nails.

Cover the plywood with two layers of construction paper. Most codes require at least two layers of “D-grade” construction paper or a water-resistant equivalent barrier. You can use asphalt felt or some type of waterproof membrane, but do not use waterproof plastic membrane that is not designed for stucco. Overlap the paper by at least 4 inches (10 cm) and fix it with roof nails.

  • Since most codes do not require it, an air gap between the two layers is recommended to prevent wall decay. One way to do this is by placing a mat between the two layers.

Install perforated channels and trim. Install the trim as a plaster stop at the corners of doors and windows. Install the perforated channel at the base of the wall for better drainage.

  • For this project, these two materials are not interchangeable.

Join a metal ribbon. Selecting the right ribbon and installing it properly is one of the most difficult parts of this project. It is recommended to consult with an expert. In most cases, you must nail or staple the batten to the joists (not the liner) at intervals of not less than 7 inches (18 cm). Overlap the slat at a distance of at least ½ inch (1.25 cm) on the long side and 1 inch (2.5 cm) on the end, but no more.

  • In all exterior stucco applications, you must use a hot dip galvanized G-60 lath.
  • Choose a batten with at least 6 mm (¼ inch) mesh or build a non-mesh batten using battens or nails. Without this mesh cover, the stucco will not adhere properly to the ribbon.


Install control joints. To avoid cracks, divide the wall into rectangular panels using control joints, separate them by no more than 18 ft (5.5 m). Also install control joints where there are uneven walls. If the batten is expanded metal (instead of stucco mesh), cut it behind each control joint to completely separate this rigid material from the panels.

Build panels in the most square shape possible and no more than 144 sq ft (44 sq m).

Mix the scratch layer. Mix the scratch coat with 1 part of cement and 2¼ to 4 parts of gypsum sand. If you are using type I Portland cement, you will have to add your own hydrated lime: count the final cement and the lime mixture as “1 part cement”. Mix with enough clean water so you can remove the stucco, no more.

  • The aggregate in the cement must be clean and well formed.

Remove the scratch layer on the ribbon. Apply the scratch coat at a 45˚ angle, pressing firmly on the ribbon. This layer should be ⅜ inch (9.5 mm) thick.

  • It may be easier for you to use a palette in some parts of the application.

Lightly mark the scratch layer. This first layer is called a scratch layer due to the horizontal flat lines marked with a palette of grooves. This will ensure a good fixation with the next layer.

Dry the scratch coat using moisture. When stuccoing on a beam structure, the coarse striped layer should dry for 48 hours. During this time, it is important to protect the stucco from drying out. Moisten the stucco twice a day unless the humidity is above 70%. Protect the wall with a shield if necessary.

Mix and apply the brown coat. Mix another batch using 1 part cement and 3 to 5 parts sand. Apply another layer of 3/4 inch (9.5 mm) stucco and spread to level the thickness up to 3/4 inch (19 mm). When the brown coat loses its shine, rub it in a circular movement to smooth it.

Moisten to dry for at least seven days. The first 48 hours are the most important, but you must continue spraying or moistening during this time, whenever it seems that it is going to dry.

Cover with the last layer. This last layer of 1/8 inch (3 mm) determines the texture of the stucco wall.  Apply and soften as you did with the brown layer, but this time use 1 part of cement with a ratio of 1 1/2 to 3 parts of sand. You can buy a finish that already has coloration or finish the coat and paint it when it has dried for at least a week.

  • Color stucco finishes are best in pastel shades.
  • If the finish has color, moistening the surface during smoothing can cause mottling. A wet layer can make the color more uniform.
  • Many decorative textures are possible when applying this final layer. Measure the façade from at least 30 ft (9m) before installing it to the eye.

Making Improvements to the Outside of Your Home

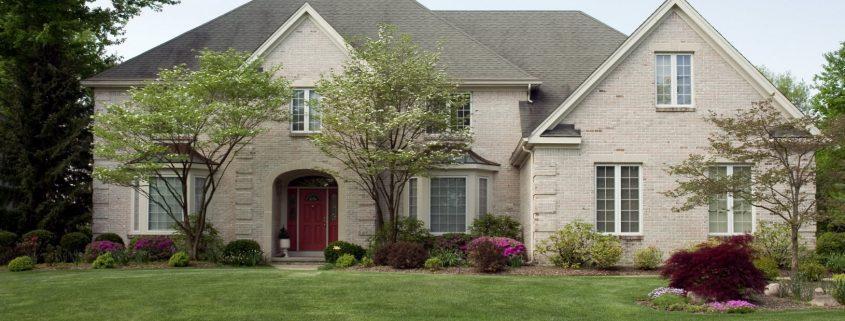
When you look at the exterior of your house you want to see a beautiful and striking facade. It is not easy to maintain the exterior of your house, but by improving the façade of your home you can even increase the value of your property. Everything depends on you, maybe you want to sell your house in the future. Here are some tips to get started. Before spending thousands of dollars on plants and gardening items, make sure you start with the basics first.

Pay attention to the roof of your house. The roof is an important part of your house and is often forgotten when improvements are made. Check that there are no missing tiles and that the roof is sealed everywhere. A fresh coat of paint is never a bad idea. Also check the gutters and make sure there are no blockages or cracks.

Check the gates. If they are wooden gates, use a layer of varnish to make them look like new. If they are electric, make sure they work without problems. Check the rails of the gate and that the grass or plants do not block the road. Iron or steel gates also need a coat of paint from time to time.

Check the windows and door frames. Ensure that they are not broken. Varnish or paint the wooden frames so they do not rot or break. Place window shutters on the window frames to protect the wood from the sun.

Fix cracks in walls and clean them before applying paint. Use the correct paint for your walls so it lasts a couple of years. All you need is a paint roller and paint. With a little patience you can perform this task for yourself.

Check the garage doors. Varnish or paint the doors if necessary. The hinges have to be oiled or lubricated if they do not move well or have a bad sound.

Try the water spickets. Check that they work well and that they do not leak. Brass or silver spickets can be washed with soap and water to remove dirt and grime that accumulates. You will also spend less by just cleaning them.

Take out the trash and clean the yard. Everything you do not use can be sold or thrown away. Clutter can give a bad impression of your home and makes your property look dirty and poorly maintained.

Clean exterior windows if they are dirty. You can clean them with water and vinegar if you do not have cleaning products. If they look bright and clean, your house will look better. Always check them, especially if you live near a sandy or dirty place.

Maintain the grass and yard.  Make sure the grass is cut and not long. Rake out the leaves and water the plants.

Tips

  • Now you can spend more time and spend money on your garden and lawn to create the fairytale garden you always wanted. It does not make sense to have a nice garden if you have walls with cracks or broken windows.
  • It is important to achieve all the basics first and make sure everything is in perfect condition.
  • Each step mentioned above can be done with effort and time. With patience and care, you can improve the exterior.
  • If you have time and resources, you can do the steps slowly until the entire property is well maintained.

The Best Tools for Working with Wood

Becoming a carpenter takes years of education and training. Most people can not only choose the tools they need to do the work and start building a masterpiece. Some woodworking tools are better for certain types of work, while others require only a few pieces.

The basics

Carpenters need to have an arsenal of tools for most jobs; however, the need for more specialized tools as the difficulty of projects increases. All carpenters need to have a strong hammer. Hammers with a wood handle are more stable than those with a metal handle and are less likely to break. For finishing work, a lightweight hammer can also be used. Carpenters should have a variety of screwdrivers in different sizes in their tool box and must also have a drill with drill bits and accessories of different sizes. Companies such as Stanley and Cobalt make robust hand tools while Black and Decker, Dealt and Craftsman offer high quality tools and accessories.

Miter saw

Miter saws are used for a variety of projects that include timber. This tool allows a carpenter to make a perfect cut at an angle of 45 degrees so that the pieces can be put together at corners. These are most often found in furniture and cabinetry work but are also used for installing molding. Miter saws can be costly, however, there is a more affordable option. A battery powered miter box can be purchased for a fraction of the price of electric miter saw and does not require a power source to operate. Bosch miter saws are considered the elite in terms of power and precision.

Milling machine

Mills have a wide variety of uses and make the work of a carpenter easy to complete. These can be used to create or join together joints but are more often used because of their ability to carve intricate designs into wood. Instead of completing the finishing work and carving with a hand tool, carpenters today use routers to speed up the process and make more accurate sculptures. With the first models difficult to use, routers have undergone many changes in recent years. Today they are light and have numerous accessories making the use of the tool easier than ever. Milling incisions are common and can be used to make holes in the center of a piece of wood.

Biscuit joiner

Joining two pieces of wood can be difficult for many carpenters. While there are several methods of bonding, one of the easiest and most widely used methods is the use of a tool known as biscuit joiner. This machine cuts a small sliver of wood off the edge of the two parts to be connected. The cut is large enough to contain a small round disk called a cookie. When the cookie is inserted into one, you can easily connect the two pieces of wood; the cookie provides a solid bond between the pieces. Only a few companies produce biscuit joiners and Porter Cable Tools has the widest selection.

Sander

No carpenter wants to present a finished project that has sharp edges, splinters or rough patches. The traditional role of sandpaper or sanding block can be used for small projects, but larger projects require a motorized sander to complete the job faster. Sanders can be equipped with sandpaper of different thicknesses depending on the project. Orbital belt sanders are the most common types of power sanders acquired by its versatility. Large jobs like sanding a floor may require the use of a drum sander. Sanders are manufactured by many companies such as Skill, Hitachi and Black and Decker.