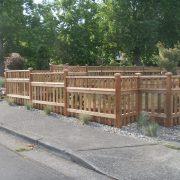
DIY Wooden Fence Installation
Installing a fence is a good way to prevent pets from escaping the garden and have a safe area where children can play. A privacy fence will increase the value of your property and provide further security. Within days, any man skilled in “do it yourself” projects can install a wooden privacy fence along the perimeter of the garden.
Instructions
- Consult with utility companies and requests them to mark underground wiring and pipes around your property. This allows you to visualize the place where the supply lines are so you do not bump into them when making the holes for the posts.
- Place a wooden post at each corner of the fence. Hold a tight rope stretched between these poles. With a tape measure, mark the location of the posts which should be spaced 8 feet (2.4 m) on center.
- With the rope stretched between the poles, insert a stake at every mark.
- Rent a gas driller to make holes in the ground that correspond to the posts at a depth of 36 inches (90 cm).
- Place a pressure-treated 4 x 4 x 8 feet (1.2 x 1.2 x 2.4 m) on each corner post. Pouring cement into the post hole. Tamp the cement once you consider that the post is straight and plumb and add water around the post; the concrete will absorb it and the pole will be installed. Use a level of 4 ft. (1.2 m) to make sure the post is vertical.
- Tie a string between the outside of each post. This will provide a guideline for placing the remaining poles and ensure proper installation of the fence.
- Set three boards of 2 x 4 x 8 (0.6 x 1.2 x 2.4 m) between the posts. Place a 9 inch (22 cm) from the floor and another on top, added another in the center of both boards. Use a level to ensure that they are level and screw them to the posts 4 x 4 ft. (1.2 x 1.2 m). For this step you’ll need an electric screwdriver and 3 (7.5 cm) outdoor inch wood screws.
- Install a stake in each corner of the fence. Place a screw on top of all the pins. Stretch a string tightly between the screws. This will serve as a guide to determine the height of the stakes.
- Screw the stakes tables 2 x 4 feet (0.6 x 1.2 m) with two 2 inch (5 cm) outdoor wood screws per table. Set ¾ inch (2 cm) screws to prevent lateral slipping. Leave a gap of 1/8 inch (0.3 cm) between the stakes to allow for expansion and contraction. If necessary, cut the stakes to the desired height with a miter saw.
- Check that the wooden stakes are plumb by using a carpenter 4 foot (1.2 m) level.
Tips & Warnings
- Apply a finish to good quality exterior wood to protect the fence. This will provide greater duration.
- Use safety goggles when using power tools.


