tree-services-12

Average Tree Removal Costs

If you have a large tree in your yard you want to remove, you should consider the total costs involved. If you have free time, and friends to help, you may be able to cut and remove the tree yourself.   Make sure you consider the cost of heavy equipment rental needed. Hiring a service to take care of the tree in your place can be more efficient and possibly less expensive in the long run.

Process

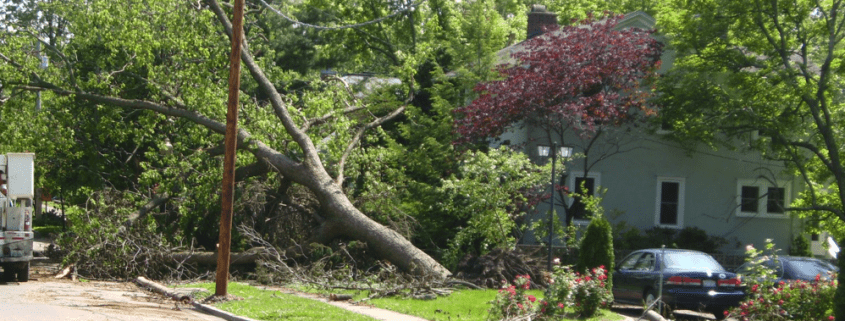
Always examine where your tree is before you start any removal procedure. The type and arrangement of the tree is very important: notify the local government and utilities first. If the tree spreads its roots deep into the soil, it can be a threat to the sidewalk and the water network. If the tree is in front of your house, it could be on the city’s property, and there is a good chance that they would remove it for you for free. However, if the tree is located near your home, it should be tied up and taken down in sections, which can increase the cost when hiring a tree removal service.

Average trees

Medium sized trees can reach 60 feet (18.2 m), but may also include smaller heights of 30 feet (9.14 m). Alder, rubber trees, wild apple trees and many other varieties fall into this category. In 2010, these trees could cost as much as $900 to remove the larger versions, but smaller ones can cost only about $175.

Larger trees

Trees 60 to 80 feet (18.2 and 24.3 m) in height are generally regarded as large trees such as red pine and oak varieties. Removing these trees can cost anywhere from $400 to $1,000. Removing larger trees, which reach as high as 100 feet (30.4 m) such as the American ash, bur oak and maple sugar, can cost over $1,500.

Additional charges

Several tree removal procedures may cost more, depending on the services you want. For example, if you want your branches and trunks are converted into chips, tree removal companies usually charge about $100 an hour for mulching services. It could also cost extra, between $50 and $300, if the company takes the wood or chips from your home. Some businesses will just cut the tree to a stump, but if you want it completely grinded and out of the yard, it can cost several hundred dollars. If you want to make an inquiry before we start, an arborist can charge up to $125 an hour for their consultation fees.

Home Decoration 8

Tips for Drilling into Drywall

Plaster walls do not present a challenge to drill into them, however, you have to be careful when drilling drywall to prevent damage or drilling in the wrong place.

Posts

A metal detector device can work well on a wall with plaster, but does not determine the location of studs behind drywall. You may be able to get close to the location of the studs in the wall using one of these devices.  Once you find a stud, you can estimate that the others are about 16 inches (40.64 cm) apart from each other. If you’re still unsure about the exact location of the studs, drill pilot holes in the wall with a small mason bit. If you feel that the drill bit touches an air pocket behind the plaster, this indicates no studs. If you encounter resistance, you hit into a stud.

Perforated technique

When drilling plaster, you cannot use excessive force because otherwise you run the risk of forming cracks in the drywall and the plaster crumbling. This means that if the drill has a hammer motion, do not use it, although the plaster may resist at first drilling. You must drill slowly at first, because the plaster is slippery on the surface and the drill can jump through the wall, entering at a wrong point.

Masking tape

An old plaster wall may collapse or break when penetrated with a nail or a drill, unlike new walls. The outer surface of drywall is where it would start to crumble, as it is broken by the force of penetration. To combat the tendency of the plaster to crack and crumble, place a piece of masking tape in place where you want to puncture the wall. The tape keeps the drywall in place, instead of leaving it to break apart and crumble. When you have finished drilling, remove the tape from the wall without fear of the paint coming off.

Enlarge the hole

You can widen the hole you drill into a plaster wall if you need one wider to fit a stand. Sometimes the biggest drill bit you have available is smaller than the hole you need to use to hang an object on the wall. In such a situation, you must insert a long, thin instrument that fits inside, like a knife or a screwdriver. Use the tool to that will make the hole the size you need using circular motions against the sides of the hole.

bedroom redesign

The Best Plants to Decorate the Home

The number of advantages plants can offer when using them as part of the decoration of the house is unquestionable. In addition to their decorative touch, plants help bring joy to the whole place and create a truly positive atmosphere at home. There are a number of plants that are perfect when decorating the interior of a house and that you must have without a doubt.

Take good note of these wonderful plants to give a natural and colorful touch to your entire home.

Ferns

Ferns are one of the plants most used when decorating the interior of the houses. It is a pretty and showy plant that helps give joy to any room of the house in addition to purifying the air and contributing much positive energy to the whole environment. The fern gives a lot of game to the decoration of the house and you can use it to highlight the corner of a room or hang it inside the bathroom giving it a very interesting natural touch.

Cactus

Cacti are one of the best plants when it comes to decorating the interior of the home. Cacti store water in their stems so they do not need as much care as other plants because they do not need to water them in the usual way. Another great advantage of cacti is that they blend in perfectly with any decorative style you choose and most you like.

Orchids

Orchids are wonderful plants that thanks to their flowers can give an elegant touch to the whole house. The only problem with this type of plants is that they need much more care than other species. However, you have a great variety of orchids that will allow you to enjoy its visual aspect in addition to the wonderful fragrance and aroma that its flowers gives off.

Photos

Photos are quite popular plants that are usually present in the decoration of many houses in this country. They are fairly resistant plants that grow without problems despite low temperatures and little sunlight. When you use them in the decoration you can choose to have them in pots or hanging plants. They are plants that grow quiet nicely and are ideal for having them in areas of the house such as the bathroom or the terrace.

Cyclamen

The cyclamen is a plant that will give great color and joy to the whole house. It is a plant that requires a series of special care, especially referring to irrigation. They need a little sunlight to be able to grow without problems and it is advisable to place them in a humid area of ​​the house. The cyclamen draws attention for its wonderful and colorful flowers that help to enhance the decor of the house.

Focus

The focus is another ideal plant to have inside the house and bring some life to the space in question. It is a large plant that grows in a uniform way that you can put in areas of the house like corners or the sides of a doorway. The focus adapts to all types of environments and does not require much care so you will not have any problems when enjoying this a plant.

Geraniums

Geraniums are another of the plants most used to decorate the interior of the house and it is that they are very resistant plants while being very easy and simple to care. Geraniums should receive enough light from outside and it is not necessary to water them very often. What most draws the attention of the geraniums are their wonderful flowers that can be of different colors as is the case of red and white and that will help to give a colorful area to ​​the house.

Lavender

Lavender is a wonderful choice to decorate the home as well as provide a pleasant aroma throughout the house. The flowers are violet and are perfect to give color to the interior of the home. Do not hesitate to put a little lavender in your house as it will help you to aromatize the whole house and purify the negative energies and create a clean and healthy environment.

I hope you have taken very good note of the best plants for decorating the home and choose the ones that you like. Remember that plants will help you give life and joy to the whole house and are a very important decorative element within it.

Vinyl Replacement

Tips for DIY Draft Inspections

Perhaps the best way to identify the sources of energy wasters in a home is a professional home energy audit, including a blower door test and thermo graphic inspection. Here, Erik Lindberg, a specialist in home energy with Enervation Inc., comments on one of the main areas included in the audit: the furnace and heating system. And DIY Home Energy Savings, gives advice for some home energy tests that homeowners can do themselves.

Furnace Inspection

It is important to get your furnace inspected every two years professionally – or at least every few years. Some people even opt for an annual inspection and tuning. Furnace maintenance includes removing dust from the air tubes, and cleaning the burners and ensuring that they are operating safely and efficiently. Make sure the furnace filter fits into a slot cover. Home furnaces are equipped with replaceable air filters designed to remove dust and other impurities from particles in the air as it circulates through the heating and cooling system. Filter openings that do not have an indoor allow air to infiltrate the furnace system, and this partially defeats the purpose of the closed trunk-line system. A filter can also be a security issue.

Air filters are designed to allow air to flow through in one direction. When installing a new filter, make sure it is installed with the air direction indicator pointing in the right direction – with the arrow pointing toward the furnace. The ductwork in heating and cooling systems should be maintained as well. Some owners choose to have ducts cleaned professionally. According to Erik, duct cleaning is a measure that will probably do little to improve energy efficiency, although there may be other benefits. Making sure that the joints are sealed ducts is useful. High quality expensive paper tape is suitable for sealing ducts. In warm weather, ducts that run through attics should be sealed very well.

To carry out a Do-It-Yourself Home Energy Audit requires a large window fan and incense.  First, make a list of the areas of your home that have the potential of drafts. Then close all exterior doors, windows and flues of the chimney. Turn off all combustion appliances such as gas burning furnaces and water heaters. (Remember to turn them back on when you are finished with the audit.) Turn on all exhaust fans (generally located in the kitchen and bathrooms). If you do not have exhaust fans, use a large window fan to blow air out of the house. The movement of fans increases infiltration through cracks and leaks in the building structure – making them easier to detect. As DIY professionals, you can use incense sticks lit to locate the source of the leaks. Air currents will cause the column of smoke to waver or flow in the direction of air leakage.

Tips:

  • As an alternative to the use of incense smoke, you can use your damp hand. Air currents can be detected because they feel cold damp skin.
  • Check air movement around switches and sockets – often overlooked as sources of air penetration.
  • Check shutters to make sure they fit properly and do not break.
  • Inspect all windows and doors to make sure they sit tight in their frames. See if you can feel air flow while they are closed. Movement indicates possible gaps that may be the source of air leaks. Look for visible daylight through cracks around door frames and windows.
  • Once you have located the problem areas, you will have to take steps to correct or you will continue lose money each month on utilities.

How to Clean Tile Grout

The maintenance and stain removal in the grout of your tile floors is a complex task and may even be exhausting, as in cases where you have large surface like a tiled wall or floor that have retained dirt and stains over time. To make the job of cleaning as painless as possible, you need the help of some kind of solution made for the task.

Chlorine bleach

First, remember that you should never use chlorine bleach on colored grout because your surface will be damaged from the color will fading. You can only use chlorine bleach on white grout. Also consider that in general, chlorine has its pros and cons. It offers an incredible effectiveness in cleaning stains on grout, but is also highly corrosive and releases some vapors. If you’re using chlorine bleach, dilute it well (“Good Housekeeping” recommends using 3/4 cup bleach to one gallon or 3.7 liters of water) and wearing gloves. Pour on to the grout lines and rub quickly with a stiff brush. Then rinse well.


Oxygen bleach

Oxygen bleach is also used to remove stains, but it is much safer to use and more natural than chlorine bleach, which contains hydrogen peroxide. The expert in home improvement, Tim Carter (“Ask the Builder”) is considered the best and final cleaner for grout joints. Best of all, it can even be used on colored grout without damaging them in any way. If you use oxygen bleach powder, just add water and apply it as you would chlorine bleach or any regular cleanser. Just do not forget to wait at least 15 minutes before scrubbing and rinsing, as this type of cleaner releases natural ions and requires time to act.


Sodium bicarbonate

Another recommendation from “Good Housekeeping” magazine is baking soda. It is known that this all-purpose product can effectively remove stains both white and colored grout and can even kill any type of mold growing on the surface of your tiles. Mix 3/4 cup of baking soda and 1/4 cup water in a bowl to form a smooth paste. Apply the paste to grout joints and rub firmly before rinsing.

PH neutral cleaner

A pH neutral cleaner has little effect when it comes to removing stubborn stains, rust and mineral deposits, but can do wonders to remove accumulated dirt in grout joints and for routine maintenance on your floors and tiles. In fact, to clean the area once a week with a neutral pH cleaner, you can prevent the formation of stains and mildew buildup. Many stores sell supplies for home cleaning products labeled as “neutral pH”, but you can use any pH balanced cleaning solution, including mild dishwashing detergent. Consider this type of cleaning as a preventive solution instead of thinking of them as stain removers.

Decorating the Home with Picture Frames

If you are aware of the new trends in home decorating, you know that decorating the home with picture frames is something that has always been popular, but today it’s done in a different way.  We are not going to just put a photo frame with an image and mix it with other frames without any sense, today the final collage is what matters.

We will give you a few ideas to decorate with photo frames that can be arranged in a very original way, with or without photos, with decorative details and many varied colors. Creativity is the new trick to decorating differently, avoiding use of photo frames in the traditional way.

Decorate only with photo frames

There is a trend that is very interesting to try to use picture frames as decorative items in themselves, not just to frame a photo. In this case the frame becomes the protagonist and must be given the most importance. When decorating with photo frames we must choose frames that are similar in tone and style, that is, modern frames with simple shapes with varied and elegant outlines. They have to have something in common even if they are not the same size or color to create a homogeneity that is good when decorating.

Photo Frame Compositions

Right now there is a trend that we see in many homes, in which different compositions of photo frames are used. In these arrangements you can look for symmetrical shapes, but the most common feature is that the set is asymmetric, so that it is more natural and original. You can try to buy different frames in different sizes and tones but in a similar style, and make configurations by rearranging until you find the positions that you like. This is a creative way to decorate the walls.

Original Home Frames

Among these photo frames we can also find original frames. There are attractive designs full of details, and others with intense color or decorated with feathers, glitter or other crafty items. A photo frame is no longer a way of framing a photo to become a decorative object in itself, so it becomes very important when decorating spaces.

Mark DIY

Many of picture frames can be modified ourselves to create totally new appearances. You can paint them colors that match with the decorations in the space if you do not find the exact tone. You can also add stripes or glitter to give a bright touch. Other frames can be decorated with feathers, buttons or branches. There are a thousand craft ideas to create different photo frames and make them personalized. If you see that the frames you have are boring you, you can look for inspiration on the web. There are craft shops where you can find all kinds of spray paints and accessories to create frames for you.

Vintage Photo Frames

Vintage photo frames have a lot of charm, so if you find some, do not let them escape. Mixing several vintage frames of different shapes is very nice. If you want to add some color, you can add paint with worn effect so that they continue to have that vintage look. This style is a trend sought today, so it’s time to rummage through the attic to find things like these.

Decoration inside the frames

In general photos are put in frames and give a homogeneous look, that is, if you have all black and white photos for example. But today we do not have to limit ourselves to only photos, but you can decorate the frames with other things, with wallpaper and colored stamping for example. They are different and special ideas that serve to create a new and more original decoration. Inside you can also put nice decorative sheets, which are trend and come in many different designs and colors.

Composition of colors

When decorating with frames on the walls, you must take into account the tones that dominate in your decoration, so that the set is beautiful. If there is a color in the room that is more prominent, you can use base tones such as white and gray and add that color in small brush strokes. You never have to fall into the excess when decorating with colors, and that’s why it’s better to add just touches than to overdo it. And you know, if you do not find frames in the right color, you just have to buy spray paint to make them the color you want.

Low Cost Ideas for Kitchen Island Remodeling

Remodeling your kitchen can change the whole aspect of your home. But even if you do the remodeling work yourself, it can cost anywhere from $5,000 to $26,000 according to the Cost Helper website. If you do not have that kind of budget, then consider inexpensive remodeling ideas for your kitchen island. Giving your kitchen island a new look will affect the décor of your kitchen in general, at a fraction of the cost of remodeling a full kitchen.

Paint

Before you go out to buy latex or semi-gloss paint to use on your Kitchen Island, you should devote time to planning your paint job first. Find a color scheme that matches the rest of your kitchen or find a color scheme that would fit in your kitchen. Remove as many pieces and components from your island as possible to make sure you are going to paint the entire island. Use a primer to help the paint stick to the slippery surface or take the time to sand the existing finish.

Paneling

Panels comes in a variety of designs and colors, which makes it a viable option for a kitchen island project. Wood paneling is a form of thick paneling that can look good on the surface of the island. It can cover the entire island base with a new cladding surface, or you can choose only select parts. Consider changing the island hardware to improve the look of the new panels.

Little changes

Sometimes a combination of small economical changes can combine for a significant impact on your kitchen island. If you have doors to your island cabinets, then consider creating an open island design by removing the doors. If your island does not have a towel rail, then install one, or, if you do not already have one, then install a second rack on the other side of the island. Put small shelves at each end of the island or a wire rack for additional storage space.

Worktop

Replace the existing top with an inexpensive laminate counter that looks like marble or granite. Instead of replacing the countertop, you can paint any color you would like. To paint an kitchen countertop, start with a primer coat that is neutral. A kit for painting a kitchen countertop comes with two substances that are mixed together to create an epoxy. Apply the epoxy to the dry primer and give it 24 hours to dry.

Removing Coffee Stains from a Carpet

You walked with a cup of coffee, stumbled and spilled it all over the carpet. These spots are unsightly and make the carpet look dirty and possibly older than it really is. Do not worry! You can clean up the mess immediately. Follow these steps to remove the stain.

Instructions

  1. Dry the area with a cloth and clean to absorb as much liquid as possible. Start from the outer most part of the stain to prevent it from spreading.
  2. Mix one teaspoon mild dishwashing soap with one cup of warm water.
  3. Apply the detergent solution on the area with a sponge. Dry again with a cloth.
  4. Mix 1/3 cup white vinegar with 2/3 cup of warm water.
  5. Apply the vinegar solution with a sponge. Dry with a clean cloth.
  6. Clean the area with a clean sponge and clean water. Dry with a new cloth.

Tips & Warnings

  • Using a white colored cloth prevents bleeding of colors onto the carpet.
  • Avoid rubbing or scrubbing, this will cause the stain to spread.

Making Doors for Kitchen Cabinets

You can update your kitchen easily and for practically pennies if you learn how to make doors for the cabinets. It is much less complicated than you would think to replace them all. To get the kitchen of your dreams you can change the look by altering specific details by finishing or refinishing the wood, painting, or swapping out the handles and knobs.

Instructions

  1. Choose the type of wood you prefer to make cabinet doors. Some of the most commonly used are red and white oak, maple, birch and knotty pine. Choose a cut that is better resist to changes in temperature and seasons and will not swell or shrink. Make sure all cuts are equal to avoid an uneven appearance. A less expensive option if you plan on painting is plywood or wood paneling. You must ensure that the thickness of the wood you choose measure 3/4 inch (1.80 cm). You can get it at the local lumberyard or home improvement store.
  2. Measure the cupboard openings where the doors will be hung. If they are any greater than 16 inches (40 cm) by 18 inches (46 cm) it would be a good idea to put on two doors.
  3. Decide what style you’re going to prepare doors. The two most common styles are flat panel or raised panel. Flat panels are easier to make and are prepared from hardwood structure with a panel of 1/4 inch (0.6 cm) to match the wood varnish.
  4. Choose the desired width of the doors. Most styles have a width of 2 inches (5 cm) by 1/2 inch (1.25 cm) which is the most attractive. It also makes it easy to calculate how much wood you will need. Set the table saw to cut 2 inches (5 cm) and saw all the pieces once. Add 1 inch (2.5 cm) of extra length. Cut crosswise to the desired length.
  5. Calculate the length and width of the panels by subtracting 3 1/4 inches (9 cm) from the total length of the door to keep the length of the panel, then follows 3 1/4 inches (9 cm) the width of the door to keep the width of the panel. Cut the pieces with the table saw.
  6. Sandpaper the wood and apply the stain or paint before assembling. Use a 120-grit sandpaper or an orbital sander. Be careful not to sand through the veneer of plywood. Apply the finish you like and let it dry completely.
  7. Assemble the doors. Add the hinges, knobs or handles.

Tips to Remodel Your Bathroom

Remodeling a bathroom does not have to be a stressful project. A well-planned remodeling gives a homeowner the ability to transform an outdated space in the home to one similar to a spa. However, the details involved can seem overwhelming so before remodeling your bathroom, consider these tips to make sure you get a stress free renovation.

Set your budget

Focus on your budget before making decisions regarding the remodel. Your overall budget will help you determine how much you can spend on the project. Divide the budget construction into categories: floors, walls, plumbing fixtures, lighting and hardware. Setting a realistic budget prevents your remodel from getting out of hand.

Design it yourself

Save money by creating your own layout and design of the bathroom. You can find good ideas on the Internet, through bathroom retailers, or at your local home improvement store. Home design magazines’ photographs and plans are an economical source of inspiration. View model homes to get a look at the latest designs and products for the bathroom. Interior design tools for computers allow you to be the architect and designer of your project.

Change the character with paint

Paint the walls for easy remodeling your bathroom. A fresh coat of paint in a different color transforms your boring walls instantly. If you hate that bubble gum pink tile, but the budget does not allow you to change it, take a can of paint and a tile epoxy to neutralizes the problem.

Illuminate the environment

Anyone who spends time in front of the bathroom mirror knows how important it is to have good lighting. Stay away from the fluorescent tubes and focus on stylish light bars located above the sink and sconces on each side. To complete a relaxing bath atmosphere, add a chandelier to create romantic lighting.

Renew porcelain surfaces

Instead of replacing higher priced items such as the tub, toilet, and tiles casing the shower or sink, hire a builder to reglaze porcelain surfaces. The whole process takes about 48 hours, requires minimal cleaning and will save you money and time.

Keep plumbing fixtures intact

To keep your budget within your limit, you can leave the plumbing in the place where they are now.  A contractor can make it seem like a simple change, but the reality is that the work and the cost involved could easily increase your budget. Instead of changing the location of the plumbing, use some of your savings to improve your lighting or your cabinets.

Add small touches to achieve a big impact

Sometimes the smallest things generate the most impact in bathroom remodeling. An economical way to give your bathroom a new look involves a simple change of hardware. Replace closet and drawer handles, or shower fixtures. New hardware coated in bronze or brushed nickel instantly creates a favorable impact in your bathroom.