Maintaining Your Roof

Inspect your roof at least once a year.  If you have gone through all the effort of putting a new roof on your house, be sure to do a regular inspection to keep it in good condition.  It’s best to inspect it during warmer months but it’s also good to inspect it after a rainy period to check for leaks or other problems.  It is very important as a homeowner to take out a ladder and carefully check the roof, especially in areas where strong winds and bad weather occur.

Look for cracked caulks or rust on the flashing.  Metal is quite susceptible to inclement weather.  Examine any exposed flashing to look for signs of wear and put caulks on affected areas.

Find doubled tiles.  Well-placed tiles should remain relatively flat throughout their lifetime, but bubbles will begin to form and will bend upwards at the edges as they wear out.  This should not be a problem in a roof’s early years, unless some of them have been installed improperly.  It is a good idea to check them and replace any tiles that appear to be loose.

  • Hammer any loose nail or remove it and use a new one to secure the tiles.  Save the roofing glue in case you have to do patching later and add a little hear and there as needed.  Seal any flashing that you see protruding with glue.

Eradicate moss from your roof.  Moss is the ruin of the existence of a roof.  Moss houses moisture and can reduce the lifetime of your roof tiles.  Remove the dead moss with a broom and consider applying a commercial “anti-moss treatment” to the roof.  This treatment will cost about $30.

  • For a natural alternative, spray your roof with baking soda.  Some anti-moss products have copper oxide or zinc which is harmful to ground water, not to mention pets and other animals. Spraying baking soda in areas prone to moss build up keeps moss at bay.

Look for asphalt granules in gutters.  When you tiles begin to wear out, you will see that the small protective beads of the tiles come off during rains and end up in the gutters.  This is a sign that the tiles are reaching the end of their lifetime and you will need to replace them soon because they will not be able to withstand the UV rays of the sun.  Start planning a roof replacement.

Watch for early signs of drip.  Inside your house, pay attention to the sign of possible leaks. It’s best to find them as soon as possible before any serious structural damage happens to the house. If you have a leak, think about having a roofer perform an assessment to determine what arrangements should be made.  Search for:

  • Peeling paint
  • Wet or dark areas on the ceiling or around fireplaces
  • Water spots around any duct

Tips

  • Have tarps on hand in case the weather suddenly changes before you can replace the roof.  Tie them together to make sure they’re secured.
  • Use a high-strength magnet (or rent one) to make sure there are no nails left in the grass.  They can end up deflating tires or damaging mowers.

Repairing Concrete Floors

Despite strenuous efforts to give concrete a good finish, sometimes the finished product has significant imperfections. Surely neither a carpet placed on it nor a vinyl floor will cover all imperfections, so making a repair that corrects the problem is the best option for both the builder and the homeowner.

Calculate the scope of the problem. Possible problems may include:

  • Ridges or mounds left by builders.
  • Cracks due to expansion or contraction. The properly installed concrete must have joints that prevent these unpleasant cracks. In the case of a 4 inch thick slab, the joints should have a separation of 8 to 12 feet. If the joint is not enough or is placed incorrectly, cracks may occur.
  • Waste like pieces of wood sticking out of the concrete while it is still malleable.
  • Damage caused by heavy objects that have fallen on the block before it has finished setting.
  • Elevation of the surface due to improper finishing or freezing temperatures during the curing process. Elevation occurs when parts of the concrete surface come off.

Use a measuring tape to determine the length and width of the area to be repaired if it is not self-evident. This can include mounds, depressions or ridges. You can disguise the small surface areas with shallow irregularities with a “floor leveling compound”, instead of lifting and replacing the existing concrete.

Chop the surface of the concrete to remove all “lift” in the material, and to create a rough surface so that the cement mix will bond well. If the work is small, a chisel hammer will suffice, but for larger repairs it will be better to use an electric hammer or even a jackhammer.

Clean dust and debris from the area you have chopped. This way the new material will have a solid surface to adhere to.

Mix the cement and sand you will use to fill the area you have chopped. Mix the dry ingredients first, using a ratio of 1 part of cement (type I or II) to 2 ½ parts of “clean” masonry sand.

Add a liquid latex binder or polymers to dry the cement / sand mixture, using enough to wet the material and bring it to a consistent but malleable state. Note that some binding agents are applied directly on the patching area, such as glue, so follow the manufacturer’s instructions.

Wet the area where you will apply the new material with fresh and clean water. Do not flood the area, but make sure that all surfaces are wet, as this helps in the adhesion of the new cement mixture, as well as preventing it from drying too fast. Dry surfaces simply “remove” moisture from the cement mix too quickly, which will cause it to contract, and eventually break.

Take a “spoonful” of cement mix from the mixer with a “tipped mason’s spoon” (or some other appropriate tool). Place the mixture inside, or over the patch, and push it hard to remove all air bubbles.

Level the wet surface with the mason’s spoon, leaving it slightly higher than the adjacent edges, to allow it to settle and contract. Allow to dry and harden for an hour or so, depending on humidity and room temperature.

Smooth the area with a steel finishing spoon when the patch material is consistent. This will flatten and soften the surface and cause the cement paste or cream to “rise” to the surface. If the surface is very large and deep, you can smooth it with a magnesium paste to get more cement cream up. This paste or cream is the material that forms the surface of the finished block.

Let the concrete “settle” or harden for an hour or two more and then finish smoothing it. At this point, you may need to splash a little water on the surface to delay drying, in addition to making the finishing process easier. Use the edge of the spoon to “shave” or scrape the splashes of mixture close to the finished surface. Another good choice of materials to repair are hydraulic cements. They usually settle in less than 30 minutes.

Clean the tools and remove all excess material.

Tips

  • Mix enough cement and sand to finish the entire patch in one go.
  • For smaller areas, you can buy fortified polymer material or dry pre-mix to patch concrete.
  • To fix the high points on a concrete floor that will be covered by another floor, you can use a grinder equipped with a masonry grinding wheel.
  • Once the repair is done, keep it wet for a few days, if possible. Use a lot of water.
  • Protects the repair of direct sunlight. A cardboard box will suffice.
  • High lime cement is more flexible and may be more appropriate for repairing concrete.

How to Build a Fence

Building a fence on your own and not hiring someone to do it can be very economical, whether you want to make a small decorative fence for your garden or a strong barrier between your pool and the outside world. The meticulous planning is the key to building a solid barrier that will remain for a long time.

Decide on the basics

Learn the lingo.

  • Posts are vertical support beams that are embedded in the ground.
  • The rails are the horizontal supports on the posts.
  • The planks are the main material of the fence and can be horizontal or vertical. They are placed on the posts and rails.

Think about what materials you will use, depending on the purpose of the fence.

  • If it is to give privacy to the backyard, it would be best to use tall wooden boards.
  • If it will not allow the pet to escape, a stretch of pickets will provide a good combination of fresh air and ample protection.

How high will it be? Privacy fences should be at least six feet (1.80 m) to avoid the curious, while barriers to contain pets or livestock may be approximately four feet (1.20 m).

Determine the length and angles of the fence. Place poles at the corners and use them to draw a line on the exact place where the fence will be built.

Take the right measures

Establish the separation between posts. Generally, between six (1.80 m) and eight (2.44 m) feet away, depending on the type of fence and the terrain on which it will be installed.

Mark the spaces with stakes. Take your time to carefully evaluate their positions, because if you do not align the posts properly, the stiffness of the entire structure will be affected.

Use a hole digger to make the pits of the posts on each stake marker. To have a strong fence, bury the posts 1/3 of its length. This will be the depth you will need for the holes.

Treat the lower third of the posts with a protective seal to prevent damage from the underground moisture. Let it set during the night so that the wood becomes saturated.

Fix the posts

Place some shovels of dirt or gravel in the holes of the posts and insert them at an angle of 90 degrees from the ground. Move them around carefully so that they settle.

Check the angle of the posts with one level and point them with stakes. The corner posts should have additional support on both sides.

Tamper the earth or concrete in the holes so that the posts are firm. Leave the props for at least two weeks so that the posts stay in place.

Make a mound of dirt or concrete around the base of the pole to avoid standing water.

Place the rails and boards

Nail a top and bottom rail along the fence posts, horizontally. Measure a distance from the top of each post to determine where to place the bottom rail to keep it straight.

Place central rails. There may be one or more, depending on the style of the fence.

Nail the boards to the posts or rails, depending on the style of the fence. You can do it on only one side of the rails or alternating in designs.

Place a door

Locate a place and size for the door (if any). Generally, these doors are 40 inches (1 m) long.

Make holes and place reinforced posts on each side. Use the method of applying gravel and tamping to make them as robust as possible.

Measure the entrance, cut 2″x4″ (5×10 cm) square shaped pieces and start to screw them to each other.

Place a hinge or support bracket to the bottom 2″x4″ (5x10cm).

Continue to build the frame, placing hinges or clamps and corner clamps in the process.

Place the door in the empty space to make sure it fits. If you see fit, prop up the hanging posts with more supports to make sure it can hold the weight.

Place the hinges on the hanging post with long-lasting lag screws.

  • The side you hold the door on will determine where you want it to open.
  • Once the hinges are firmly in place, install the handle and the latch on the other side.

Finish the fence

  • Apply several layers of wood sealant to protect the fence.
  • Paint the fence and the door with stain in a color that complements the environment or that provides a colorful design.

Tips

  • The most important thing is care and precision, measure twice and cut only once!
  • When nailing the rails, measuring each post can be a great waste of time. Save the effort by measuring a stick with the desired length and then using it to measure and mark each post.
  • Usually fences are built around properties, make sure you are not invading your neighbor’s property before proceeding with the construction.
  • Approximately one third of the total length of the posts will be underground, that is, if the fence is to be six feet high (1.80 m) the post itself should be 9 feet (2.7 m) and the hole should be three feet (90cm) deep.
  • When you make the door frame, drill holes for the bolt heads on the vertical parts to achieve an aligned connection between the frame and the door.

Cleaning Aluminum Siding

To clean aluminum siding, choose a dry and windless day. The first thing to do is look for signs of mildew, curling and necessary repairs. Once you have determined what cleaning method to use, try to work as much as you can under the shade. Water pressure cleaning is a good technique for ordinary dirt and grit, while mold requires cleaning with a bleach or vinegar solution.

Choose the cleaning method

Look for loose or rotted pieces. Replace any that show signs of rot. Reclaim the those that are loose. Avoid pressure washing until you have made these arrangements.

  • Pressure washing loose or rotted pieces can cause water to seep through the lining and the back wall could absorb it.
  • If the aluminum cladding needs repairs and you do not feel capable of doing them, call a specialized professional.

Check for mold; Look for gray, green or black spots. Examine to determine if there are ruts. Look especially at the north side of the house and anywhere that does not receive much sunlight.

  • Eliminating mold requires more powerful cleaners. Even pressure washing will not stop the mold from coming out soon after.

Put on work gloves and rub the surface. Then look at the gloves to see if they have a light-colored powder.

  • Consider pressure washing if you find signs of chalk or embedded dirt.

Clean the lining with a brush and cleaning products

Get an extendable brush for coatings. Choose one that can range between 8 to 20 feet. As an alternative, you can attach a car cleaning brush to an extendable rod for paint rollers.

  • You can buy a specific extendable brush to clean linings or use a long pool brush.

Mix a cleaning solution in the bucket. Make sure that the brush head easily enters the bucket you choose.  Fill the bucket with hot water and a biodegradable detergent, guided by the product label. If necessary, add 3/4 cup of bleach or vinegar for every gallon of water.

  • Add bleach or vinegar if the coating shows any sign of mold.
  • Do not mix bleach with any product that contains ammonia.
  • You can use a specific cleaner for coatings, liquid dishwashers or a cleaner like Spic and Span.

Test the cleaner first in a small area. Wear gloves if the solution contains bleach or an aggressive cleanser. Moisten a clean white cloth in the solution, rub a small area of ​​the coating and see if it is powerful enough to do the job.

  • You can try different mixtures until you find the right power to clean the siding.
  • Adjust the mixture as needed, following all safety instructions for the product or cleaning products you choose.
  • Use eye protection if indicated by the product instructions.

Protect any plants near the cleaning area, if necessary. First, water the bushes, grass and other plant life near the house, and then cover them with tarps or plastic. Once you have finished cleaning, remove this cover and water the plants again.

  • Protect the grass and other plant life if you are using bleach or a chemical cleanser.

Moisten the siding with a spray bottle, if desired. Fill the bottle with the solution and moisten a portion of the liner about 20 feet wide for its total height. Let the solution settle a few minutes before brushing that area.

  • Pre-wetting the coating will reduce the subsequent rubbing time.

Brush the coating. Dip the brush in the bucket of the cleaning solution. Start at the bottom and go up.  Rub the lining to the sides, advancing and receding. Re-wet the brush when necessary.

  • The coating under the part you are cleaning must remain moist. Rinse it while you work so it does not dry out and come in contact with the dirty solution that is leaking from above.

Soak the siding with a hose. Put the hose in the jet position and soak the area you just brushed. Start at the top and go down.

Clean with water under pressure

Choose a pressure cleaner. Look for a cleaner that produces a pressure of at least 2,000 psi (pounds per square inch). You may have to pick it up with a van, minivan or pickup, and you need help loading and unloading it. Talk to the rental agent about how to connect and operate it and consult all the necessary security measures.

  • You can rent a pressure washer at home improvement stores.
  • If the cleaner does not come with nozzles, you will have to get them separately. You will need nozzles between 15 and 25 degrees.

Cover the area. Spread tarps, old sheets or plastic on the floor. Cover any nearby vegetation.

  • If the siding is sprayed, the covers will protect the floor from the paint flakes.

Protect yourself. Wear eye protection, sturdy shoes and long pants. Follow all safety precautions for the make and model of the pressure washer. Also, read the instructions for the methods of handling, blocking or shutting down.

  • It is vital that you protect yourself properly. The jet of a pressure washer is very powerful and dangerous. Its force can cause many types of serious injuries.
  • If your house was built before 1977, or if you do not know for sure if the paint on your siding has lead, give it an analysis. You can ask the local health department to provide you with safety instructions.

Coupling the 15-degree nozzle. Do not use settings below 15 degrees, and above all do not use a zero-degree nozzle with a pressure cleaner.  Make sure you fix it properly.

  • If the nozzle is not properly fixed, it may pop off when you turn on the cleaner.

Turn on the pressure washer. Attach the washer to a normal garden hose and attach it to an outside water supply. Start the engine.

Practice using the cleaner from a couple of steps away. Go closer until you find the most appropriate point. Apply the water horizontally or at a slightly downward angle.

  • Use the cleaner with caution, as it may leave marks on the coating or take off finishes.

Rub the coating or raise the pressure, if necessary. If a low-pressure wash does not work, rub the coating with a soap solution and continue with a low-pressure rinse. Alternatively, you can do a test wash with a 25-degree nozzle in a not very visible area. Make sure that no damage occurs before proceeding with the cleaning.

  • Continue with a high-pressure wash, knowing the risk that you can damage the test area.

Warnings

  • Trisodium phosphate (TSP) is no longer recommended for tasks such as washing siding, due to its extreme power and the risks it poses to people, animals and the environment.

Repairing a Roof Leak

Minor leaks can be fixed without the help of a roofing professional. The following steps will teach you to identify problems and make repairs for flat roofs, shingles and wooden shingle roofs. If you want to work on your roof, you must do it on a day when the roof is dry to prevent accidents.

Fix the tiles

Check that there is no damage to the roof material, directly above where the drip is coming from. This is probably easier to find on a flat roof, but leaks can enter the roof of the house at a good distance from where the roof damage actually is.

  • If your roof is slanted, inspect the areas on the roof that are higher than where the leak enters your house.
  • If you have an attic, inspect it with a flashlight to look for water spots, black spots and mold.
  • Use a hose to run water on different sections of the roof and ask someone inside the house to notify you when you see a leak.

Look for damaged, bent or missing tiles near where the leak comes from. Also look closely for exposed roof tacks.

Straighten folded back tiles. In cold climates, you may have to soften the edges of the tile with heat, with an electric hair dryer. Using a torch or other items with open flame is not recommended, as asphalt shingles can be flammable, and regardless of the weather or whether they are fire resistant or not, excess heat will ruin the shingles.

Rearrange the tiles that were folded backwards after straightening them. Do this with a generous amount of cement for asphalt or composite roofs around the exposed edges.

Replace damaged tiles. If the tile is removed from the roof without much effort, breaks or simply falls apart, you have to change it.

  • Remove the tile by lifting the edges and check the nail.
  • Scrape the area below the tile to remove any remaining roofing cement.
  • Use a sharp blade to smoothly round the back ends of the new tile.
  • Slide the new tile into place and hammer a 1¼ inch galvanized roof nail in each top corner. Then cover the head of the nails with roofing cement.

Roofing roll for roofing

Look for cracks or bubbles in the roof material.

Restore the bubble. Cut a line in the middle of the bubble with a blade, but do not cut the roof felt (substrate) underneath.

  • Squeeze or absorb any liquid that is inside the bubble. The area needs to be completely dry.
  • Use a generous amount of roofing cement under the loose roofing material and press it.
  • Place galvanized roofing nails on each side of the repaired bubble.
  • Cover the entire top with roofing cement, including the nail heads.

Damaged wooden tiles

Divide the damaged wooden tiles with a hammer and chisel.

Slide the chisel under the damaged tile and remove the pieces.

Use a saw to cut the ends of any nail that cannot be removed. Work around the nails if you cannot cut them without damaging the good shingles.

Cut a tile approximately 9.5 mm (3/8 inch) smaller than the old tile using a fine tooth saw.

Slide the new tile into place and hammer it with 2 galvanized roofing nails.

  • If the old nails that you could not remove are in the step, use a hacksaw to make a cut on the tile so that it fits properly around the nails.

Place the tiles with a set of nails, then seal them with putty.

Connections

Inspect the areas where the surfaces connect, such as the chimney or vent pipes.

  • Look for damage to the putty and reapply putty where necessary.
  • Remove the damaged or deteriorated putty so that the new application can stick with the roof or the exposed surface.
  • Use a spatula to remove the old, loose putty.
  • Clean and dry the area.
  • Cut the end of the tube from the putty and spread it on the same line, applying it to the crack with an applicator. Let it dry.

Larger repairs will be necessary if there is damage to the exposed surface, around the chimney or at the base around the ventilation pipes, as they may have to be changed completely.

Tips

  • Use a piece of replacement aluminum or copper foil for an emergency.
  • The sealant must be compatible with the roofing material and be completely waterproof. Polyurethane or silicone putty usually gives durable waterproofing results. Putty or latex sealants, synthetic plastic is not recommended.

Pressure Washing Your Vinyl Siding

Periodic cleaning of vinyl siding helps maintain the value and beauty of the exterior of your home. A pressure washer machine is the ideal tool for cleaning using a spray coating, eliminating soil and dirt. Most pressure washers are easy to use and take little effort to work. All the materials that are needed, including the pressure washer, can be purchased or rented at your local hardware store. For you to do this successfully, you have to prepare the surface, select and use the proper pressure settings and practice how to use the machine. Read the following for specific instructions on how to pressure wash vinyl siding.

Select the appropriate equipment and settings. A gasoline or electric pressure washer, with a normal pressure of at least 3,000 PSI, and a flow rate of at least 4 gallons per minute, will provide enough strength to clean the difficult areas that must be reached to clean the vinyl surfaces. Adjust the low-pressure nozzle to 25 degrees. Add a suitable cleaning solution (for example, mild detergent) to the tank.

Test the spray in a small area to get used to its power. You can increase or decrease the power of the jet, adjusting the configuration of the nozzle or the distance at which you have your hands off the ground.

Work constantly, pressure washing one section at a time from bottom to top and sweeping from left to right. Always make sure the nozzle is pointing down at a 45-degree angle to minimize the amount of water that gets behind the siding. Excess water can lump.

Rinse the coating with fresh water. Work from top to bottom to avoid scratches, and rinse the area within 5 to 10 minutes of cleaning, before the detergent dries.

Tips

  • Point the nozzle at an angle and use the distance jet to clean glass windows.

Installing a Privacy Fence

Installing a fence will add the necessary privacy to your property. There is a wide variety of options for every budget and aesthetic taste. The following guide will teach you how to install a wooden privacy fence, although other options are also explained and discussed.

Before building your fence

Check the rules of the neighborhood. Before building a fence, it will be important to determine if you are allowed to build. If you build a fence in a place where it’s not allowed, you could get a fine and you’ll have to take down the fence. Before building, consult the rules of your local neighborhood or those of the neighborhood association regarding the construction of fences.

Check the city codes. Frequently cities have rules about fencing. You will need to find out what they are before building one. Some cities require permits to build a fence of any height, others only for those that exceed a certain height. Find out if you need a permit or if there are any other restrictions for your construction.

Get a permit. If you find out that if you need a permit, get one before building. It usually costs a little money and can be obtained from your local Municipality or from the Planning Department.

Choose your materials. It is important to decide what type of fence you want. There are many different types of materials, all with different benefits and drawbacks. You will need to consider how much time you want to spend or keep, how much money you have to spend on building the fence, and how long the fence should remain at your location.

A wooden fence is the most common. It lasts between 5-20 years, depending on the type of wood (for example, cedar will last longer than pine) and are relatively cheap. But wooden fences can be difficult to clean if paint is placed on them.

Vinyl fences will last many times longer than wooden fences, they can last a lifetime if you use quality vinyl. They can come in a variety of colors that should not fade over time and are easily cleaned if you put paint on them. However, they are slightly more expensive in terms of initial costs.

Brick is an option if you do not like the look of vinyl or wood fences, or if you feel the need for something stronger. You can use real bricks or you can use “concrete block”. The concrete block can then be covered with clay or plaster for a more “southwest” look. Concrete blocks can also be placed perpendicular to each other to create a patterned look on your wall. However, any type of masonry construction will be much more expensive than the other options, although it will last longer than wood.

Farm fences or green fences are a good option if your city is very restrictive with permits or if permits are very expensive. They are also good if you prefer more green plants in your garden, instead of fences. You can plant Arvovitae, a green shrub that grows three feet a year, put it on an iron or chain fence and bind ivy on it, or plant more standard hedges like holly.

Place the posts

Find the location for the posts. Use thread tied to stakes, determine the perimeter of your fence and mark the location of the corners, also measure and mark the locations of the intermediate posts (if necessary). The distance between posts depends on you but take into account that the normal space is 8 feet from center to center. Mark all locations with spray paint or stake holes.

Dig the holes for the posts. Use a hole-making device and dig holes at least ¼ to ⅓ of the height of the planned fence. Be sure to follow the rules stipulated in your permit, because many cities have rules about the depth of the hole. You will not want to hit a water pipe!

  • You can use a manual excavator or a motorized drill. You can rent both at your local hardware store.

Place gravel. You should put a couple of inches of gravel at the bottom of the hole, to provide drainage and make sure the posts do not rot.

Place the posts. Use 4×4 poles at your preferred height (factoring in the depth of the hole) and place them one at a time. This may require someone else to help you.

Pour quick drying concrete. Before placing the concrete, use a pole scale to ensure the pole is vertical and double check the height to make sure it is the one you want. Pour the concrete, mix it with water according to the manufacturer’s instructions and continue using the scale while pouring it to make sure it stays straight.

  • Alternatively, mix the quick-drying concrete in a bucket or wheelbarrow and then pour it.
  • You could still use thread to make sure the posts are aligned with each other.

Continue placing the posts. Place all the posts before continuing with the next step.

Build the fence

Measure and cut your railings. These are the boards (we recommend the 2x4s) that are placed between the posts, aligned perpendicularly. You will adhere the main boards of the fence to these. You must measure and cut them so they fit between the posts.

  • You will probably need two to three rails, depending on the height of your fence.

Create the frame of your railing. Then take a 1×4 board and cut it so that it is the same height as the posts. Mark the places in the wood where you want your railings to be. With this mark, nail the 2×4 directly to the end of the bottom and the top (and possibly the center) of the railings. These rails should be perpendicular with a turn of 90 ° of the 1×4 board, with a look similar to a T (if you look from one side, you should see the side of 1 “of the 1×4 and the 4” of the 2×4 ). Do this for each end of the railing.

Fit and adhere the frame. Fit the frame between the posts and secure it from the inside edge on the posts using screws.

Adhere the external tabs or posts. Use slats or posts the width you prefer, but they should not be thicker than 1 “. Clamp or screw them using a spacer between each board to ensure that they are even and that the space between them is slightly less than their width. Continue along the entire length of the fence.

Adhere the inside of the slats or posts. Now attach the boards on the inside of the fence. These should be placed so that they cover the openings created by the outer boards.

Add a door. You may or may not want to add a door to the fence to create an entrance to the patio.

Add the final details. Now you can paint or stain your fence as you wish. You can add a decorative layer or plant shrubs along the base.

Tips

  • You will usually receive a copy of the local rules and regulations when you apply for the permit.
  • The posts, the frame and the boards must be made of pressure-treated wood.
  • Only build along your property.
  • The materials to build the fence and doors are available at most hardware stores and home improvement stores.
  • Only galvanized nails should be used for pressure treated wood. Coated screws, stainless steel nails or other corrosion resistant fasteners should be used with cedar because galvanized will discolor cedar wood.

How to Prune a Tree

Pruning helps trees grow strong and look attractive and well cared for. A tree is pruned to remove damaged branches to facilitate growth or to give the tree a distinctive shape. It is important to do it correctly to avoid damaging the tree. Continue reading to learn the basic steps.

Evaluate the tree. Take some time to observe the size and shape of the tree and imagine how it should look once pruned.

Identify the main branches of the tree that would come to conform your “skeleton”.  Avoid pruning these branches.

Remove branches that are damaged. Whether they have been damaged by a storm or any other event, if there are broken branches they must be pruned so that the water and nutrients they are consuming are redistributed to the healthy branches.

Reduce the density of branches in areas where there are clusters. To grow healthy trees need good air circulation between their branches. When there are branches too close to each other, fungal growth is favored, and more insects are attracted.

  • Eliminate branches that are growing inward, towards the center of the tree. These cause disorder and are not healthy branches.

Prune branches that cause obstruction. Whether it is low branches that block a path or high branches that endanger the cables, it is good to prune branches that cause some kind of worry.

Prune branches to help shape the tree. If you want your tree to have a more rounded or neat shape, prune the branches that protrude at strange angles; a few cuts will make a big difference.

Prune as little as possible. Each cut you make exposes the tree to an infestation of fungi and insects, since you are removing the protective bark. Prune only what is absolutely necessary and never take off more than 25 percent of the branches of a tree.

  • Make sure that at least 2/3 of the height of the tree is composed of live branches; leaving only the trunk is not enough to ensure that the tree survives.
  • You cannot prune more than once per season. You should not prune more branches, unless a storm breaks some; the tree needs time to recover.

Prune to minimize damage

Dust off your tools to prune in the dormancy period. Less stress is caused to the tree when it is pruned in late fall or early winter, since sap loss is minimized. In addition, it is better for the tree if pruning is done at this time of year because the possibility of the “wound” becoming infested with fungi or insects is reduced, since these are also in a period of dormancy at the end of autumn and early winter.

  • A good indicator of the ideal time to prune is when the tree has lost all its leaves. This means that the tree has entered its period of dormancy until the beginning of spring.
  • If at any time of the year a storm breaks a branch, it is fine to prune it immediately instead of waiting until winter.

Make a cut at the bottom of the branch. This initial cut should not cross the entire branch, the reason for doing so is to prevent the branch from slitting too close to the trunk of the tree when it is about to fall under its own weight.

  • The cut should be made near what is called the neck of the trunk. It is that small part of the bark that protrudes and from which the branch is born. You have to leave the neck intact, meaning that the cut should not be made flush with the trunk.

Cut the branch several inches away from the trunk. Your second cut will cut off the branch at the height of the first cut you made. Remove the branch and what will remain is a stump.

Make a precise cut to eliminate the stump. Now you can make another cut just where the neck of the trunk ends, by doing so you will give the tree the opportunity to heal quickly and healthily.

  • Make sure you do not cut the neck of the trunk; it must remain intact.

Clean your pruning tools. Disinfect everything once the work is finished as tree diseases spread when the tools are dirty.

Tips

  • For small branches use pruning shears. For medium-sized branches (more than one inch in diameter) use shears (anvil or curved blade). For branches with a thickness greater than 2-3 inches use a tree saw. Do not use hedge clippers when you trim a tree.
  • Dead wood can be removed at any time.
  • Take a bleach solution with you in a container that is not prone to tip over and that is large enough to submerge your tools. When pruning, you can easily transmit diseases from one tree to another, this risk can be eliminated by frequently submerging the tools in the solution. This becomes especially important in small, highly populated orchards.
  • Verify the appropriate time of year to prune specific trees in your geographic area through a gardening resource (e.g. an association).
duct-cleaning-8

Cleaning Your Air Conditioning Ducts

It is necessary to regularly clean the air conditioning ducts in your home so that they can perform as efficiently as possible. Dirty air passages can harbor some types of virus, bacteria and other germs that can affect your health. In addition, dirt and the accumulation of dust that flows through air ducts can circulate particles that can potentially dirty and damage your furniture, appliances and clothing.

Prepare a cleaning bucket. Use a small bucket. Fill it with warm water and dishwashing detergent. Fill a spray bottle with vinegar. Just in case, have a household spray cleaner that can on remove mold on hand. Gather several rags, prepare your vacuum and look for a flashlight. Put all these items close by so you can easily use them.

Locate the air ducts in your house. Some houses have conduits in high areas of walls. Others have them at the bottom of the walls or even in the floor.  Some ducts may be in unusual places. Check in each corner to locate them all. The plan is to clean each of them systematically. Check if there is any furniture located under the duct, pictures on the wall, carpets, decorative items, etc. Move them so they do not get in the way and so they do not get dust or something else on them.

Remove the cover of each duct. The method you use will depend on the type of conduit you have. Some can be levered, others unscrewed, and others slide to be removed. Check the factory manual if you’re not sure.

Use a firm surface where you can climb if the duct is in a high place. A ladder, a bench, a firm chair, etc. Make sure that what you use is firm on the floor and does not wobble with your weight.

  • Use the vacuum cleaner’s nozzle to remove dust, lint, particles, etc. that have accumulated in the passageway of the conduit. If your vacuum is heavy and the duct is too high, ask someone to pick it up so you can concentrate on grabbing the nozzle and cleaning.

Use a rag and clean the inside walls of the duct with the mixture of warm water and detergent. Use a flashlight to see if there is mold. If there is, clean it with vinegar and if that does not work, apply the mold remover spray (be sure to follow the instructions). Use a paper towel to clean what is left after using the cloth and let it dry.

Re-cover the conduit. Continue with the next duct until you have cleaned them all.

Tips

It would be good to have a notebook where you can keep track of cleaning and maintenance work. In the list, it includes the cleaning of the conduits and the affected rooms. If for some reason you cannot clean the ducts of any room, the next time you clean them, start in that room.

  • If you care about having good air quality, cleaning the ducts is a task that should be done quarterly.
  • Not all houses have air ducts like houses that do not have central air conditioning.

How to Put a New Roof on Your Home

All homeowners want their home to be as safe as possible and everything starts with the roof. Although roofing materials usually last for 20 or 30 years, roofs will start to wear out sooner or later and can cost several thousands of dollars to repair professionally. Fortunately, with the right materials, planning, precautions and the adequate effort, any homeowner can renovate the roof of his house in a safe and economical way.

Keep in mind local building codes related to roofs. Many building codes regulate the number of layers of tiles that a roof can have, as well as the authorized tile materials.

  • Coastal areas that experience many winds and hurricanes have different load and structural design requirements than those in more central areas. If you live on the coast and want to work on the roof of your house, you must be very careful to obtain the appropriate permits to ensure the safety of your project.

Obtain all the necessary permits. Check with your local government agency if you need a building permit before changing the roof of your house. The permits are often offered by the Construction Services Department of the city where you live. Generally, you can get your project authorized if you provide the following:

  • Proof that you are the owner of the property
  • Application for permission (they provide it to you)
  • Declaration of reparation stating that you will replace the roof you are going to remove so that the construction complies with the current code.
  • Construction designs
  • Lifting designs

Choose an appropriate type of tile. There are many varieties of tiles available, some of which are more appropriate for certain climates and roof styles. Choose something suitable for your location, your home and the style of the project.

  • Asphalt shingles are the most common type of roofing shingles. They are very durable, and their life time can reach 20 or 30 years in the right conditions. Being reinforced with fiberglass, asphalt shingles often have a bit of roof pitch that sticks on top of the shingles.
  • Slate tiles are the heaviest and most durable tiles you can buy. Because they break easily, you need special pressure cutters to cut them and they are about three times heavier than the other tiles. It is recommended that you use slate tiles only if you are an experienced roofer looking for challenges. Slate tiles are great if you want to create a unique and durable roof for your home and are willing to go the extra mile.
  • Laminated tiles look like slate tiles, but they are layered asphalt shingles. They are similar, but a little thicker than asphalt shingles, so working with them could be similar. If you like what the board looks like, but you want the job to be a little easier, consider using this type of tile.
  • Wooden shingles are often the piecing of cedar, spruce or pine cut by hand. Wooden shingles are common in coastal regions of New England and allow a dilation and appearance of natural wear that some people like. They must be placed at a certain distance so that they can expand, but these types of tiles usually last 30 years if they are properly installed.

Define how many tiles you need to do the job. The area of ​​the surface that will cover the tiles is defined as a square of 9.29 square meters (100 square feet). However, tiles are usually sold in batches and usually 3 batches are needed to cover 1 square.

  • To find out the number of lots you must buy, measure the length and width of each section of the roof and multiply both to get the area. Add the areas of each section, then divide by 100 and you will get the number of squares that the roof has. Multiply this number by 3 to know the number of lots you need to buy.

Measure the length of a tile when you place it on the roof. This will help determine how the tiles you place across the roof will look like. Most asphalt shingles measure 91.4 centimeters (3 feet) in length. If the width of your roof is not a regular multiple of the length of the tile, you will have a piece left over at one end of each row.

  • The last row of tiles should hang above the edge of the roof. In the case of a roof with wooden tiles you would have to cut the tiles that go along the edges to create a straight line to accommodate them.

Prepare your roof

Take the appropriate safety precautions. Many roofs are very sloped and require roof struts to make work safer. Scaffolds and baseboards help secure the area above and around the roof to prevent tools and equipment from falling off the roof and hitting a pedestrian.

  • Place roof racks 5 x 25 cm (2 x 10 inches), about 91 cm (3 feet) above the roof edge. Make sure you wear a good pair of rubber-soled boots, so you do not slip while working on the roof. Goggles and work gloves are also recommended.

Rent a dumpster. It is useful to rent a large dumpster to throw away the old tiles. Normally, this costs about $200. If you keep it as close as possible to the house and cover the air conditioning units, the porches and other things that you do not want to be dented or dirty with the nails of the tiles and other rubbish, you can save cleaning time later.

Start by removing the tiles in the uppermost part of the trash container. Use a garden rake or shovel specially designed for roofs to take off the tiles to remove them more quickly or you can do it by hand and use a hammer. Leverage the nails, first loosening the ridge and then the tiles, picking them up with the shovel to take them to the struts. Take frequent breaks to take them to the trash with the shovel. Do not worry about removing all the nails at the beginning, some of them will come out with the tiles and others will not.

  • This is usually the dirtiest part of the job and it demands more physical effort, so make sure your plan takes into account the time and effort required to complete it. The tiles are often heavy and dirty, so do not stack them for a long time before removing them from the roof struts and taking them to the trash.
  • Step very carefully and make sure you work with at least one other person. Consider investing in a safety harness if you are on a very high roof.

Remove the metal flashing that is around the chimney, the ducts and the roof files. Some roofers reuse the metal flashing if it is in good condition, in which case you would have to carefully remove the nails and leverage them. Although to be honest, the flashing in the lime hole is almost always worn. Consider replacing everything while you are halfway through the project. If it looks questionable, drop it and install a new one.

Clean the roof. Sweep the roof and leave it as clean as possible, taking the time to remove any stray nails that did not come out when you removed the tiles. Reattach the loosened boards to the siding. Examine the siding to see if there are damages and rotten boards and replace the damaged sections as appropriate.

Install a barrier against ice and water and an asphalt felt. This sub-layer will serve as a temporary barrier against the weather. If you have gutters, you will need the ice and water barrier to cover all the gutters in the roof. Fasten it with tacks separated by a few inches at the top to hold it in place. Once the entire section is attached with tacks along the branding line, raise the bottom, peel back the backing and then drop it back into place. The ice and water barrier will automatically stick to the roof.

  • Unroll and staple a 13.5kg (30lb) felt over the rest of the roof. Use many 0.8 cm (5/16 inch) staples to make it safer to walk on the felt and avoid it being blown away by the wind. Now is when it’s worth having a hammer-type stapler (it costs about $30).

Complete the process of making your roof “weatherproof” with tarred paper. Use tin caps approximately 5 cm (2 inches) around metal discs and place them under the roof nails to prevent the felt from crumbling and blowing away in the event of winds before they are finished to place the tiles.

  • Keep the paper aligned and straight with a score line on the roof deck using marks measured from bottom to top. Do not use the bottom of the roof as a straight line. Doing so will cause the paper to bend, leaving wrinkles in the material. Allow the felt to extend from 6.5 mm (1/4 inch) to 1 cm (3/8 inch) at the bottom edge of the roof.

Put on the new roof

Put a drip mount around the perimeter of the roof. Use roofing nails separated by a distance of 30 cm (12 inches) that extend from 6.5 mm (1/4 inch) to 1 cm (3/8 inch) beyond the edge of the roof over the felt paper.


Place the flashing on the roofing tile, where two sections create a peak. The flashing comes prefabricated, folded to fit or flat and ready to be cut.

  • Some roofers like to reuse the old flashing if it’s still in good condition. The flashing almost always wears out but use your best judgement as to whether it can be reused. Usually, you will have to replace it.

Make a series of lines of marks separated by a space of 15 cm (6 inches). Use marks with chalk to keep the course of the tiles straight.

Place the initial course. Follow the lines of the marks, nailing your tiles with intervals of 15 cm (6 inches). Leave a space of 7 cm (3 inches) between the nails from the top edge of each tile. Depending on the type of tile you buy, there could be a special group of tiles for the initial row or a roll of lathing material that you can cut according to the length of your roof.

  • If you are going to use 3-tab tiles, place the nails approximately 1.8 centimeters (3/4 of an inch) above the cutouts, near where the tabs are attached to the top of the tile. Also, place a 5 cm (2 inch) nail on each end of the tile, aligned with the other two. In total, you will use four nails for each 3-tab tile to secure them.

Place the first course. Make a line to mark the initial row to use as a guide and remove the plastic strips from the back of the tiles in the package. Cut 15 cm (6 inches) from the length of the first initial tile you nailed, then use the rest of the tiles without cutting them. Modifying them in this way will join the ends of the first regular row of tiles that you placed on top of the initial tiles.

  • Alternatively, you can use an initial row of full-size tiles if you flip them until the tabs face up.

Place the second row of tiles. Put the first tile of the second-row half tab further back 17 cm (6 inches) from the edge of the first tile in the starting row so that the bottom of its tabs touches the top of the cut spaces in the tile that is located below. This half tongue must be cut in the part protruding from the left edge of the gable roof.

  • Continue placing the tiles in this same way, cutting the tiles to fit in the additional space you leave at the end of each row. Leave spaces between ducts, chimneys and flashovers and take more time in those areas.

Place tiles around ducts and chimneys. Cut a square of flashing that extends about 15 cm (6 inches) from the tube, with a hole in the center large enough to fit the tube. Place the tiles over the flashing, using glue to hold them in place and cut a special tile to make it fit over the pipe and finish the job.

  • There are “boots” for ventilation pipes that you can buy to slide them over the ventilation pipes or provide them with additional protection. A rubber washer makes it fit precisely and prevents the union from dripping.
  • To place the tiles around chimneys, cut several batten slats to fold them and create a bond between the outer edge wall of the chimney and the roof. Install them normally and place the tiles until they reach the edge of the flashing. Use glue for roofs and place the tiles on the flashing as usual.

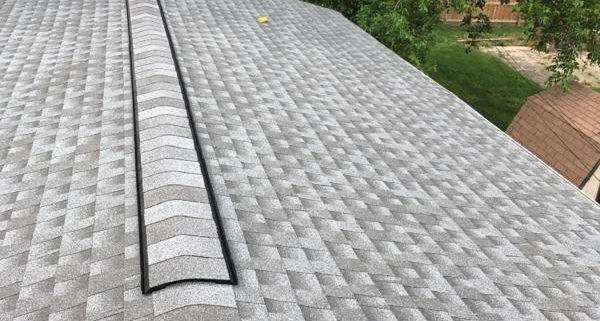
Install the prefabricated ridge. Use cement roofing adhesive on any exposed nail according to the manufacturer’s instructions. Ridge tiles are used to connect your courses on one side and the next, finishing the higher parts with a uniform finish.

  • Although it is recommended to use prefabricated ridges, it is also possible to cut and make your own ridges with regular 3-reed tiles. Cut them according to the size you want and fold them over the high parts, installing them as usual.

Finish the job. Roofing causes a lot of clutter, so it’s important to save time when you work and clean up afterwards. Nails, pieces of lost shingles and other debris will likely contaminate the yard and the area around the house, which can be dangerous.

  • Some roofers pass high strength magnets (something similar to a metal detector) to collect the lost nails. Sometimes you can rent them at roofing supply stores to make sure there are no dangerous nails out there.