Pros and Cons of Laminate Flooring

Laminate is a synthetic floor covering that has varying levels of durability and resilience. Its printed decor layer allows it to mimic the look of more expensive flooring like wood or stone. It cannot be sanded or refinished which means it’s more prone to water damage.

While it can raise the value of your home, it may not seem as authentic as real wood floors. Here are the pros and cons of laminate flooring.

Cost

Laminate is a relatively affordable flooring option that can be installed in a variety of room types. It also requires very little maintenance and is easy to clean. It can also improve a home’s resale value. However, it is not as durable as hardwood and can sag over time.

The cost of laminate flooring can vary widely depending on its quality and style. It is best to choose a floor that mimics the appearance of natural materials such as wood or stone. It is also important to consider the thickness of your laminate flooring. Thicker floors tend to be more expensive, but are better able to resist moisture damage.

In addition, the thickness of your floor can affect its durability and the ability to withstand impact. It is also important to avoid cheap laminates that are made from toxic glues, as they can emit harmful fumes into the air. If you are looking for an eco-friendly flooring solution, look for a non-toxic laminate that is made from recycled material.

It’s also a good idea to choose a laminate that has a timeless design, as it will not become outdated as quickly as carpet flooring. Additionally, you can save money by choosing a laminate that is easy to clean and will stand up to the demands of your family’s lifestyle.

Durability

Laminate is known for its durability and resistance to scratches, stains and fading. It’s a great choice for high traffic areas and households with children and pets. It’s also easy to maintain; a simple sweeping or damp mopping is typically all that’s needed to keep your floor looking like new. Many manufacturers offer maintenance products to help preserve the finish of your laminate flooring.

The durability of laminate is largely due to its multiple layers. It typically has a tough, clear plastic wear layer above a photographic image of the texture that it’s simulating, and then a core and underlayment. Some brands also use a melamine resin or aluminum oxide to strengthen the core and reduce scratching.

While laminate is generally hard-wearing, it can be prone to damage from heavy furniture or dropped items. It’s best to use felt pads under the legs of your furniture and be careful when moving it to avoid accidental abrasions or cosmetic damage. Laminate is also susceptible to damage caused by sharp heels or pet claws if there’s not enough underlayment.

Another downside of laminate is that it can be water-sensitive. If the fiberboard core is exposed to a large amount of water for a long period, it may swell and warp. In addition, it’s not as moisture-resistant as wood and cannot be sanded and refinished when damaged.

One of the biggest drawbacks to laminate is its susceptibility to water damage. The layered design of laminate means that direct contact with standing water can cause the HDF core to break down and expand, which will eventually result in significant damage and need for replacement. This is a major factor that has historically restricted its use in areas like bathrooms and basements.

Appearance

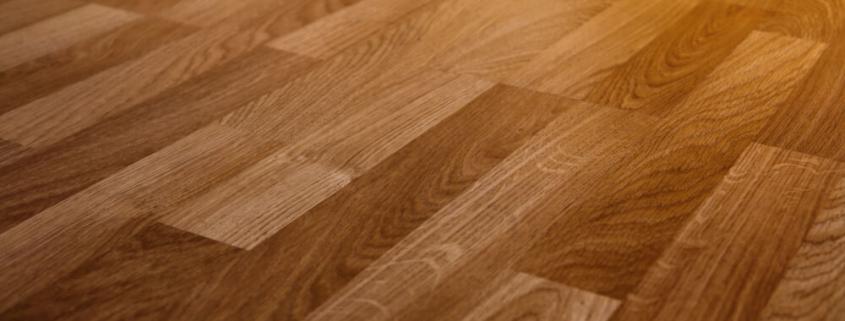
In general, laminate floors look very similar to natural wood flooring. They come in a wide range of styles, from classic oak looks to trendy distressed wood looks. Many manufacturers also produce laminate floors that imitate the appearance of tile or stone. These types of floors tend to be more affordable than the real thing and hold up to most environmental conditions.

Laminate floors contain a layer of protective plastic that shields them from damage. Its clear coating can resist stains and scratches. It is also durable enough to stand up to heavy use and household traffic. Some varieties are resistant to moisture, making them suitable for bathrooms and basements. Some even have built in underlayment that simplifies installation and reduces the amount of padding needed in a home.

Whether you choose a waterproof laminate or one that doesn’t have this feature, you should clean your floor regularly with a mop or broom. It is best to avoid using wax-based cleaners or steam cleaners, as these will leave a film on the surface. It’s also a good idea to put doormats at entrances, as these will keep sand and dirt from scratching the floor’s surface.

Compared to solid hardwood, laminate is easier to maintain and more resistant to stains. It’s also a better choice for households with pets and children because it’s not as susceptible to moisture. Moreover, it’s softer underfoot than tile and does a better job of retaining warmth.
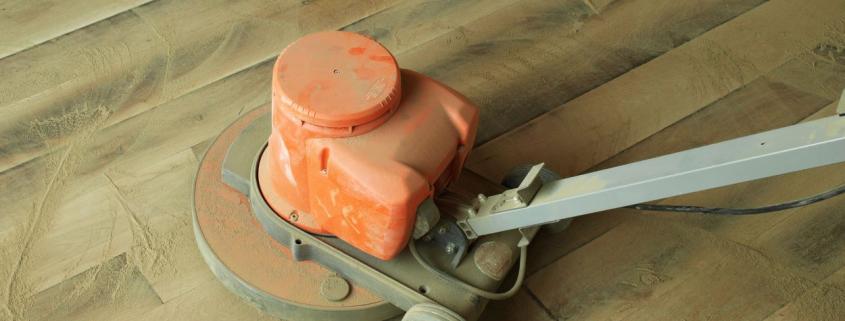
Installation

Laminate is a quick, simple and cost effective installation that can be done by most homeowners, or by a professional installer. It is hygienic (many brands contain antimicrobial resin) and relatively easy to maintain

A wide variety of styles and colors are available to suit most decor tastes, from rustic natural wood looks to contemporary grey and white. Laminate also comes with a lifetime guarantee, so it can last longer than other flooring options, making it more affordable in the long run.

The Difference Between GFCI and Regular Outlets

Every year, hundreds of people die from electrical shocks. Thankfully, thanks to GFCI outlets and breakers, those deaths are now very rare.

GFCI outlets, also called GFI outlets, work on the principle that electricity always wants to find a path down to ground and away from energized parts of a circuit. That includes locations like your bathroom with tons of moisture, which are prime conductors for electricity.

GFCI Outlets Are Designed to Detect Ground Faults

Before GFCIs became standard in most homes, about 800 people died from household electrocutions each year. Today, with GFCI outlets in place, these deaths have dropped to less than 200 each year.

GFCIs work by keeping tabs on the electrical current running through the outlet and cutting power, or ‘tripping’ it in a split second when they detect that electricity isn’t flowing the way it should. The system is so fast and sensitive that it can react to a mismatch as small as 4-5 milliamps, and cut the power before the electricity can affect your heartbeat.

To keep tabs on the current, GFCIs have two vertical slots and a hole in the center that is slightly larger. When an appliance is plugged in, the electricity flows from the top slot (called hot) down to the neutral slot and through the grounding wire. If the GFCI detects that electricity is flowing through something other than the path it should be (like a person or water) it will trip.

Like any man-made device, GFCIs wear out over time and should be tested about once a month by pushing the test button. A good GFCI will turn off the flow of electricity and display a red light when it’s working properly. Older outlets that don’t have a built-in test button may need to be replaced with a newer model that does feature one.

They Are More Durable Than Regular Outlets

There are many electrical safety devices that can protect you from dangerous shocks. One of the most popular is a GFCI outlet or receptacle. This device replaces a standard receptacle and can also protect other outlets “downstream” (any outlet that is receiving power from the GFCI). Often referred to as GFI in the electrical industry, these devices are very inexpensive, easy to wire and provide a high level of protection against fatal shocks.

They are required in kitchens and bathrooms, laundry areas, garages, basements and outdoor outlets. They are even required in some commercial buildings. The National Electric Code (NEC) mandates them for use in any area where the risk of electrical shock is greatest.

These devices detect a short circuit by monitoring the current flow between the hot and neutral wires. If there is an imbalance of 4 or 6 milliamps, the GFCI receptacle or circuit breaker will trip and shut off the electricity in less than a thirtieth of a second.

This is very different from a house fuse, which works by tracking down and disabling slow electrical leaks like the ones incurred when a nail punctures an outlet cord. GFCIs prevent deadly shocks by shutting off the electricity in milliseconds before it can cause serious damage or even death. If you are interested in having a GFCI installed in your home, you should contact a professional electrician such as Promise Electric. We are licensed and insured, so you can rest assured that your home is in good hands.

They Are Designed for Use in Wet Areas

Most homes today have standard outlets in living spaces. They look similar to light fixtures, with two vertical slots and a hole centered below them. The left slot is called neutral, the right is hot, and the ground pin sits underneath and connects to both. A GFCI outlet looks the same as a regular outlet, but has an internal sensor that can detect even a slight mismatch in current flow. If it senses a problem, it cuts power instantly and protects against electrical shock.

GFCIs are a crucial safety feature for wet areas, like bathrooms and laundry rooms. They monitor the current flowing in and out of plugged-in devices, and break the circuit when an imbalance occurs. The imbalance may be caused by a wire touching water, or it could be that the current is taking an alternative path than it should — such as through you (electrical shock).

If your GFCI outlet has popped out or won’t stay in when you push the red reset button, it’s time to call a professional electrician. They can inspect the outlet and determine if it needs replacement or if the breaker that controls the outlet is tripped in your breaker box. They can also help you figure out why the GFCI isn’t working, and how to fix it. This is a good opportunity to replace your old two-prong outlets, too.

They Are More Affordable

GFCI outlets, also known as ground fault circuit interrupters, guard against electrical shock by monitoring the flow of electricity. They are recognizable by the ‘test’ and’reset’ buttons on the outlet face and can be installed anywhere in the home. However, they are most commonly seen in kitchens, bathrooms, laundry rooms and garages. The National Electric Code (NEC) requires them for receptacles located within six feet of sinks in the kitchen and bathroom, as well as receptacles located outside or in unfinished basements.

Having the right type of outlet in these wet areas is important for safety and will decrease your chances of electrical shocks. If you’re interested in upgrading your existing outlets to GFCI outlets, consult with a local certified electrician to determine the best route for your project. The cost of GFCI outlets will vary depending on the location, size and number of new outlets required.

If you have an old, worn out outlet in your house, replacing it with a GFCI outlet will save lives and prevent serious injuries. Whether your outlets are in the kitchen, bathroom or elsewhere, a GFCI will keep your family safe from deadly electrical shocks. To find out more, contact your nearest CORL Technologies office and schedule a consultation with a certified electrician.

Natural Ways to Melt Ice on Your Driveway

Slippery driveways and steps can be dangerous, especially if you’re not prepared. While laying gritty material like kitty litter or wood shavings will create some traction, it won’t melt the ice itself.

The good news is that there are a number of natural, eco-friendly and effective ways to melt ice on your driveway without damaging your concrete. These include snow melting mats, fertilizer, coffee grounds, rubbing alcohol and sugar beet juice.

Salt

Salt has long been the go-to option for melting ice on driveways. It works by lowering the freezing point of water and snow, making it easier to melt and less likely to return as hard ice.

However, rock salt is corrosive to concrete and can be damaging to plants and pets if ingested. And as temperatures drop below 20 degrees Fahrenheit, it becomes less effective.

To get the best results, remove as much snow from your driveway as possible before applying salt. You can use a plow or snowblower to make quick work of this step, and then apply salt. Be sure to spread it evenly using a rotary spreader for fast and efficient distribution. Avoid spreading salt on grass and plants near your driveway, and keep it away from pet paws as it is irritating to them. Also, if your driveway is near water or sewer lines, be careful about putting down rock salt as it can damage them over time.

Baking Soda

Sodium bicarbonate (baking soda) is a household staple with impressive multi-tasking powers, from zapping stinky refrigerator odors to cleaning greasy pans and baking pans. But it’s also an effective ice melt option for your driveway, as long as you don’t apply it in excess.

This natural alternative to salt lowers the freezing temperature of water, which helps snow and ice melt at a more manageable rate. It’s gentle on concrete and non-toxic to pets and plants, which makes it a smart choice for a wide variety of climate conditions.

Just sprinkle baking soda in the affected areas and let it work its magic. The only downside is that it takes longer than other options to dissolve ice, but it’s a great option when you don’t have any other products on hand. You may need to repeat this process as needed, especially if it’s cold and windy.

Coffee Grounds

The nitrogen and acids in coffee grounds help melt ice, and they’re safe for use around pets. They also don’t damage concrete and aren’t harmful to plants, unlike rock salt.

Alternatively, you can spread a handful of dry, used coffee grounds over your driveway to provide extra traction and prevent skidding. It’s a natural alternative to sidewalk salt, which is hazardous to grass and flower beds and can pollute groundwater.

Another option is calcium chloride, which works at a lower temperature than rock salt and doesn’t damage surfaces. It is available as liquid, flakes or pellets. You can also try magnesium chloride, which has a lower melting point and is safer for use near vegetation. Finally, vinegar is a cheap and effective alternative to rock salt. The acetic acid in vinegar lowers the melting point of ice and is safe for use around pets and plants.

Fertilizer

If you’re looking for an alternative to salt and calcium chloride, fertilizer can be an excellent option. Fertilizer mixes that contain potassium chloride, urea, and ammonium sulfate work well at lower temperatures than rock salt and don’t damage concrete or pavement.

These natural deicers can be purchased at most home improvement stores and are typically much less expensive than traditional ice melt products. Additionally, they won’t damage your driveway and are better for the environment and surrounding plants than traditional rock salts.

Of course, you can also simply use sand or kitty litter to provide traction and break the ice bond. These options won’t melt ice as quickly, but they are affordable and easy to find at your local grocery store. You can also purchase heated snow-melting mats that are laid down and plugged in, eliminating the need for any salt or deicers. These are a great solution for those who have pets or young children.

Sugar Beet Juice

Sugar beet juice is a surprising option that works well for melting ice on a driveway. It has a chemical composition similar to rock salt and is safe for your car, plants and sidewalks. However, it can stain concrete, so clean up as soon as it starts to melt.

Rubbing Alcohol

Rubbing alcohol also has the power to melt ice, but emptying a bottle on a large area would be expensive and inefficient. Instead, make a homemade de-icer by mixing one part water and two parts rubbing alcohol in a spray bottle. It may take longer to clear a sizable area, but it is a cost-efficient and environmentally friendly alternative to salt.

Rubbing alcohol has a lower freezing point than water, so it will quickly melt ice on your driveway. You can use a standard 70% isopropyl solution for this purpose. Mix it with a half-gallon of water and six drops of dish soap in a bucket, then pour it over the ice. It will dissolve the ice in no time, and you can easily shovel away the remaining snow.

Areas of Your Home That Need Insulation

When winter rolls around, a lot of homeowners get itchy to make their homes a little more comfortable. Fortunately, many indoor projects can be completed without propping open windows or dealing with frigid temperatures.

For instance, replacing your doors can help you save energy, elevate your home’s visual appeal or make it more secure. You can also improve your interior doors by painting them, adding molding and installing decorative door knobs.

1. Insulate Your Attic

While most people don’t spend much time in their attics, this is an area that plays a major role in a home’s energy efficiency. Since warm air rises, a poorly insulated attic can cause your heating and cooling system to work harder to keep your home at a comfortable temperature.

Adding insulation to your attic is one of the best things you can do to improve the energy efficiency of your home, especially during winter. While you might be tempted to save this project for later, it’s important to insulate your attic as soon as possible to save on energy.

Before you start, clear the attic access door and lay down a sheet of plywood to protect the floor of your attic while working. Also, make sure you have a ladder and a good light as well as some tools. Begin by visually inspecting the existing insulation. If you find any sections that are missing or damaged, fill in those areas with rolled or blown insulation. If there are any gaps or holes around wires, exhaust fans, recessed lighting, chimneys and soffits seal those as well.

2. Add Insulation to Your Crawl Space

If your home has a crawl space under it, you’ll find that the floor there gets cold during the winter. In addition, uninsulated crawl spaces are subject to water leaks that can cost homeowners money in costly repairs and damage to their homes.

The best way to know if your crawl space is adequately insulated is to inspect it in person. Put on an N-95 mask and enter the crawl space through the access hatch. Check for signs of mold and dampness and see if the joists are warping or rotting.

There are several different types of insulation for crawl spaces, including rolled fiberglass, rigid foam boards, and spray insulation. Fiberglass is the most inexpensive option and can be used to insulate between floor joists. Rigid foam boards are another good choice and can be installed on the foundation walls of your crawl space to prevent moisture and heat loss. Finally, closed-cell spray insulation combines thermal and moisture protection, but it can be expensive. A professional insulation contractor can help you decide which type of insulation is right for your crawl space.

3. Add Insulation to Your Garage

Insulating your garage helps keep warm air from seeping into your house and vice versa. It also decreases heat loss, saving you money on heating and cooling bills.

You can use standard cotton-fiber batt insulation, which comes in compressed packages and is easily stuffed between studs. Make sure to wear gloves, goggles, and a face mask while handling the insulation. For walls that connect to rooms inside your home, place the insulation with the paper side facing the room. This will prevent contamination of the interior of your home.

If your garage already has drywall, you can hire a contractor to blow in cellulose insulation for an efficient solution. The contractor will open a hole in the drywall, spray a layer of cellulose into the wall, then patch the hole.

If your garage has no drywall or insulation, consider installing a vapor barrier. This will protect the insulation, studs, and exterior walls from moisture problems like rot and mold growth. You can purchase a roll of vapor barrier at most home improvement stores. If you’re using your garage as a living space, consider adding a mini-split system for a cost-effective way to heat it.

4. Add Insulation to Your Basement

Whether your basement is finished or unfinished, it’s important to have enough insulation to keep your home warm. You can add insulation to your basement by framing in walls with drywall and spraying foam on the exterior. It’s also a good idea to make sure your basement or egress windows are well-insulated, and that air ducts running through the basement are properly sealed and insulated.

In addition to insulating basement walls, you can also add insulation to the non-insulated rim joists and headers that rest on the foundation of your house. These are a major source of heat loss in homes. Rigid foam, such as closed-cell spray polyurethane, XPS, or EPS foam, can be adhered to the concrete wall and sealed with caulking or foam-compatible adhesive.

You can also use fiberglass batting or rock wool between the studs of your basement walls to increase energy efficiency. However, be aware that loose-fill insulation can promote moisture and mold problems if it gets wet. Foam board insulation is a better option since it resists moisture and can be cut to fit the space.

What Goes Into Refinishing Hardwood Floors

Hardwood floors add a warm, elegant look to any home. They can also stand up to decades of wear and tear.

Refinishing hardwood floors can eliminate scratches and scuffs. It won’t, however, get rid of urine stains or their odors or fix warped boards from prolonged water damage.

Refinishing is a labor-intensive process that can be done yourself or hired out to professionals. It requires special tools, knowledge and time.

Cost

Refinishing hardwood floors could be costly pr. It is a major undertaking that involves the sanding of floors, repair of any damage or wear, and application of color treatments. The cost will vary according to the kind of wood, its condition, and the amount of damage it has incurred over time. For example, exotic wood is typically more expensive than traditional oak. It will also be more difficult to refinish than standard oak.

Choosing the right contractor is also important to the final costs of refinishing your hardwood floors. It is recommended that you hire a professional with a solid track record in home flooring projects. Then, be sure to discuss the project with your contractor and ask for a quote.

During the process of refinishing, homeowners can expect to be out of the area being refinished for a little while. This is due to the lag time between each coat of finish. During this time, it is recommended to add felt tabs or pads to the bottom of furniture legs to prevent scratches and scuffing on the newly-finished floors. It is also a good idea to vacuum and wipe the surface of the floors regularly. This will keep dirt and dust from scratching the new finish and will help maintain the beautiful appearance of your hardwood floors.

Time

The time it takes to finish your hardwood floors depends on the size of the room, the number and type of furniture pieces to be moved, and if any old carpet or other flooring is being removed. It also depends on the type of refinishing you choose.

Traditional sanding requires a drum sander and sandpaper of progressive grits to remove the existing coating and expose the bare wood. This process can create a lot of dust, which can cause health problems for some people with allergies or asthma. To minimize the amount of sanding dust created, some contractors offer a dustless refinishing option for an additional cost.

Staining adds a tint to your hardwood, and may be done over one day if the stain color is light, or two days for darker shades. Staining must dry completely before applying a polyurethane sealant that protects the floor from moisture and dirt.

Dirt and sand can scratch or damage hardwood floors, so sweep regularly and consider adding doormats at every entrance to keep the sand and dirt off the wood. Direct sunlight can also fade or discolor hardwood, so drapes or blinds can be used to block or diffuse the sun’s rays. Water damage can warp or crack hardwood, and can also cause mold to grow in the subflooring, which requires the replacement of all affected boards.

Worker Safety

While refinishing floors is a very labor intensive project, it can be done safely. Workers should wear dust masks and eye protection, especially if they will be doing any heavy lifting or using power tools. Any electrical outlets or other fixtures that are close to the floor should be covered with plastic tarps to protect them from sawdust and any other debris. Any furniture or wall decorations should be removed from the room to prevent them from being damaged during the sanding process. If you are refinishing your floors yourself, be sure to follow all of the manufacturer’s instructions and carefully read the warnings.

When properly cared for, hardwood floors are very durable and will last a lifetime. They are easier to keep clean than carpet and do not require a lot of water to clean. They are also less likely to be damaged by scratches or dents than other types of flooring. If a scratch or dent does appear, touch-ups can usually be made with color marker.

If you are refinishing your floors, choose a stain that complements your home and lifestyle. Testing stains on your actual floors is a good idea to make sure you love the look. You can also ask your contractor what stains they have available on hand and see if any of those are ones you would like to test out.

Environment

Before beginning the refinishing process, it’s best to remove any base shoe moldings or rugs from the room. This will help the sander get closer to the walls, and it will minimize dust. Additionally, it’s a good idea to tape plastic sheeting over doorways and vent ducts to prevent the spread of sanding dust throughout the house.

It’s also a good idea to keep pets away from the work area, as the strong fumes from the polyurethane can irritate their lungs. It’s also a good idea to open windows and doors as much as possible to let in fresh air, and use an air purifier that is designed to remove volatile organic compounds (VOCs) from the environment.

Trends in Granite Counter Colors for 2024

In a kitchen or bathroom renovation, countertops are one of the most important design elements. Choosing the right color and style can elevate the aesthetic of a room.

Whether you’re looking for an elegant white countertop or something with more dramatic appeal, granite is a durable and timeless choice. The professionals at Handyman On Call can point you in the right direction and help you find the right match for your design style.

Darker Tones

As homeowners become more adventurous with their kitchen color schemes, white countertops are still popular but are starting to make way for a more vibrant and diverse palette. There is also a shift away from stark, minimalist styles to kitchens that are complimented by warmer tones of brown or gold.

If you’re a homeowner looking for a versatile design, consider Coffee Brown granite countertops. This stone is a rich mix of brown tones that will complement any cabinet finish. This warm natural stone will complement wood and cream cabinets and provide a neutral backdrop for a bolder backsplash or decorative accents.

For a more dramatic look, choose Nordic Black granite countertops. This dark granite possesses an elegance that is both timeless and contemporary. Distinguished by its expansive mineral structures and deep veining, this dramatic granite countertop is a statement maker that works well with light or dark cabinets including wood and metal, and it pairs beautifully with gold fixtures. Black granite countertop colors are also available in several veining options, so you can find the perfect match for your home.

Blues and Greens

Granite countertops have always been a desirable kitchen accent due to their durability and heat resistance. These natural stone surfaces also boast a unique aesthetic, complementing both traditional and contemporary decor styles. In 2024, homeowners can expect to see a range of new hues and patterns that elevate their kitchens.

Blue and green granite countertops have been a growing trend in recent years. These natural stones evoke the feeling of the sea and are perfect for brightening kitchen spaces. If you are a nature lover, consider Blue Pearl granite, which features a variety of blue flecks and veins that resemble short brush marks.

Peacock green granite counters, for example, boast dramatic blue veining that creates a bold and striking appearance in any kitchen. This counter color can be paired with light or dark cabinetry for an elegant and sophisticated look. It can even be combined with white cabinets for a bright and airy kitchen environment.

Another popular granite countertop color is Brass Blue. This option features a cool blue backdrop that showcases gold and copper flecks. This neutral hue pairs well with a variety of other finishes, including brass home accessories and kitchen fixtures. Brass Blue also compliments darker cabinetry for a moodier kitchen aesthetic.

While all-white kitchens continue to be a popular design trend, there is a shift towards countertops that are complimented by warmer tones of brown and gold. For instance, a white or cream granite countertop can be paired with wooden cupboards and flooring stools for a warm and inviting ambiance. White granite can also be paired with gold hardware and lighting fixtures for a more elegant look.

For homeowners who are seeking a subtle and classic granite countertop, there is also Alaska Granite. This material features a soft white background with delicate gray and brown speckles. Its subtle and refined aesthetic blends seamlessly with a wide range of interior design styles. It is also a great choice for high-traffic areas due to its durability and resistance to stains.

Gold and Lighter Shades

Granite countertops are the perfect finishing touch to any kitchen. They add warmth and character to a room and can enhance your home’s resale value. However, it’s important to choose a color that complements your style and suits the overall aesthetic of the space.

If you prefer a more serene look, go with Silestone Le Chic or Wilsonart Coastal. These neutral tans pair beautifully with a wide range of kitchen color schemes. With a hint of gray and a subtle beachy vibe, they will work well with traditional wood decor and plant-filled windows. For homeowners who anticipate moving soon, a neutral tan like Cambria Baybridge or Wilsonart Coastal will open up the possibilities for future homeowners as well.

If you are looking for a light granite counter, consider Alaska White or Colonial White. Both of these stones contain denser amounts of onyx than standard white granite, so they have more dramatic patterns. They also have a creamy white background that works well with light-colored kitchen cabinets.

For a more dramatic and exotic look, try Namibian Gold granite. This dramatic stone has stunning flecks of color that mimic the colors of the Nambian desert. Its arid palette blends well with warm creams and browns, so it can be used in conventional spacious kitchens or complement rustic environments inspired by arid plains and shifting desert dunes. The rich desert hues of this beautiful granite are enhanced by honed, leathered, and polished finishes.

Reasons for Needing to Replace Shingles

Your roof protects the rest of your house from the elements, including rain and snow. It also keeps heat in, which reduces energy bills.

However, shingles can wear out or become damaged over time. Some problems may only affect a few shingles, while others require a full roof replacement.

Damaged Shingles

Excessive wind can also damage shingles, leaving them exposed to moisture and UV rays. These conditions can cause heat blisters, which are characterized by darkened areas and round, concave dents embedded with granules.

When a shingle is damaged, it is important to replace it immediately. To do so, first loosen the nails holding the shingle above it with a flat pry bar. Once loosened, you can then pull up the damaged shingle. Once you have removed the damaged shingle, slide in a new one, and nail it into place. Be sure to use fresh nails, as reusing old ones can lead to further problems. Then, line the shingle up with those around it to ensure that they are properly overlapping.

Missing Shingles

Missing shingles are an obvious sign that it’s time for a roof repair. They leave your roof vulnerable to moisture, causing mold and mildew, which in turn deteriorate the shingle’s protective layers and weaken the structure of the roof itself.

Missing tabs or shingles often appear at critical points where seams meet. These spots are especially likely to leak, as water naturally seeks out the lowest point.

Some common reasons for shingle loss include severe weather, improper installation and general wear and tear. If your roof has a lot of missing shingles, it’s time to schedule a professional roofing inspection.

While climbing on your roof to inspect the shingles is a good idea, it’s not a DIY project for most homeowners. Climbing on a wet, slippery roof can be dangerous. Plus, if you try to remove the old shingles, you might accidentally cause more damage. This can lead to water leaks into the house and cause serious damage in the attic, walls, and ceiling. A leaky roof can cause mold and rot, and the resulting repair work is expensive. A professional can help you prevent these issues with regular maintenance and repairs.

Curling or Clawing Shingles

Shingles may begin to curl due to aging, sun exposure and physical damage. Curled shingles create bare spots on your roof which can be susceptible to further damage from the weather and reduces the ability of your roof system to properly shed water. It is possible to replace a few curled shingles, but this is generally a temporary fix and will eventually need to be done again.

If you notice the edges of your shingles beginning to curl up or claw, you will need to have them replaced immediately. This is an indication that your roof system is nearing the end of its life and makes it more vulnerable to ice and wind damage.

In some cases, the shingle’s manufacturer may not have followed installation instructions which can cause them to curl. This could include not using enough nails or the wrong type of nail. This is a very common issue that can lead to shingle curling and it should be corrected as soon as you notice it. If left unchecked, this will only lead to additional issues and more costly repairs in the future.

Water Damage

The shingles are the shield that keeps rain, snow, and debris from penetrating the roof and home. Without shingles, a home would experience serious water damage. Even a single damaged shingle can cause leaks and other problems. Because of this, it is necessary to replace any shingle that is damaged or leaking.

A damaged shingle may not lead to a leak immediately, but it can cause a problem hours, days, or even weeks later. It can also expose the sheathing to rot and other moisture. This can lead to mold in the attic, ceilings, and other parts of the house.

A common way to recognize a shingle problem is noticing a discoloration on the ceiling of the home. The staining is caused by the buildup of moisture under the shingle. It is essential to inspect the roof for any shingle problems regularly, especially after severe weather events. Home and roof professionals recommend inspecting the roof at least once a year. This will prevent a small problem from becoming a major repair bill down the road.

Inexpensive Ideas to Upgrade Your Bathroom

A full bathroom remodel can be pricey, but there are plenty of inexpensive upgrades you can make to upgrade your space. From painting floorboards to installing new flooring, these budget bathroom ideas can help you update your bathroom without breaking the bank.

Instead of tiling, consider engineered wood or vinyl flooring that looks like tile and will keep you on budget. These options are also more moisture-hardy than solid hardwood.

Replace Your Cabinet Hardware

Whether you’re doing a full bathroom remodel or just a cosmetic update, replacing the cabinet knobs and pulls is an easy way to make your room look fresh. Choose hardware in a new finish or style that coordinates with your faucet and shower head. It can also be a great opportunity to upgrade the lighting in your space and install a new mirror.

Changing the vanity light fixture can have a dramatic impact on your bathroom’s overall look and feel. And adding a recessed medicine cabinet above the vanity will give you more storage space without making your room feel cluttered or cramped.

Install New Flooring

Adding new flooring is one of the most significant changes you can make to a bathroom on a budget. Options like vinyl or laminate offer cheaper alternatives to a traditional tile floor and are also easier to install, especially for DIYers.

If your current bathroom is tiled, you can easily update it by recoloring the grout or painting a fun pattern on top. You can also upgrade your walls by adding beadboard, wallpaper or a fresh coat of paint to create an eye-catching design.

Upgrade Your Faucets and Shower Heads

The most basic upgrades can make a big difference to your bathroom. Changing out the shower head or bathtub faucet is one of the quickest and most affordable ways to give your space an upgrade. You can even choose a new model that’s water-efficient to cut your utility costs and give your bathroom a boost in style.

Adding a new vanity light or adding a simple frame to your bathroom mirror can also make a dramatic change without breaking the bank. Then, add a few decorative items like a towel rack or robe hooks to complete the look.

Add Storage

Many homeowners overlook the importance of organizing a bathroom, but doing so can make a huge difference in how your space looks and feels. You can do simple things, like putting a basket on the toilet to hold lotion, extra toilet paper and other supplies, or installing shelves where you can display items. You can also hang a shower caddy to store shower products and towels, or install hooks on the back of your door for bathrobes and washcloths.

If you don’t have enough storage space, adding a tall storage cabinet with a small open shelf, two cabinets and a drawer will eliminate clutter and keep your bathroom looking sleek. Consider getting one made from mildew-resistant materials for a humid environment, which will also make it easier to clean. Another storage upgrade that adds value is a vent fan, which helps to draw out moisture and odors, and prevent mold and mildew growth. You can even do this as a DIY project!

Other Ideas

A simple way to make a room feel bigger is by introducing natural light, which will help keep the space feeling clean and bright. Consider installing a skylight to bring in extra sunlight, or even add a window to your shower so you can see the outdoors.

The most expensive part of a remodel can be moving your plumbing, so try to work within your existing configuration. Trying to move your toilet, sink or tub around could quickly eat up your entire budget.

Another way to save money is by reorganizing your storage space to use existing items in new ways. For example, you can store a lot of stuff in baskets on the counters, hanging towels and your robe behind the door or on shelving, and putting up a mirror to increase the amount of natural light.

Kitchen Trends for 2024

Homeowners are updating their kitchens to create a mood-enhancing space. With a focus on sustainability, these new kitchen ideas will bring warmth, earth tones and a connection to nature into the heart of the home.

Gone are the days of plain, monochromatic backsplashes. In 2024 homeowners are embracing backsplashes with eye-catching patterns that create depth and personality.

Dark and Moody Color Palettes

Embracing dark colors in the kitchen offers a rich and moody aesthetic. Instead of a stark white kitchen, consider incorporating cabinetry in smoky blues, deep navy blues or even charcoal grays for a dramatic effect. Browns and reds are also trending, and crimsons are popular choices for cabinets. These deep shades of color can be complemented by warm metals like brass in polished or matte finishes to bring out the colors’ natural beauty.

Greens are also a growing trend in the kitchen, especially approachable and muted shades like sage or olive. This trend is part of the larger biophilic design movement, which encourages bringing natural elements into the home for a healthier and more connected lifestyle.

Another way to incorporate these earthy trends is by swapping out traditional chrome and stainless steel hardware for brushed brass or bronze. These warmer tones complement the colors of natural wood and add a touch of luxury. Many homeowners are also mixing metals, choosing one finish for larger fixtures and appliances and another for smaller details like knobs and pulls.

Indoor Gardens

In the kitchen, plants aren’t just a pretty addition to the space—they also add a soothing scent and act as a natural air filter. From a single potted plant to an herb wall, the options are endless. This trend speaks to the biophilic design theme which is becoming more prominent in 2024.

In line with the desire to connect to nature, a large number of homeowners are adding features that help bring the outdoors in. Long banks of windows, glass doors, and window walls are a common sight in the kitchen. These allow the room to be bathed in warm sunlight, which is mood-boosting and can help regulate your circadian rhythm, says Cathlyn Davis, founder of her namesake interior design firm.

Backsplashes are getting a dramatic upgrade. Instead of a standard tile backsplash, designers are showcasing slabs of stone that have a beautiful natural texture. The look is especially popular with marble, which can be expensive but creates a stunning focal point that’s easy to wipe clean.

Darker cabinetry, including black and green, is on the rise. It’s a refreshing change from the sterile white that has dominated kitchen design over the past few years, and it’s a way to make your kitchen feel more organic and natural, says Davis. Meanwhile, fluted millwork details are making a comeback on island countertops, nook tables, and cabinets.

Natural Stone Countertops

If you love the idea of a minimalist kitchen, but want a little extra visual interest, try a concrete countertop. These countertops are crafted from a composite of repurposed chips of marble, glass, and granite—which come in a wide variety of colors and patterns for a playful yet sophisticated artistry. This trend also offers an eco-conscious twist with its use of recycled materials.

In addition to natural stone, marble and other dramatic marble and stone countertops make a statement in 2024. With stunning veining and natural patterns, these countertops add elegance to your cooking space, as well as durability and functionality.

Other popular trends to watch for in the kitchen include terrazzo backsplashes, which are made of repurposed marble, and custom concrete countertops. These materials offer a striking look that will complement your wood cabinets and give your kitchen a modern, contemporary edge.

Other kitchen remodel trends that are making a big impact in 2024 include cozy breakfast nooks, spacious dining areas, and built-in bench seating. These design elements encourage gatherings and help you create a space where family and friends can gather to cook, dine, work, and socialize. Unlike the fidget spinner and floss dance movements that fade into the background, these design trends will stay on-trend for years to come. So get inspired by these design trends and transform your kitchen into a space where memories, style, and comfort connect seamlessly.

Taking Your Kitchen Outside

In the spirit of “wellness” trends that have taken center stage over the last couple of years, kitchens are starting to take their cues from nature. This trend shows up in 2024 in the form of natural wood accents that replace sterile all-white looks and in kitchen countertops that feature a variety of colors and textures.

Another way the kitchen is becoming more like nature is in the form of new outdoor kitchens. While a grill and some countertop space used to suffice, homeowners with big backyards are now creating multi-functional spaces that include full-size stoves, ovens, sinks and even refrigerators.

This is a great way to add extra storage and living space to your home without losing valuable floor space. It also gives you the opportunity to enjoy the great outdoors and spend time with family and friends while cooking and eating.

If you’re not ready for an entire outdoor kitchen, a cozy breakfast nook can be just as welcoming. It’s predicted that this trend will continue to grow, as people want to feel more connected with their environment.

Types of Landscape Lighting to Add to Your Home

Great landscaping lights turn your yard into a nighttime showplace you want to share with family and friends. They add to the visual interest of your home and landscape by highlighting features, creating shadows and contrast and adding depth.

Highlighting is a common landscape lighting technique that works well for manicured plants and simple structures. It also looks great when applied to walls. Other techniques include silhouetting, wall washing and moonlighting.

Pathway and Walkway Lights

Pathway and walkway lights, often referred to as low-voltage or solar pathway lighting, are perfect for accenting paths, garden beds, driveways and patio areas. These small fixtures project downward and have a glare guard to keep light from shining into people’s eyes. There are many different styles of these types of fixtures that vary by size, shape and finish. Some even have a color-changing option.

When used properly, these kinds of lighting can really elevate the look and feel of your home. Illuminating pathways helps your guests safely navigate your property at night. It also prevents them from stepping on plants and other landscaping features.

It’s important to note that walkway lighting should be a part of your overall landscape lighting plan and shouldn’t be added as an afterthought. This is because the wrong type of path lights can create a jarring visual experience for your guests.

Pathway lights are typically spaced about 5-15 feet apart, depending on how large your pathway is. The larger the pathway, the more lights will need to be spaced out to ensure the proper amount of coverage and prevent overtaxing a single fixture. A landscape lighting professional will help you design a layout that provides the perfect amount of coverage while still keeping your pathways looking beautiful and inviting. If you are looking to take your pathway lighting up a notch consider adding smart LED color changing bulbs that can be controlled with a remote or app.

Postmount Lights

Ensure the safety and security of your home and surrounding landscape with outdoor post lights. These versatile and attractive lamp posts can be placed along driveways, near back patios, in front of a garage or anywhere else that extra lighting is desired. These fixtures are available in a wide range of styles, so you can find the perfect match to your home and garden design.

Modern and contemporary post lights offer a variety of style options to suit your outdoor decor. Some designs emphasize simplicity and minimalism with straightforward structures and materials while others use unconventional shapes, structures and materials to create an artistic statement.

Many of these lighting pieces have a classic lantern-like appearance to give your home’s exterior an updated look. They can also serve as a focal point for your yard or garden, adding a striking feature that impresses guests and neighbors.

Choose from a selection of different wattages, color temperatures and beam angles to match the brightness and coverage needed for your space. Then, decide whether you want your fixture to be a direct burial or surface-mounted lamp post. If you opt for a direct burial fixture, consider an option with a built-in electrical outlet. This allows you to run power to the post without having to run additional wires through your yard. If you’re looking for a more secure lighting solution, you can opt for motion sensor or security light designs. These features trigger automatically to provide an effective glare that helps deter criminals and unwanted intruders from your property.

Hardscape Lights

Adding in ground lights to pathways is one of the most cost-effective ways to add light to a pathway and also helps with safety by eliminating tripping hazards after dark. You can choose from a variety of options for in ground lighting, including low voltage lighting that is safe to work with and easy to install.

Another great way to illuminate hardscapes is to add lights to retaining walls. This highlights the textured beauty of the wall while helping your customers find their next step safely at night.

When installing these types of lights in retaining walls it is best to do so during the construction process before the top cap is placed on the wall. This ensures the lights are in the correct position so they illuminate properly. For the best results, use a 12V hardscape light with a swivel so that you can adjust the angle. Also, when installing the fixture be sure to leave a little extra wire so that you can service it in the future. This will save you a lot of time and money in the long run.

Uplighting

When it comes to landscape lighting, the options are nearly limitless. But there are a few key things that should be kept in mind when planning your lighting system:

Highlighting – Use spotlights or well lights to light statues, planters and other garden features. These fixtures come in a wide range of beam widths and wattages, which make them ideal for a number of landscape lighting techniques like silhouetting, grazing and shadowing.

Achieve a stunning grazing effect with your landscape lighting by shining a light on a wall and letting it create soft shadows on the surface. This technique can draw attention to a textured or architectural feature of your home, such as a stone or brick wall, or it can add dimension to a greenery or planter. Spotlights, well lights and low-voltage flood lights are often used to achieve this look.

Decorative lighting – Add a touch of whimsy to your landscape with decorative lights like lanterns, string lights and glow-in-the-dark orbs. These lights are available in a number of styles, from chic classic lanterns to elegant white orbs that complement any decor style.

Decorative lights are a great way to highlight your favorite flowers, plants or trees without breaking the bank. For the best results, choose lights that are designed to withstand harsh weather conditions. Many of our landscape lights are crafted from copper or solid brass, which are more durable than aluminum and can better resist rust or corrosion over time.